
Lesson
Project objective
– Will be able to calculate the elasticity force;
– Investigate the force of elasticity and give examples of its manifestation;
– Make a catapult.
Teacher’s guide
– For the practical part of the project, the students work in a group of 3-4 students.
– The students should be introduced to topics like the elasticity force.
– Before starting the experimental part, familiarise and provide the pupils with all the necessary materials.
– Give a brief instruction on how to use the hot melt glue.
– Explain the PBL (project based learning) rubric to the students at the beginning of the lesson. Skills 4K (critical thinking, collaboration, creativity, presentation)
Safety in Steam lessons
Before we begin the lesson, teachers are advised to familiarise themselves with the safety procedures. If necessary (if using items specified in the PPE), brief the students. Go to Safety in Steam lessons
Theoretical part
A force that counteracts an external load and restores a body’s shape is called an elastic force. The work of the elasticity force is to keep the shape of the object being acted on: compressed, shifted, stretched, bent. If the elastic forces cannot cope with external forces, the body changes shape.
The change in shape and size of a body as a result of an external force is called deformation.
Deformation is called elastic deformation and classical deformation.
- Elastic deformation completely disappears after external forces stop acting.
- Plastic deformation does not disappear after external forces cease
The wind bends the tree but the elastic force holds it in place. When the wind force becomes greater than the elastic force the tree falls and changes its position.
Any throwing machine that shoots stones, spears or arrows is referred to by the Greek term catapult. Ancient Roman authors gave catapults the name “Tormentum” (to twist). They were machines having a torsional principle of action. The first catapults began to be used as early as our era in Greece (in the V century), then up to the XV century they were used in all European countries. Ancient catapults operated either on the bow principle (ballistas and scorpions) or on the slingshot principle.

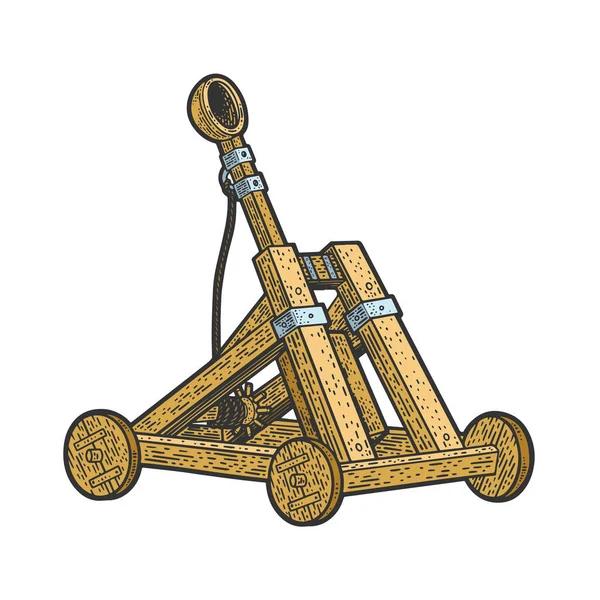
The latter were listed as siege weapons and only began to be used in the Middle Ages. The long arm of the lever was used as a counterweight to the short end of the lever, which was attached to the long end of the lever. The long arm of the lever, under the action of the counterweight, was lifted up, a strike on the stop beam ensued and the projectile, discharged by the sling, flew on its trajectory. The projectile or stone could reach its target after a few hundred metres.
Practical part
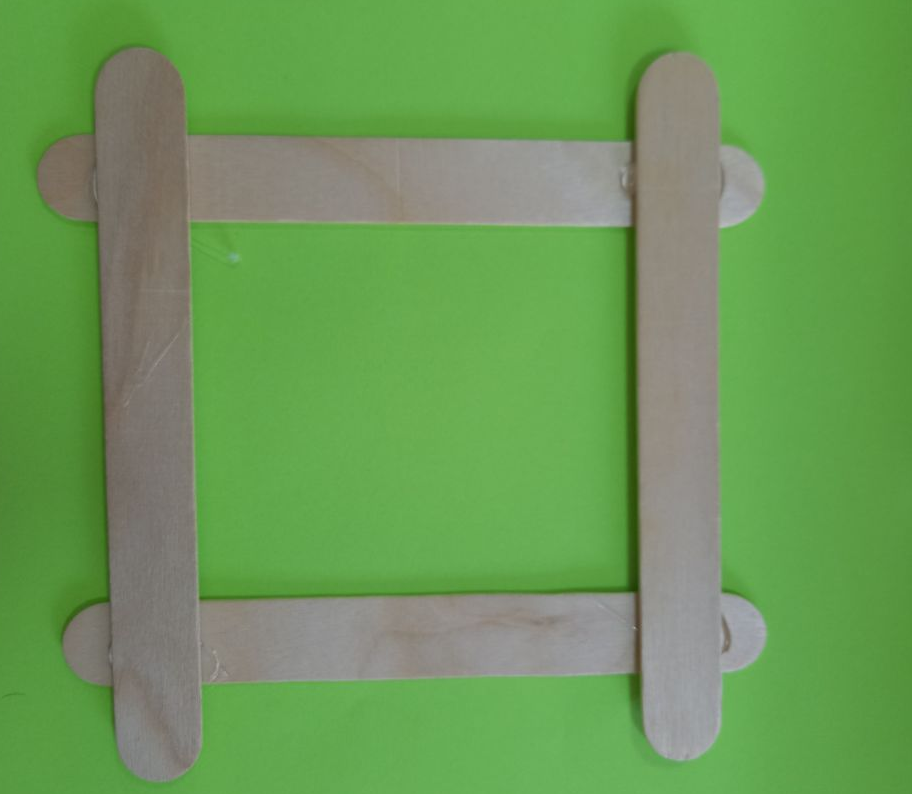
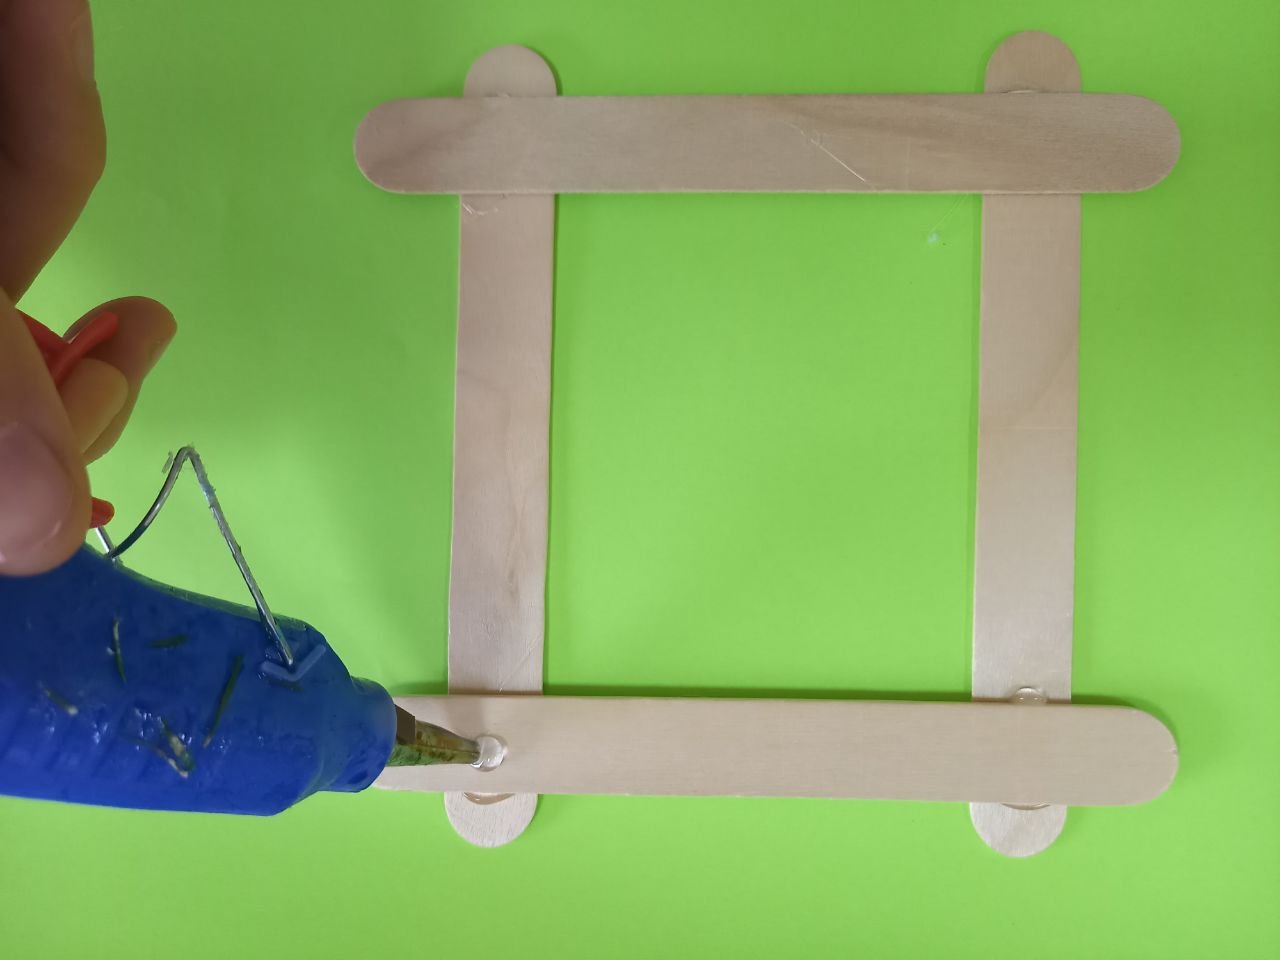
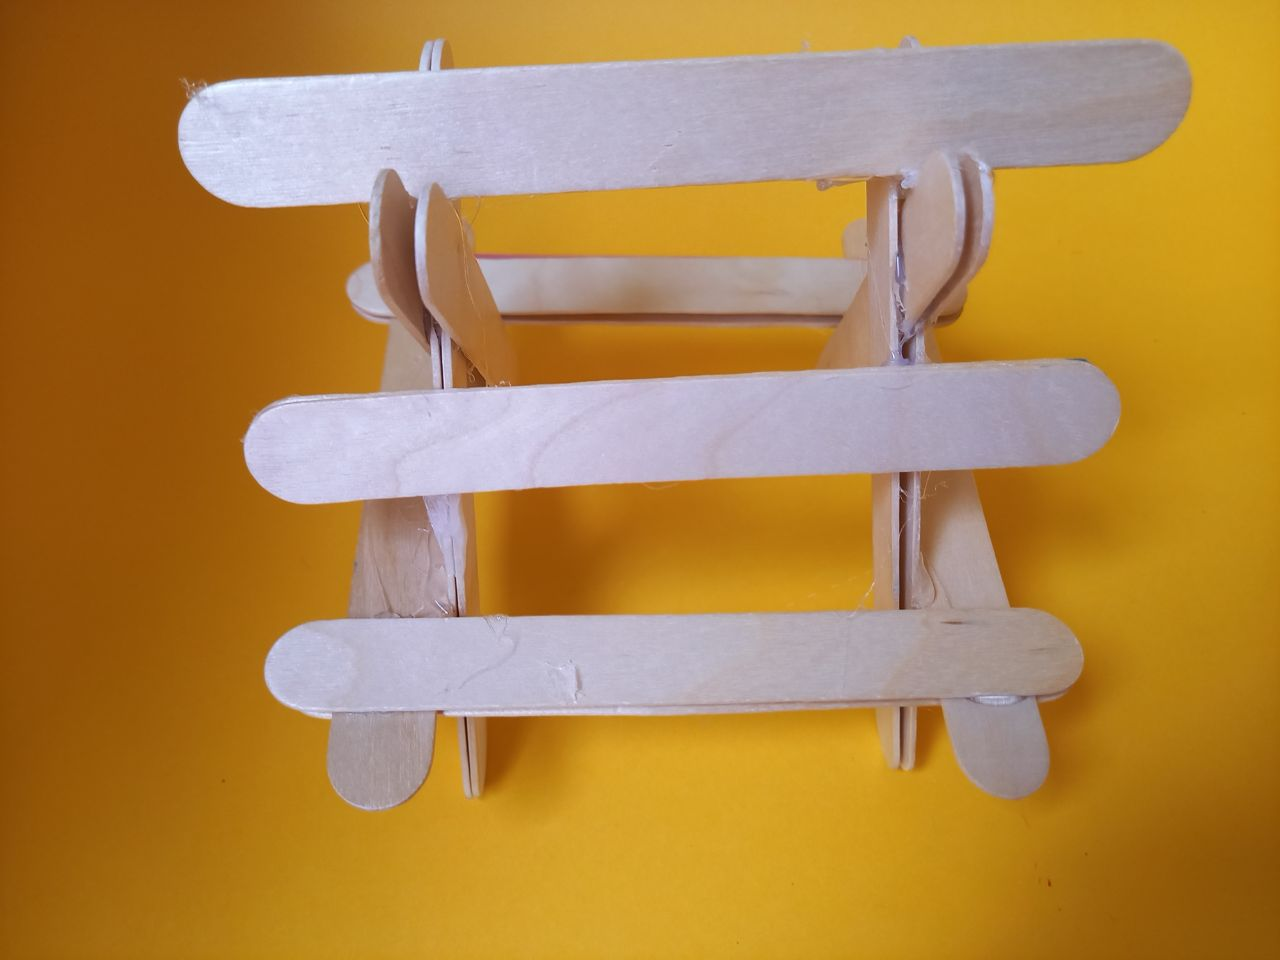
Step 1. Take four popsicle sticks. Place 2 sticks horizontally and fix the other 2 vertically on top with hot-melt glue
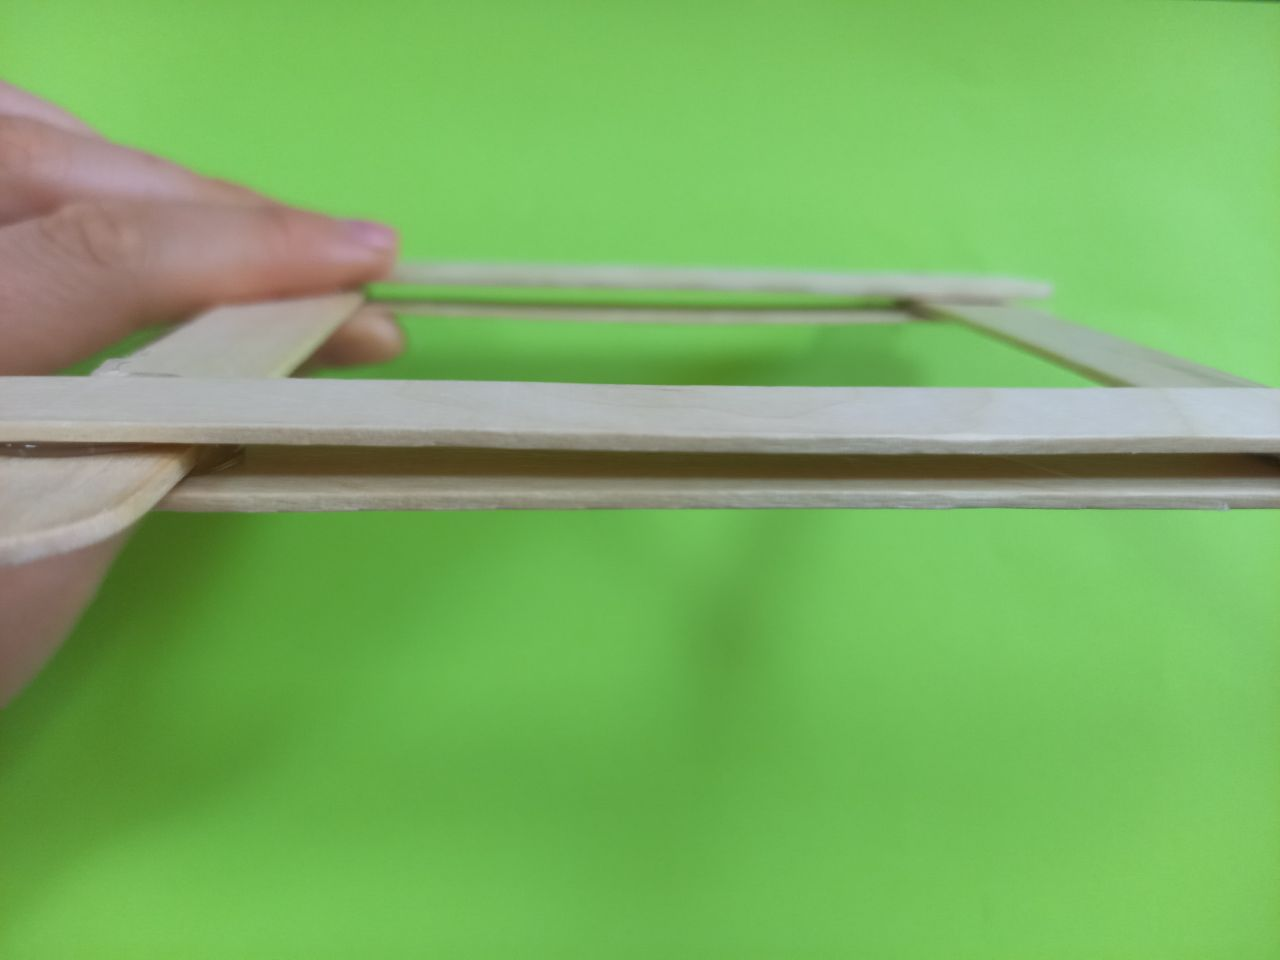
Step 2. On top of the vertical sticks, attach two more geo-horizontal sticks
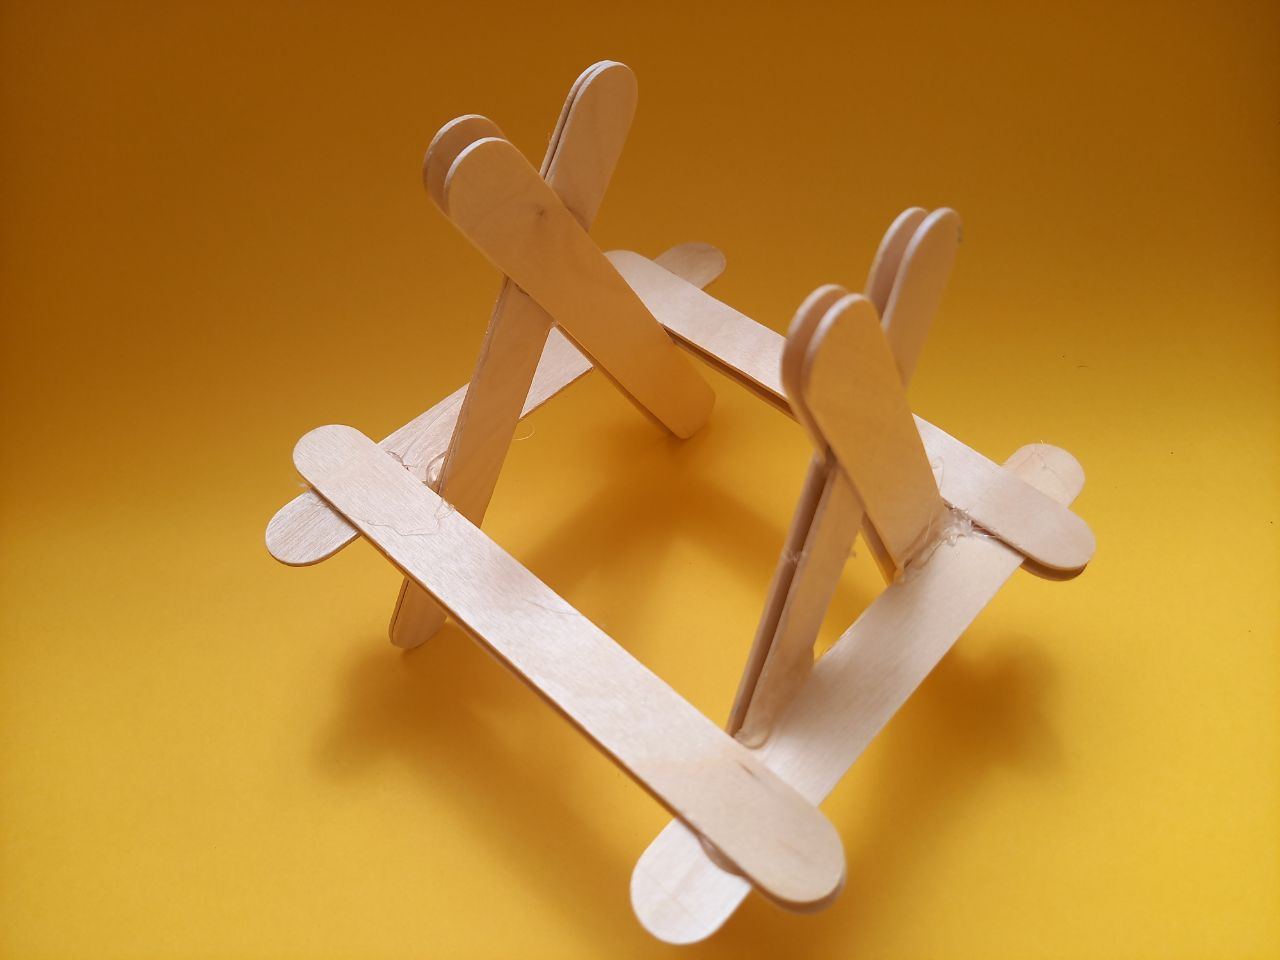
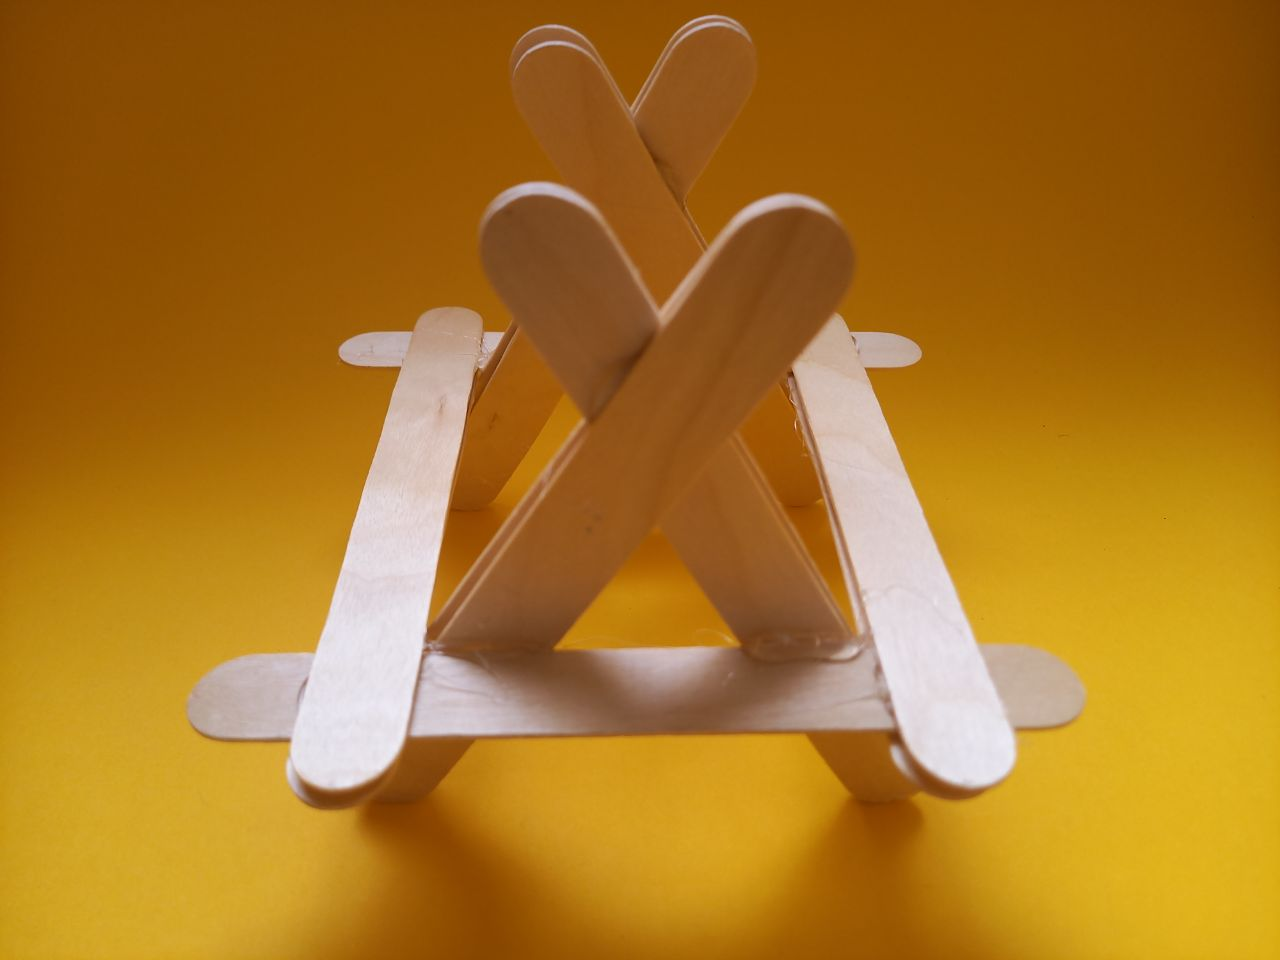
Step 3. Make a cross with 4 sticks. Inserting from the top as shown in the picture
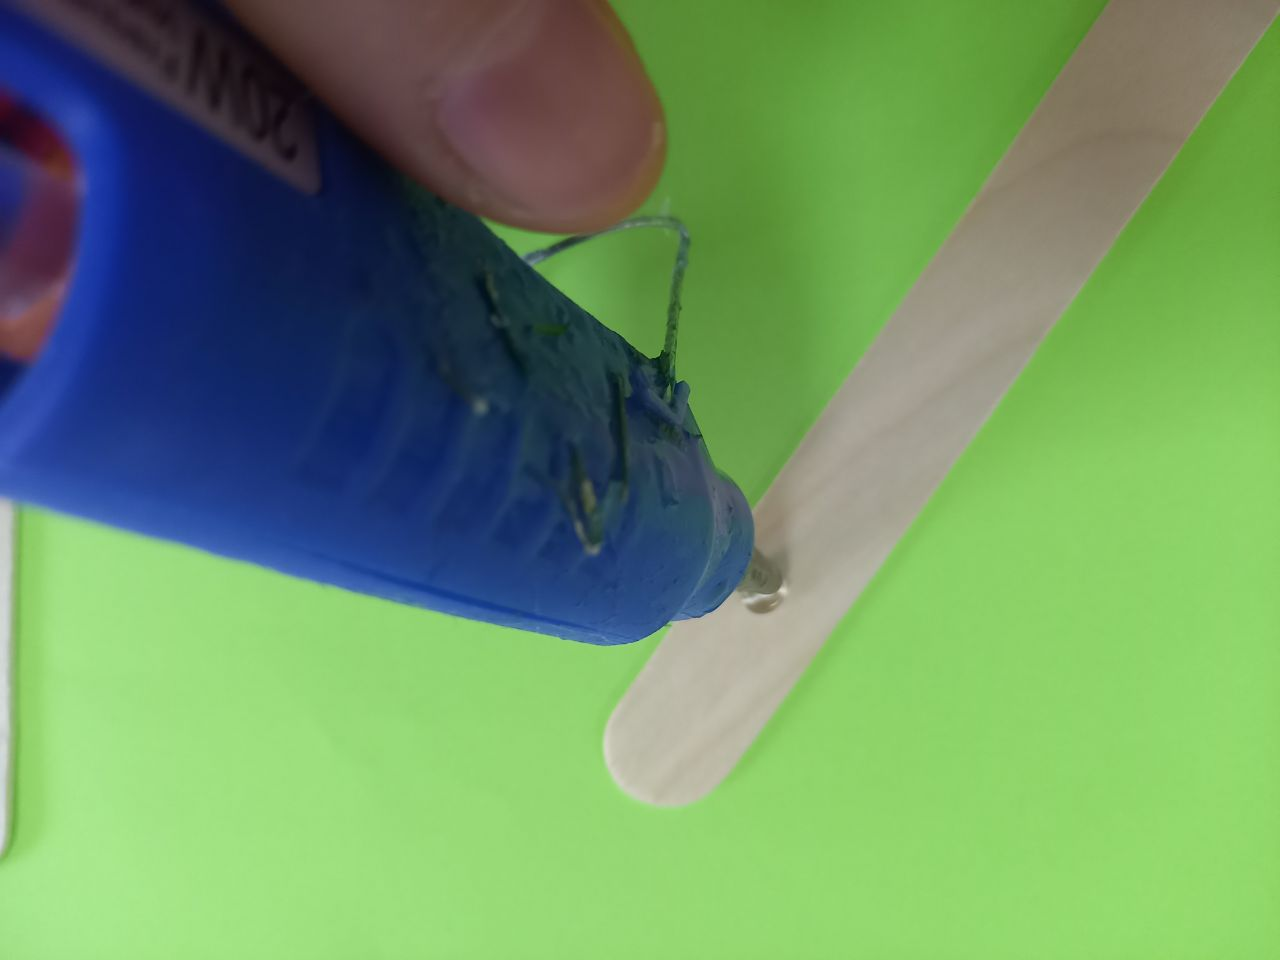
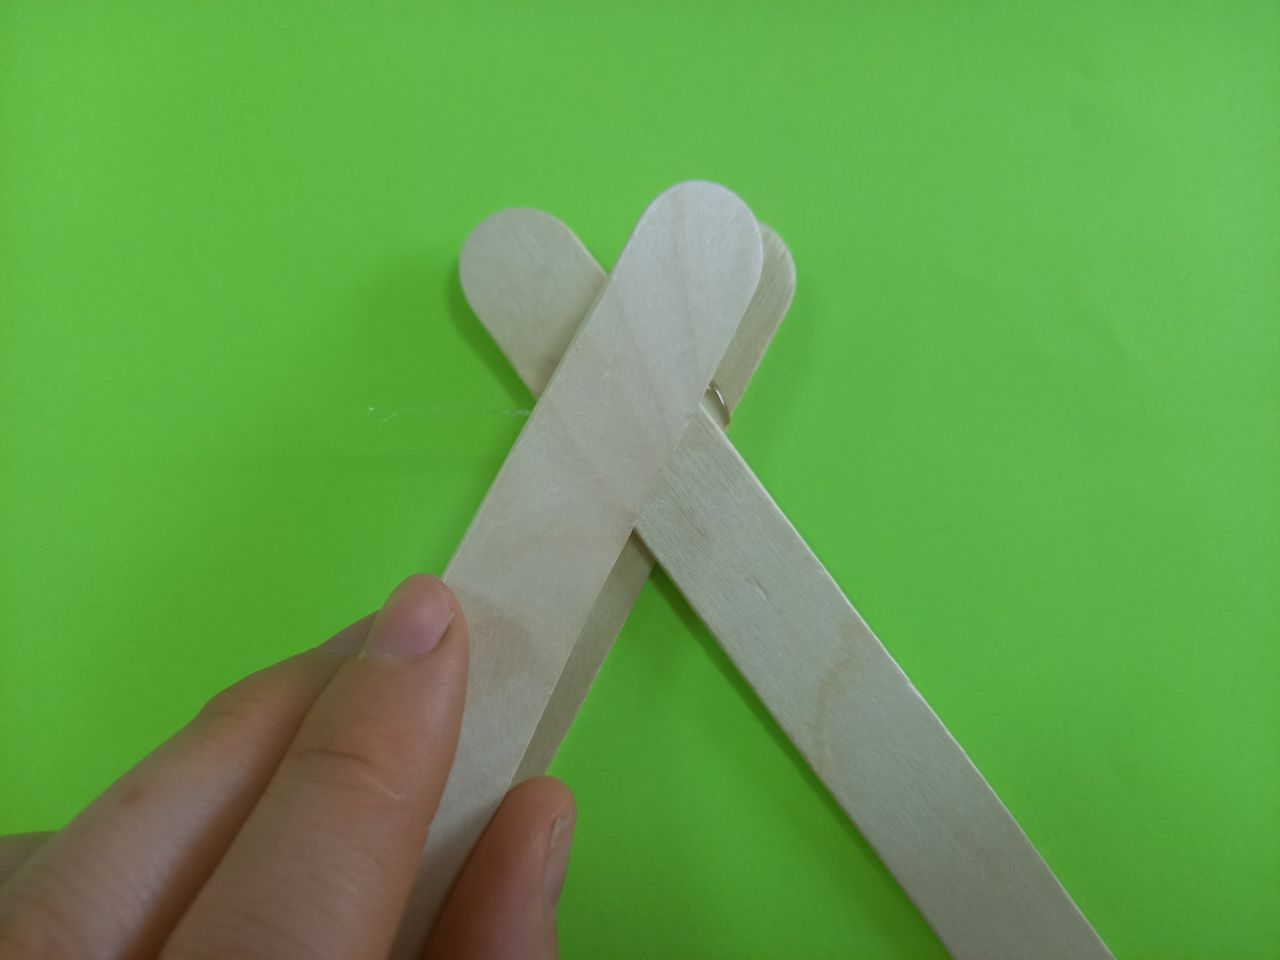
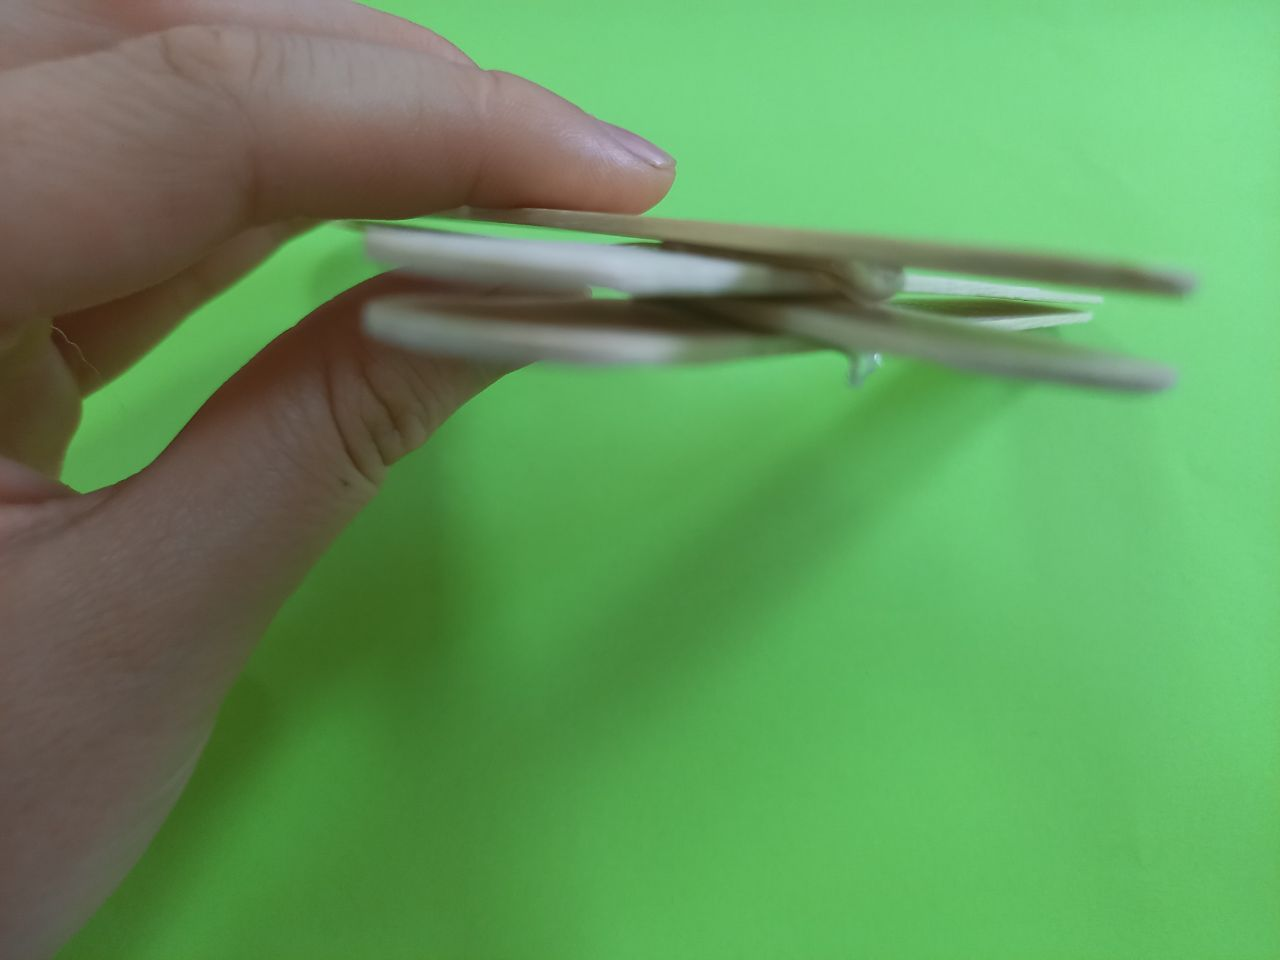
Step 4. Make these 2 crosses
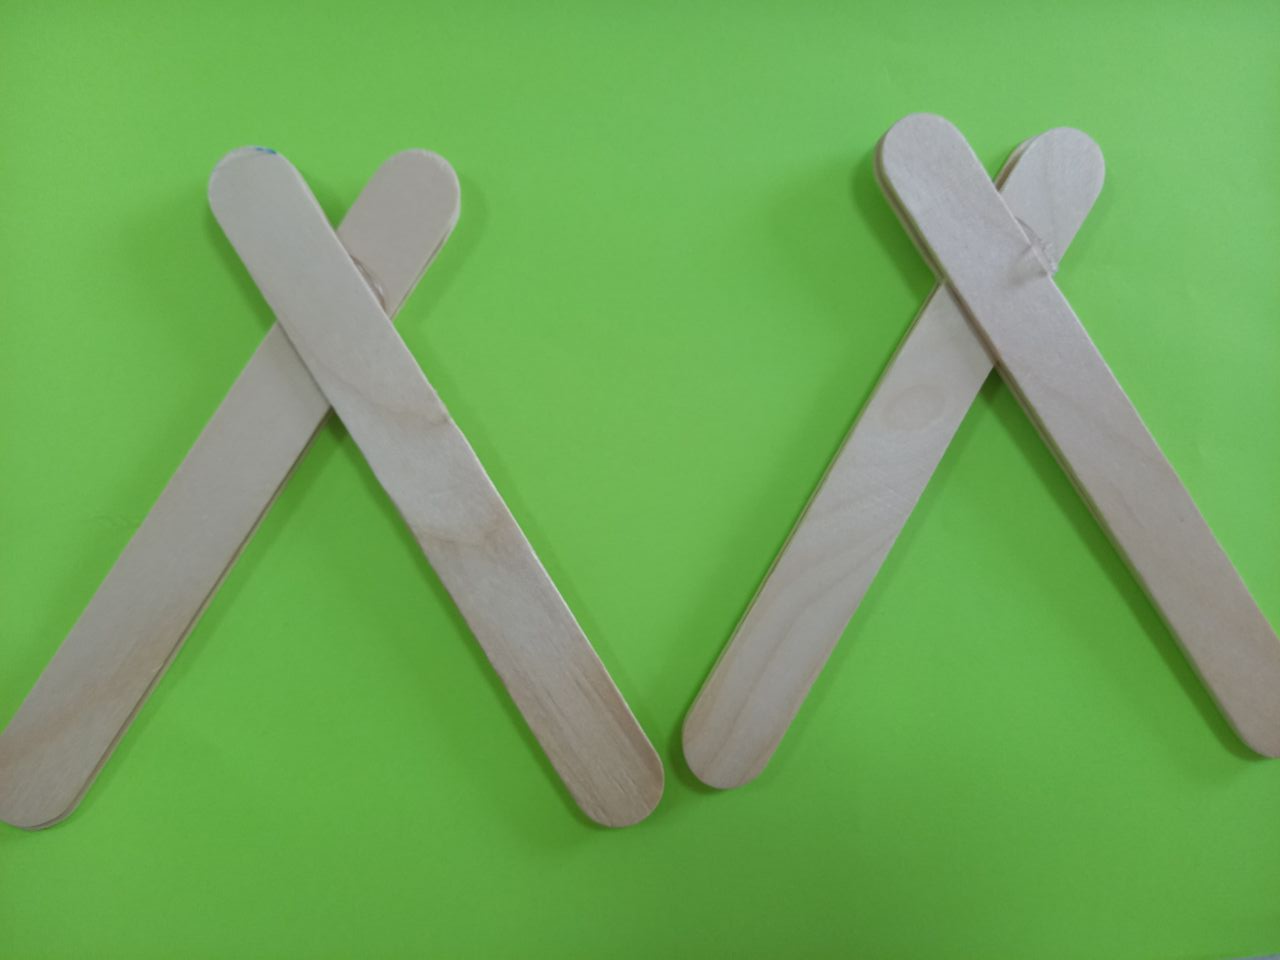
Step 5. Join and secure the cross and the square
Step 6. Take the sauce container and fix it to the stick with hot melt adhesive – this will be the lever

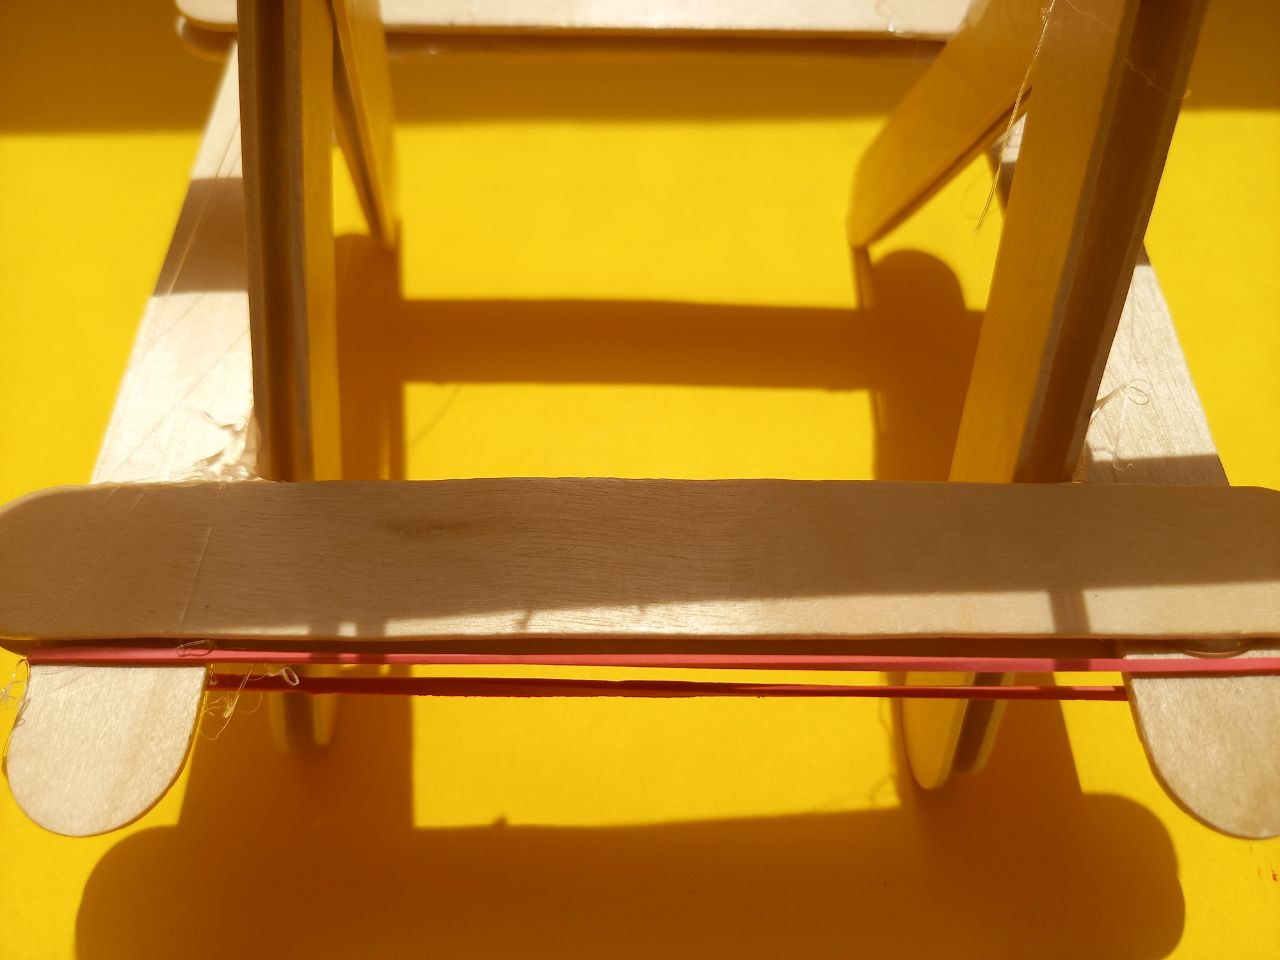
Step 7. Make a stop bar and attach it to the middle of the cross, and another stick to the middle of the stop
Step 8. Now use a rubber band to secure the lever
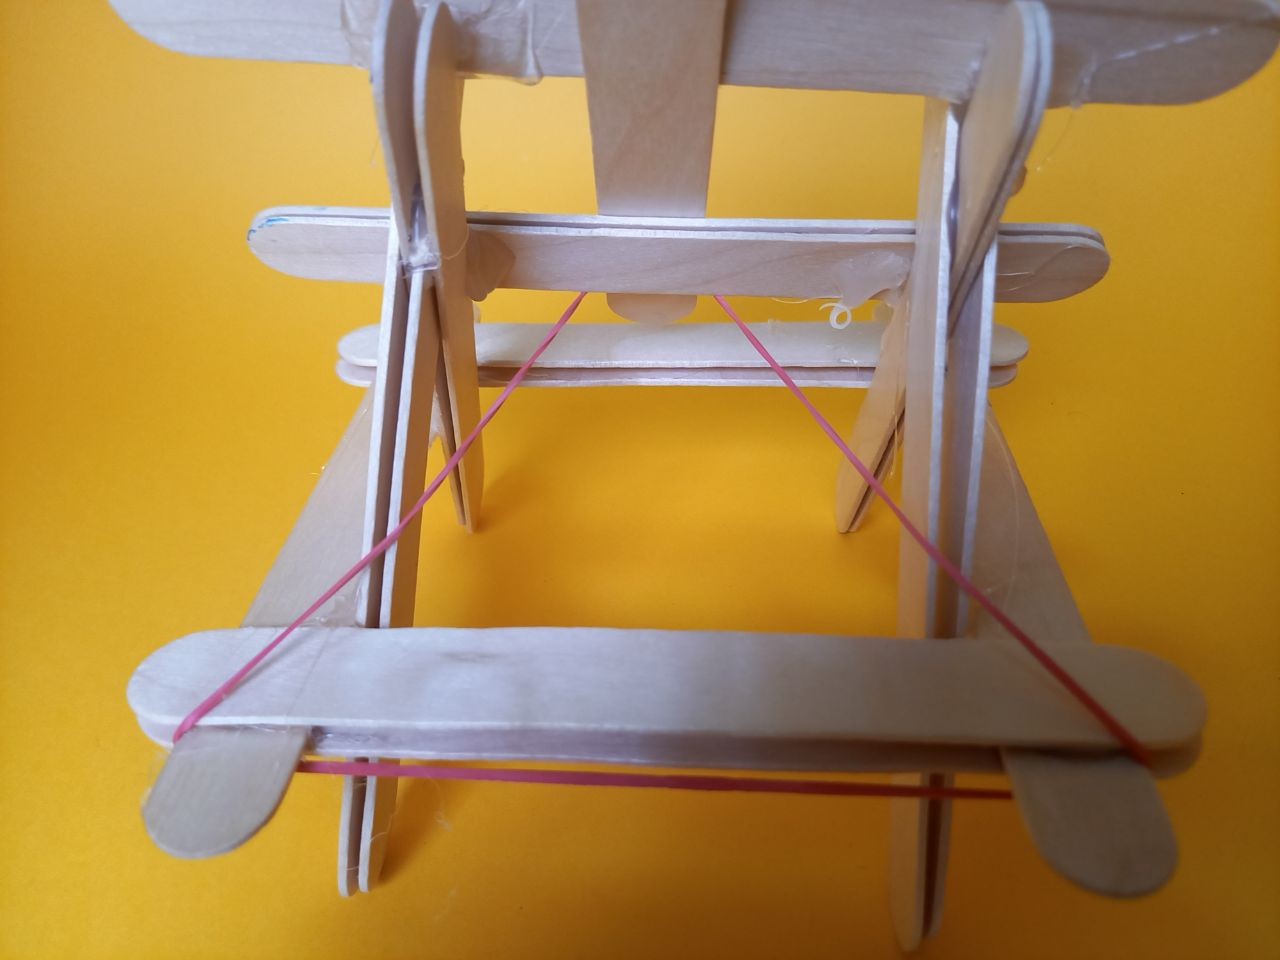
Step 9. The catapult is ready. You can test it as shown in the video

Conclusion
In this lesson the students have learned what elasticity and catapult force are. They also learned where elasticity is used. And made a catapult.

In this project, each student is awarded a STEAM title, by category:
– You independently, investigated the force of elasticity and gave examples of its manifestation, you are a real scientist – a physicist!
– You have developed teamwork skills by working in a group.
Evaluation
