Week 1
Teacher’s guide:
- Divide the students into groups;
- Give brief instructions on how to work with scissors and cardboard;
Goals:
- To improve knowledge of geometric shapes and the shape of objects
- Develop imaginative, logical and spatial thinking
Before starting work, familiarise yourself with the safety instructions [ safety insructions].
Introduction
Tell the students what a puzzle is.
A puzzle is a puzzle game in which you have to put together a figure from its many pieces.
The benefits of puzzles:
- Increased concentration. Attention is needed to find the right puzzle pieces.
- Development of imagination. When putting a puzzle image together we don’t see the whole picture, so the brain tries to draw out the missing pieces.
- Development of logical thinking. When putting a puzzle together, it is necessary to consider its sequence and shape [1].
Resources:
[1] https://mimigram.ru/blog/chto-takoe-pazly-i-chem-oni-polezny/
Practical part
Place a sheet of coloured cardboard vertically and fold it down the middle as shown in the picture below. The two pieces should be identical.
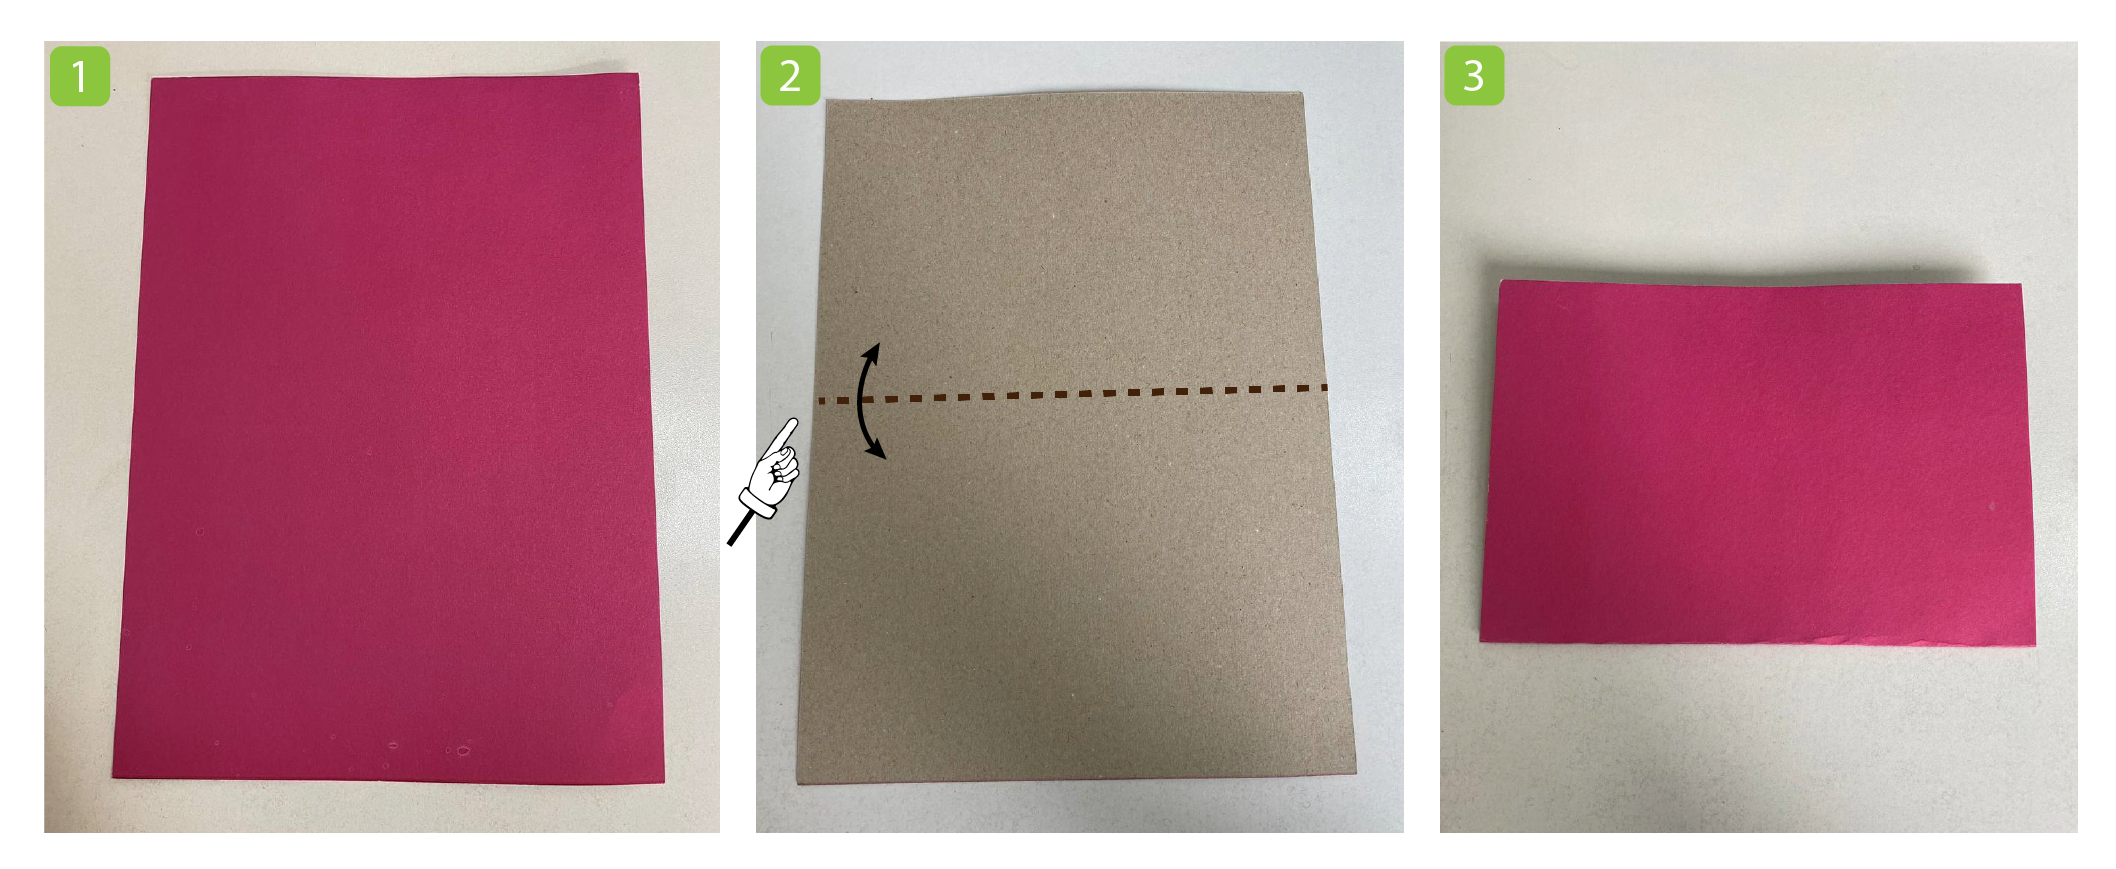
Fold the piece down the middle once more so that the two sides of the piece are the same. Unfold the piece of cardboard.

Cut a sheet of cardboard along the resulting fold lines into four pieces.
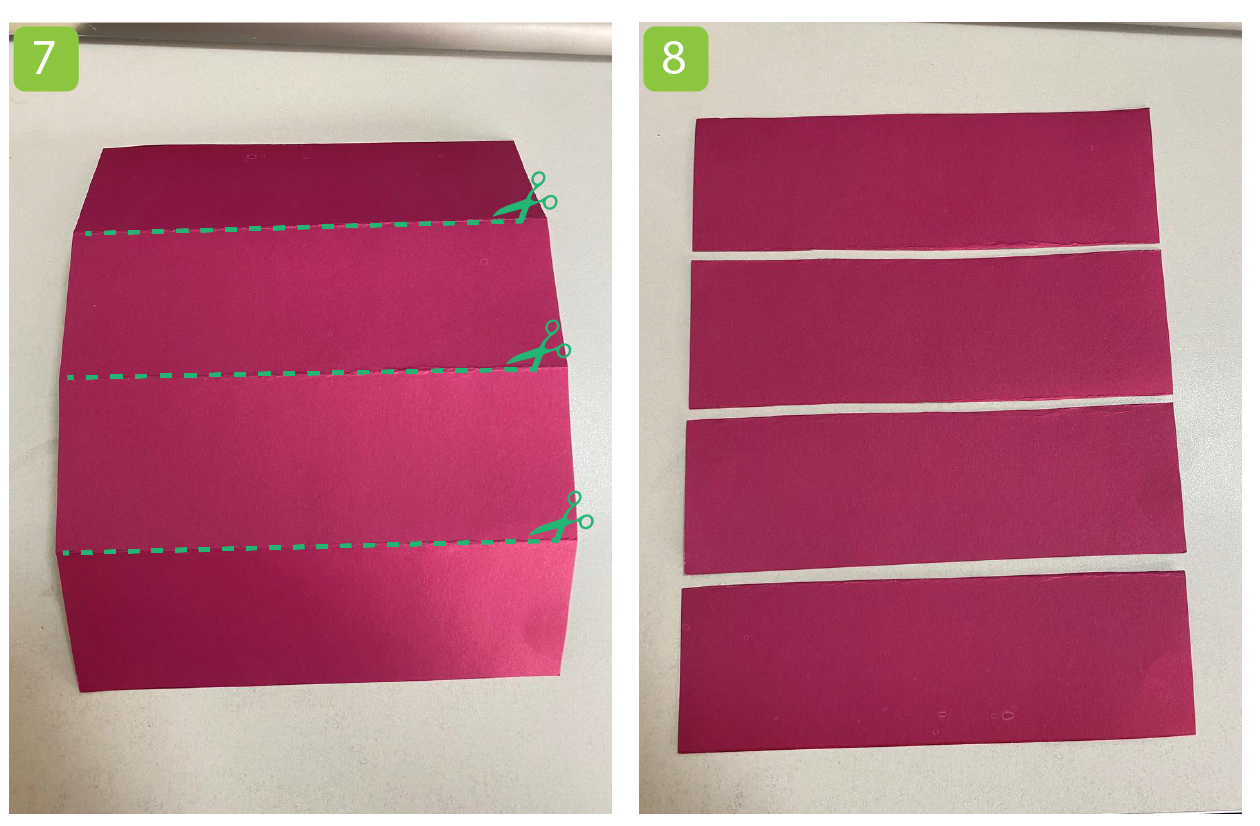
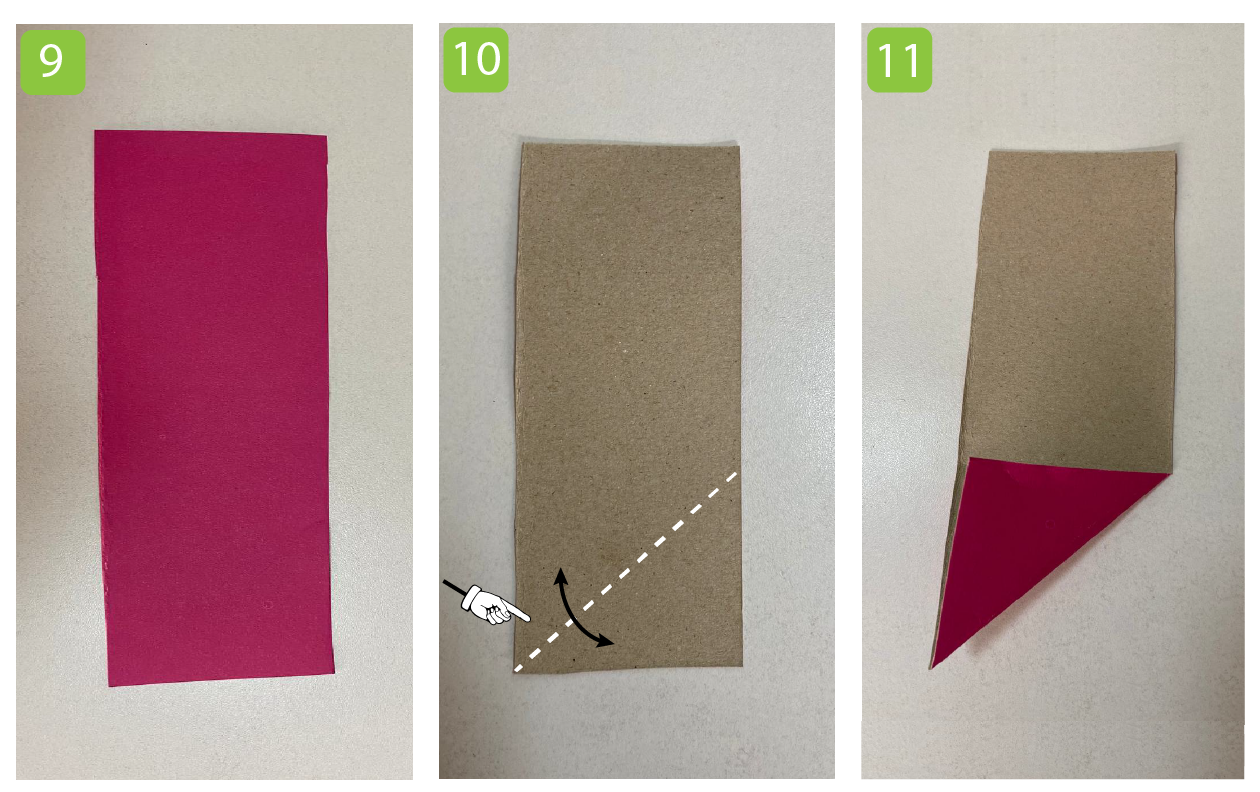
! For further work, each student should receive one piece from the cut piece of cardboard.
Place the piece vertically and fold it so that the bottom edge and the side edge meet. This should form a triangle.
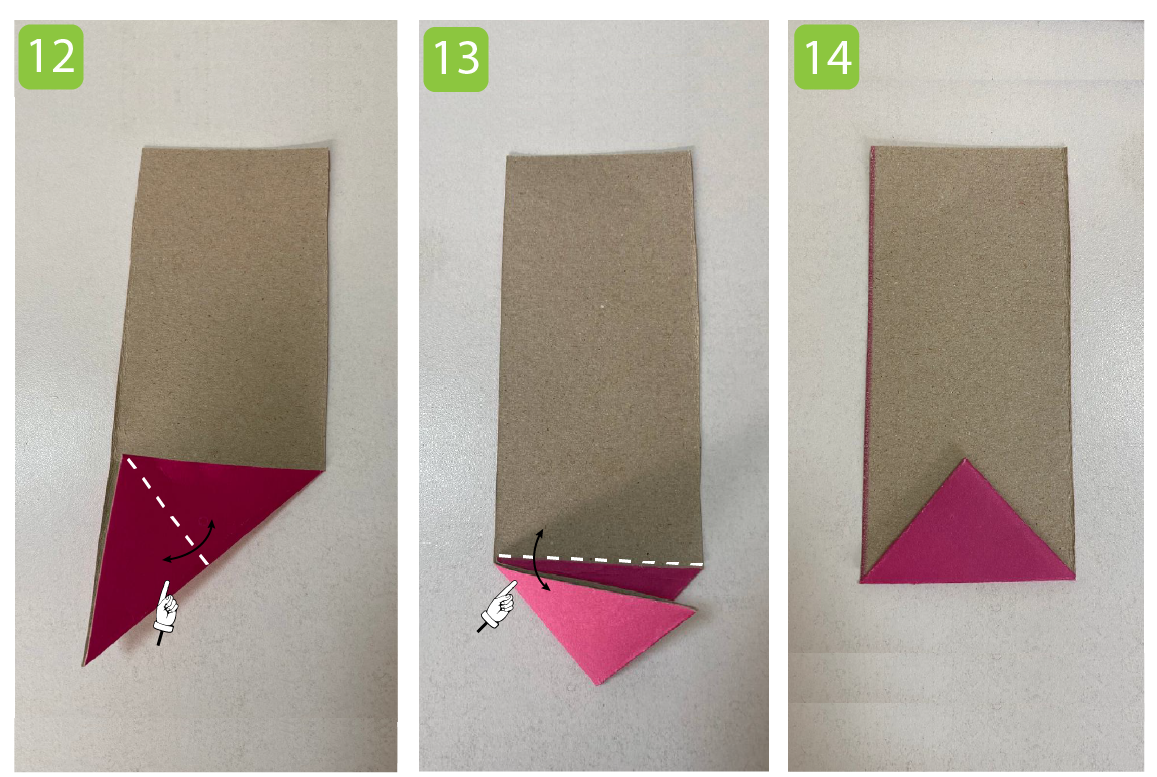
Fold the resulting triangle as shown in the picture.
Unfold the piece and cut it along the fold lines as shown in the picture. You should have four identical triangles.
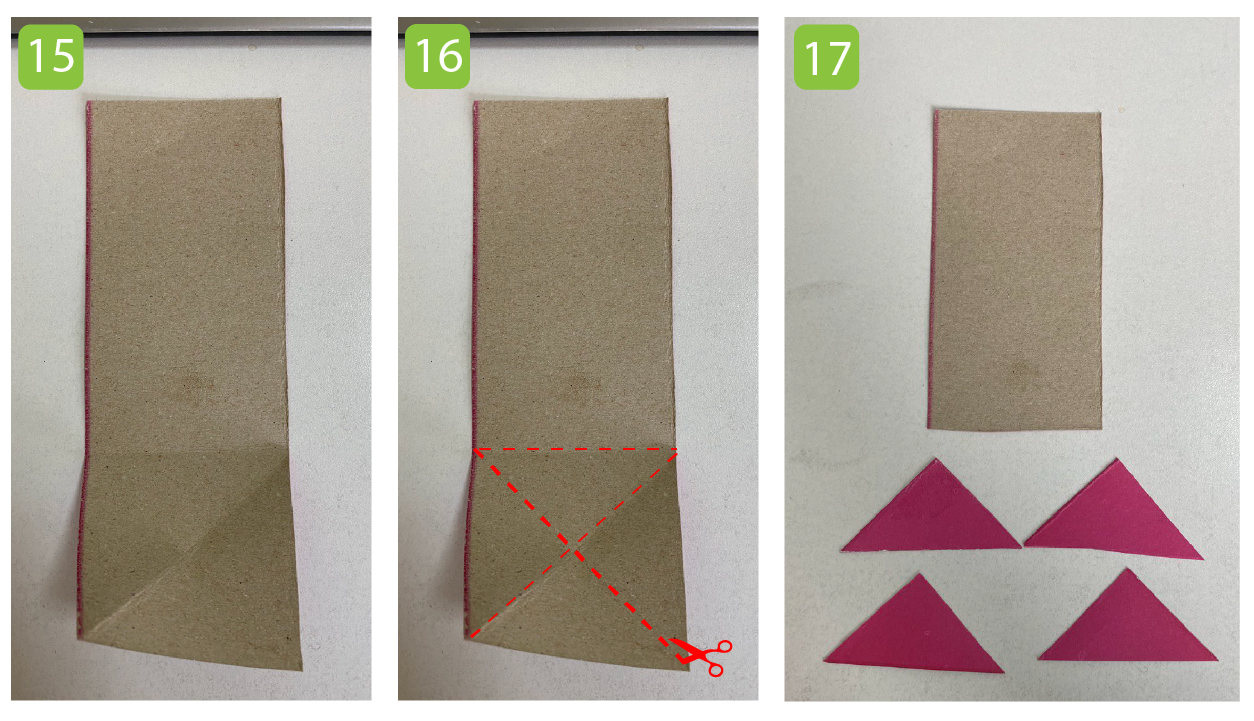
Repeat the identical process twice with the rest of the piece. You should end up with twelve identical triangles.

At this stage the pupils need to learn how to assemble the pictures using the triangles. First, show the first picture (without lines and folds) to all students on the interactive whiteboard [ download ]. Ask the students to think about how they could assemble the picture they see using the triangles they have cut out.
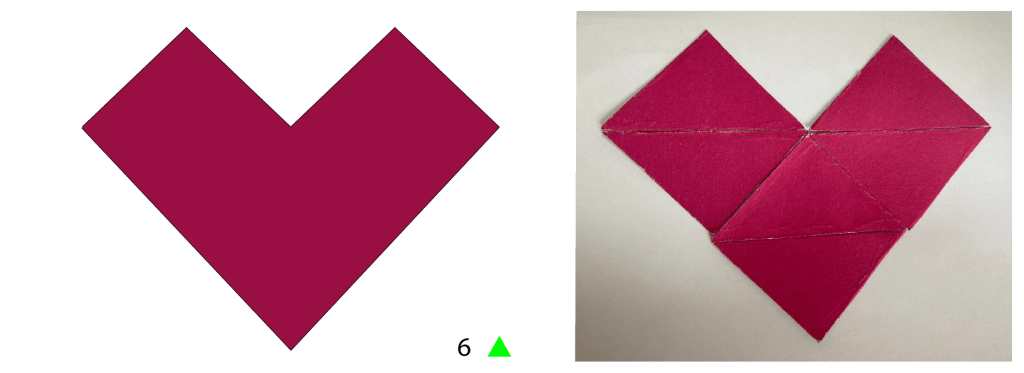
Start with easy examples. Show the pupils the drawing at home and ask them to assemble it using only four triangles (the number of triangles needed is shown in the bottom right-hand corner of the pictures).

After the students have tried to assemble the picture shown or have assembled it, show them a second picture of the fully assembled picture.
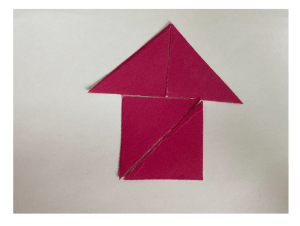
Move on to more difficult examples. Following the picture of the house, ask the students to assemble the picture of the heart (the order of the pictures on the fail is according to the level of difficulty of the picture to be assembled).
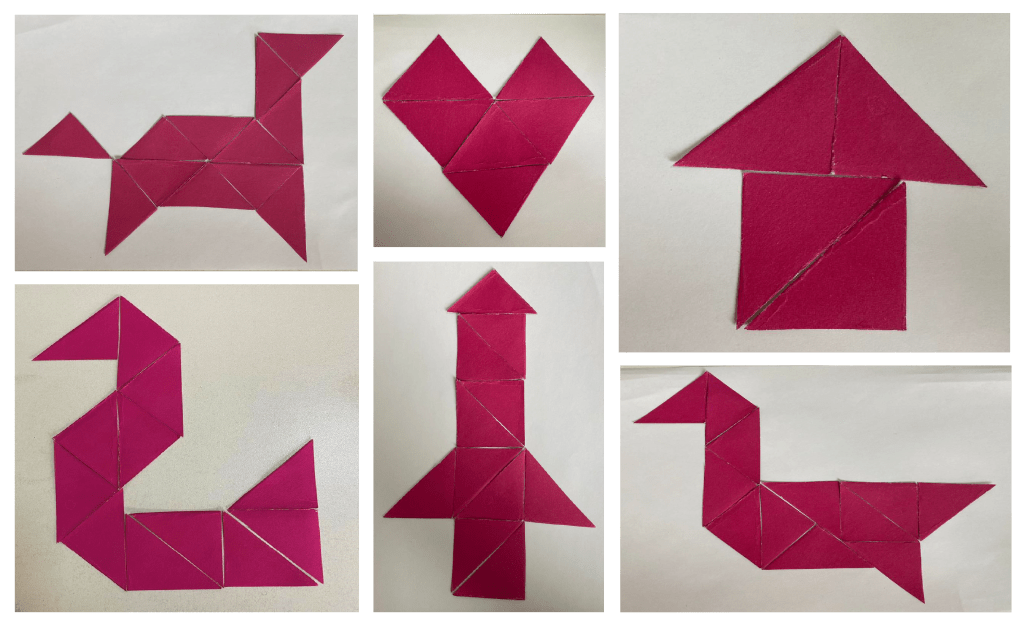
At the end of the lesson let the pupils choose a picture they like. Ask them to glue their chosen picture to an A4 sheet of paper using glue paper. Examples of glued pictures are shown in the picture below.
Conclusion
On this project, pupils developed imaginative, logical and spatial thinking by assembling puzzles (drawings) using triangles.