
Lesson
Project objective
- To investigate how animals adapt to habitat conditions.
- Design a nest for birds.
Teacher’s guide
– For the experimental part of the project, the students work in groups of 4-5.
– The students should be introduced to the topics covering the purpose of the project.
– Before beginning the experimental part, familiarize and provide the students with all the necessary materials.
– At the beginning of the lesson explain the PBL (project based learning) rubrics to the students. 4K skills (critical thinking, collaboration, creativity, presentation)
Safety in Steam lessons
It is recommended that teachers are fully aware of the safety procedures before the beginning of the lesson. If necessary (if they are using items specified in the PPE guidelines), brief the students. Visit Safety in Steam lessons: Safety rules
Theoretical part
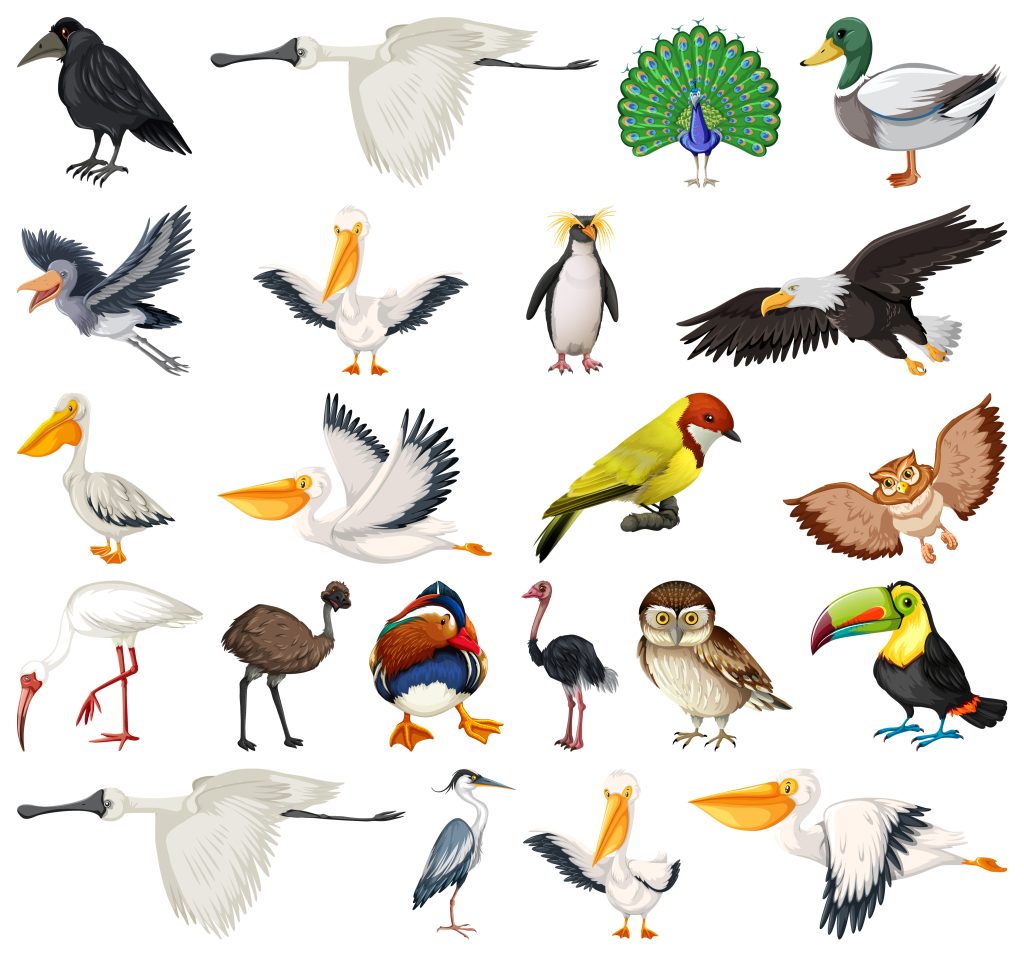
Look at these birds:
Name them
Where do they live?
What kind of beak do they have and why are they different?
What do they feed on?
Which ones are migratory?
How do you think they adapt to their environment? For example, what do they do in winter, etc.
Animals experience the changing seasons in different ways. Many animals change their light summer coats for thicker, warmer winter fur.
Birds that stay in colder climates also change their plumage to warmer ones: winter feathers are usually wider than summer feathers and more pubescent.
Animals unable to live with low temperatures and lack of food hibernate and wait out difficulties, minimising the expenditure of precious energy.
Active animals such as birds are not suited to this method, and if they cannot adapt to the harsh conditions of their homeland, they leave it. Moving away from colder climes is easier for birds than for other land-based animals because they have wings, which enable them to migrate far away.
Practical part
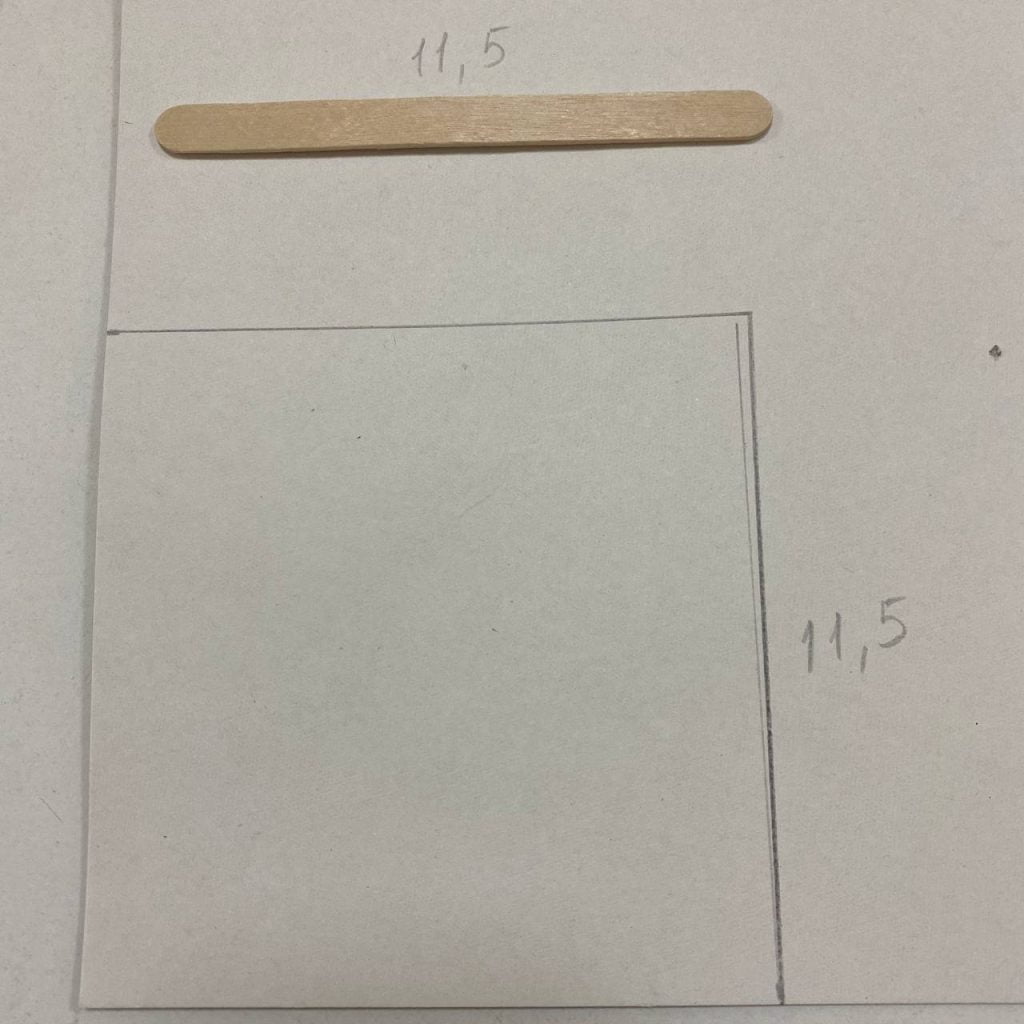
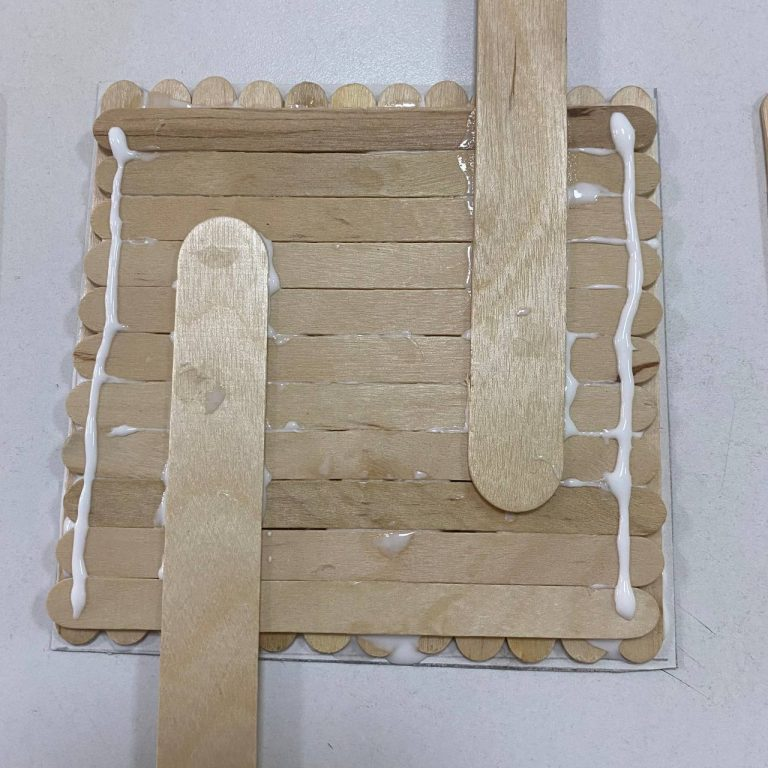
Step 1: Cut out a square the length of the popsicle sticks from the cardboard. Everyone will probably get different squares to match the popsicle sticks.!!! Measure the length of the popsicle sticks in advance
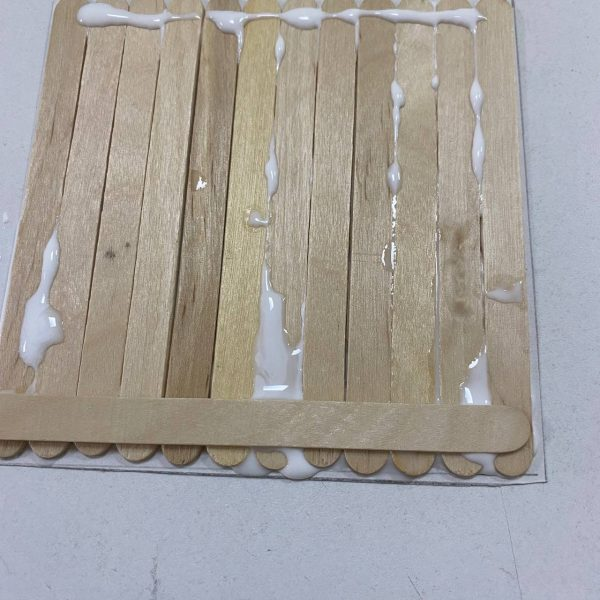
Step 2: Next, using PVA glue, glue the length of the sticks to the cardboard all the way around
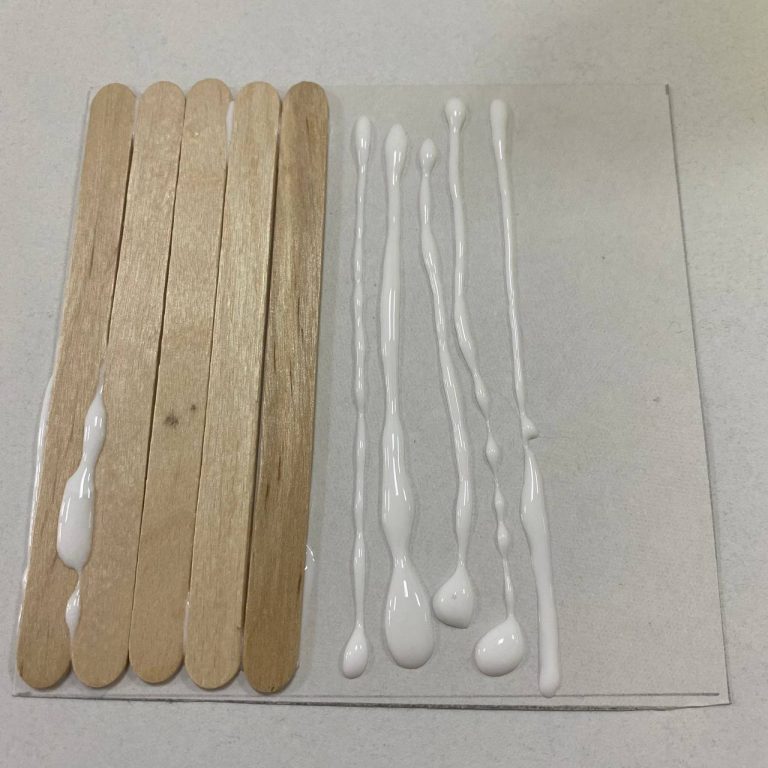
Step 3. Then wait 1 minute to allow everything to set a little
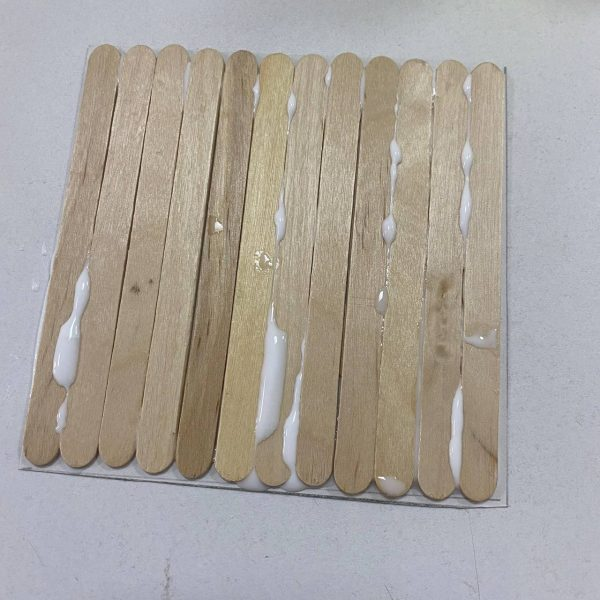
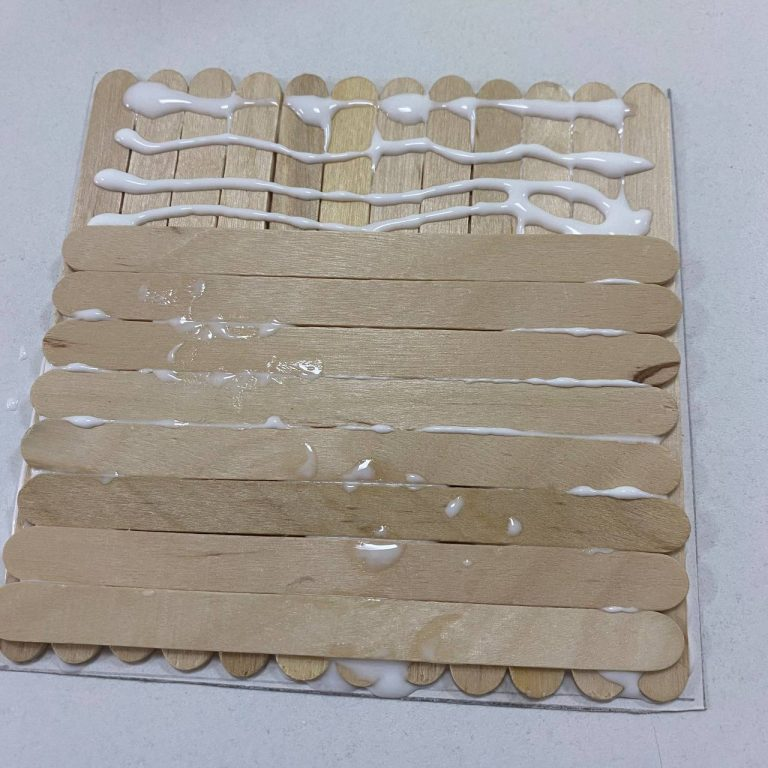
Step 4: After that, perpendicularly glue the second layer of sticks
Step 5: Make sure everything is level
Step 6. Then take the larger sticks
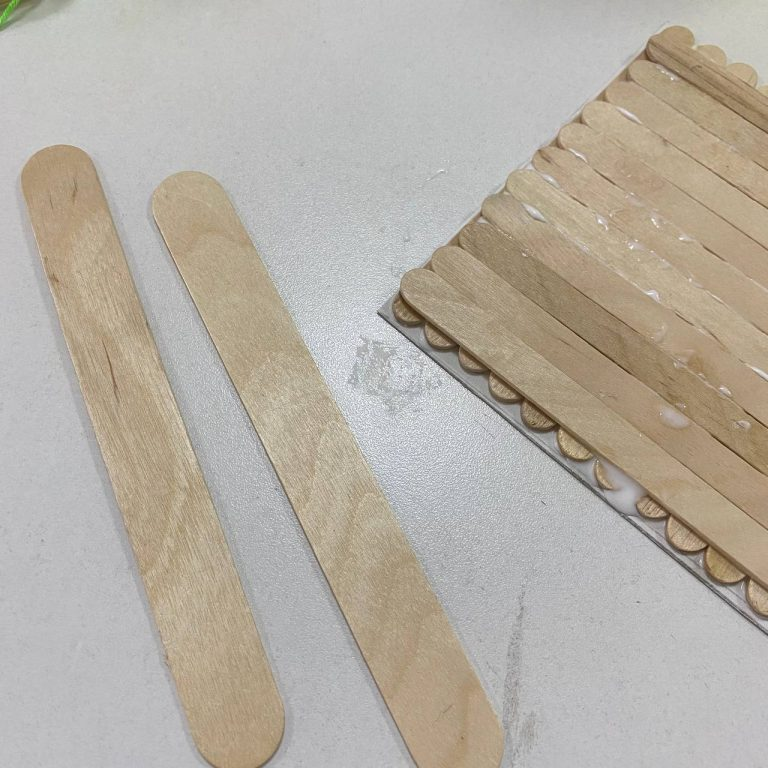
Step 7. And glue them on both ends, so that they stick out about 5-7 centimetres.
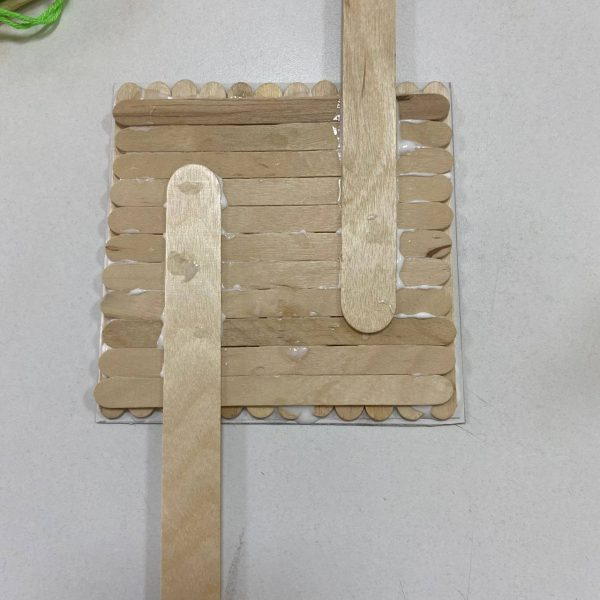
Step 8. Then glue the sticks on both ends of the square
Step 9. Then vice versa, from the other two ends of the square

Step 10. And so, in staggered order, you can repeat it 7-10 times.
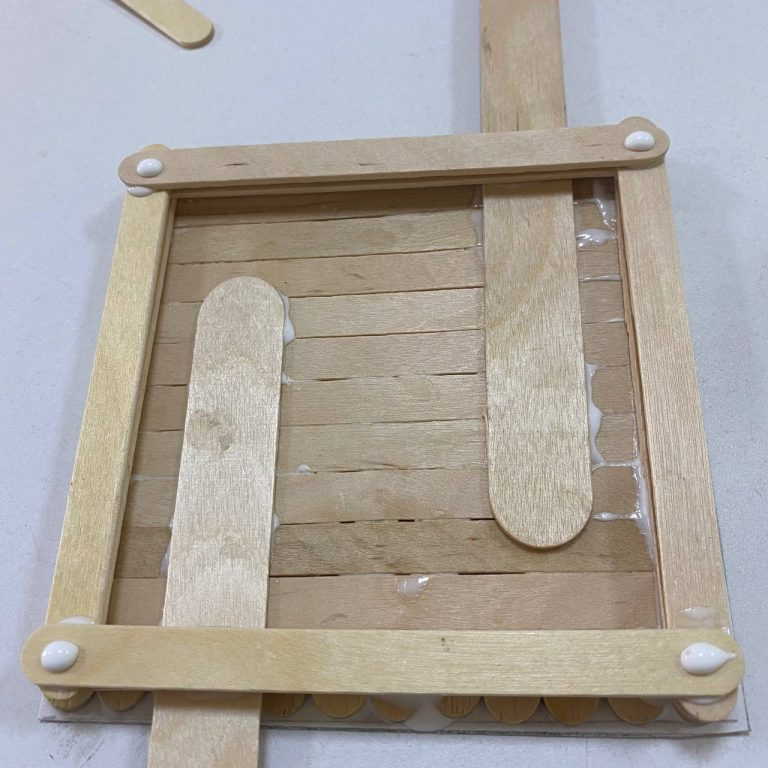
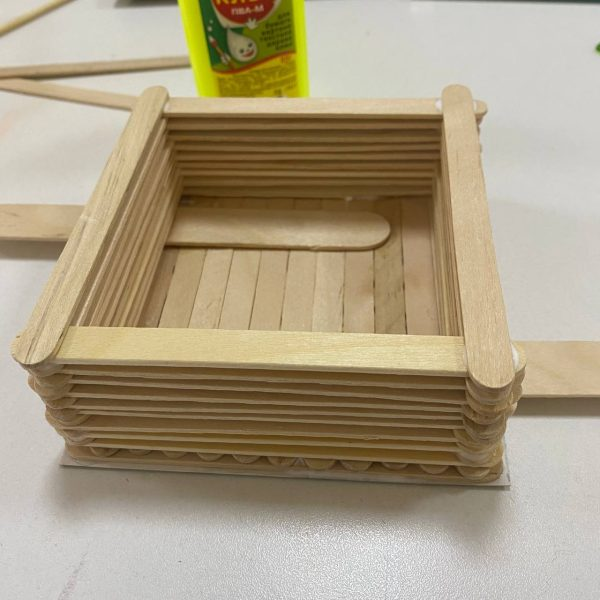
Step 11. The construction should come out as shown in the illustration
Step 12: Prepare the rope. Wrap it on four sides (as you usually wrap presents, cakes etc) and a length of rope on top. As in the pictures below.
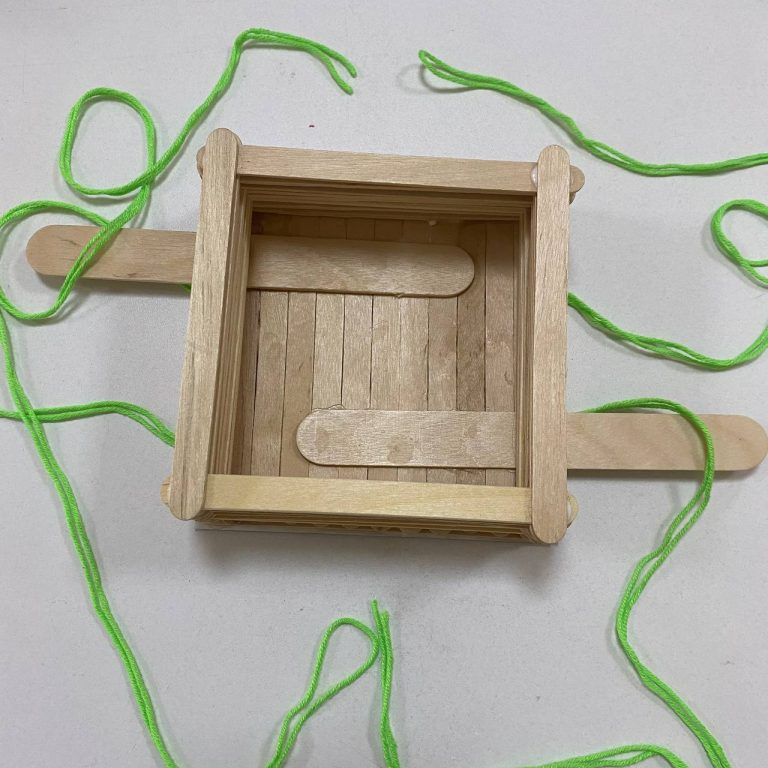
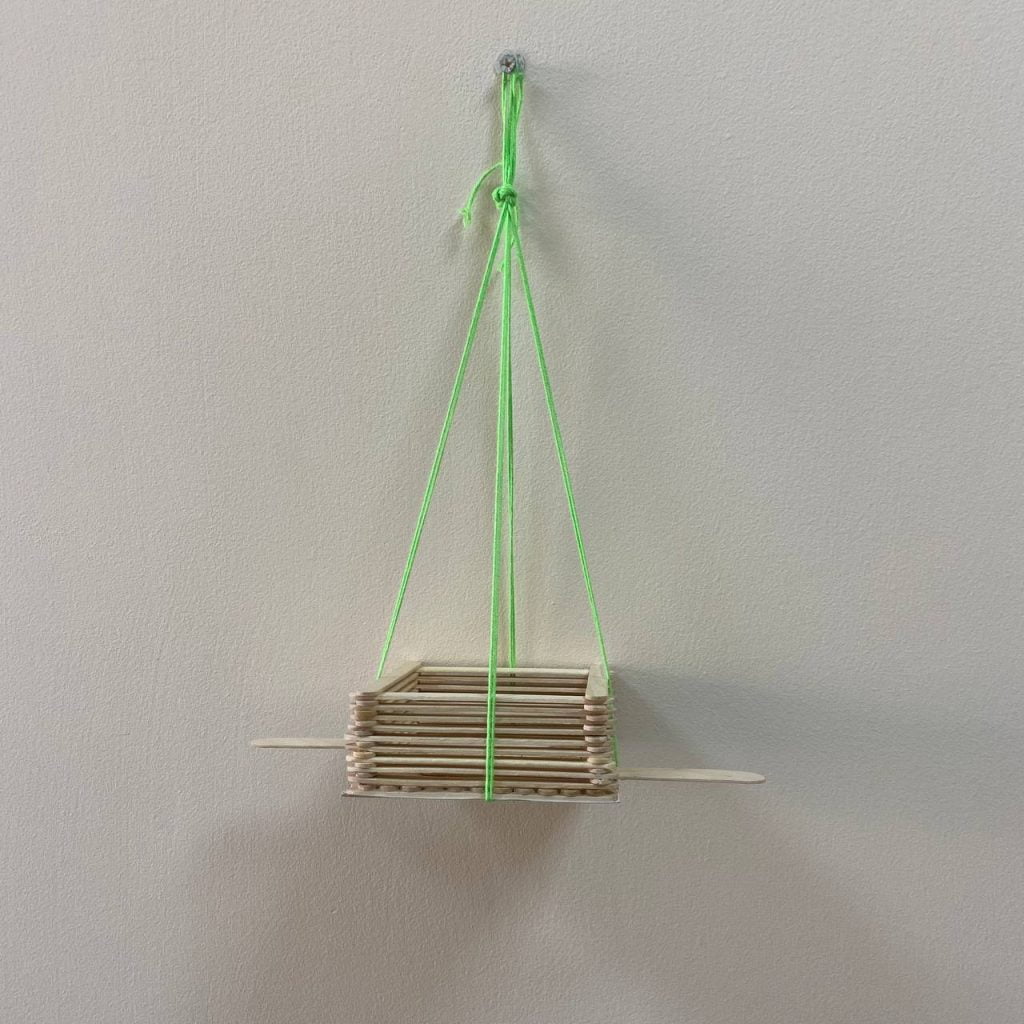
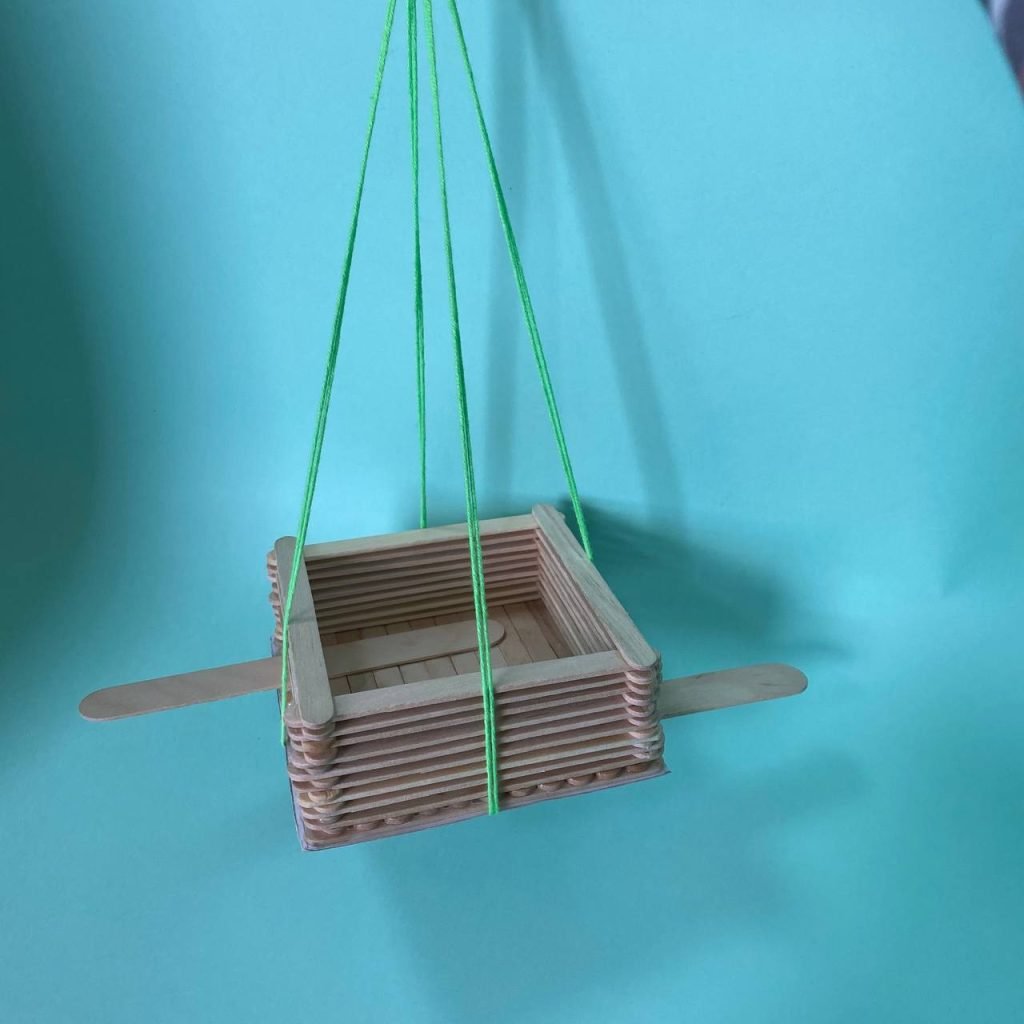
You can fill the inside with cotton wool, etc. And hang it on a tree near the school. You can also fill it with birdseed. It’s up to you.
Conclusion
In this way, the students have learned how animals adapt to their environment. They also made a nest for the birds out of popsicle sticks.

On this project, each pupil is awarded a STEAM title, in several categories:
- Congratulations, you are a real – zoologist as you have explored the world of animals and birds!
- Congratulations, you are a young – construction engineer! We are sure that in the future you will surprise the world with your masterpieces!
Evaluation
