
Week 2
Make of parts
This week, students will work on the planning and fabrication of objects (barrel, house, switch stand, and irrigation pipes). This lesson is aimed at developing an understanding of the design and construction of engineering facilities and the manifestation of creativity.
Tell students:
You will be making parts (barrel, house, switch stand, and irrigation pipes). Divide and distribute tasks among yourself. You will be provided with instructions for making parts with examples and illustrations. Consider improving your structural design. You can change the details of the structure and add new objects to the project.
2.1 Making a barrel for storing water.
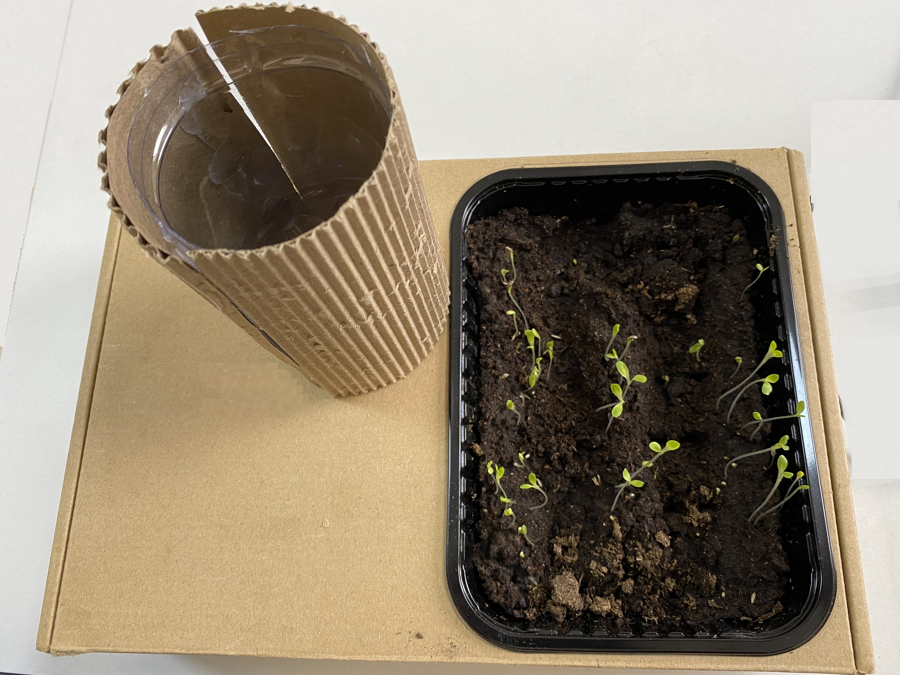
The barrel in this project is needed to store water pumped out of the ground. It is advisable to locate it closer to the irrigation site.
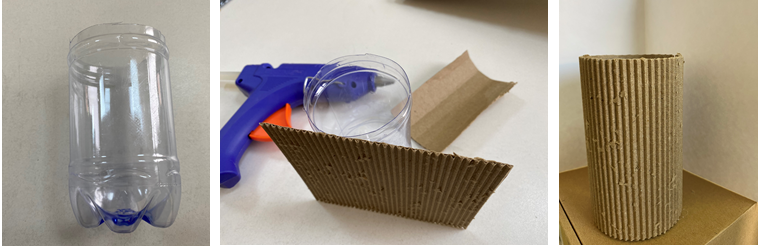
Take a 0.5L plastic bottle and cut off the top.
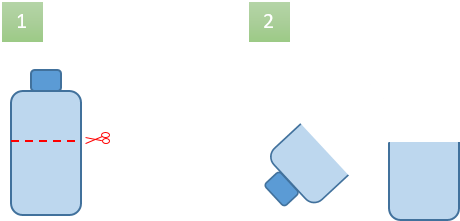
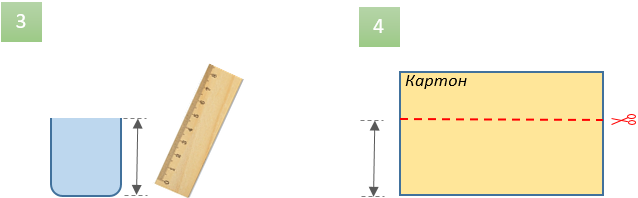
Measure the height of the resulting barrel blank and use it to prepare the cardboard cover. Cover the blank from a plastic bottle with cardboard using hot glue.
We got the following:
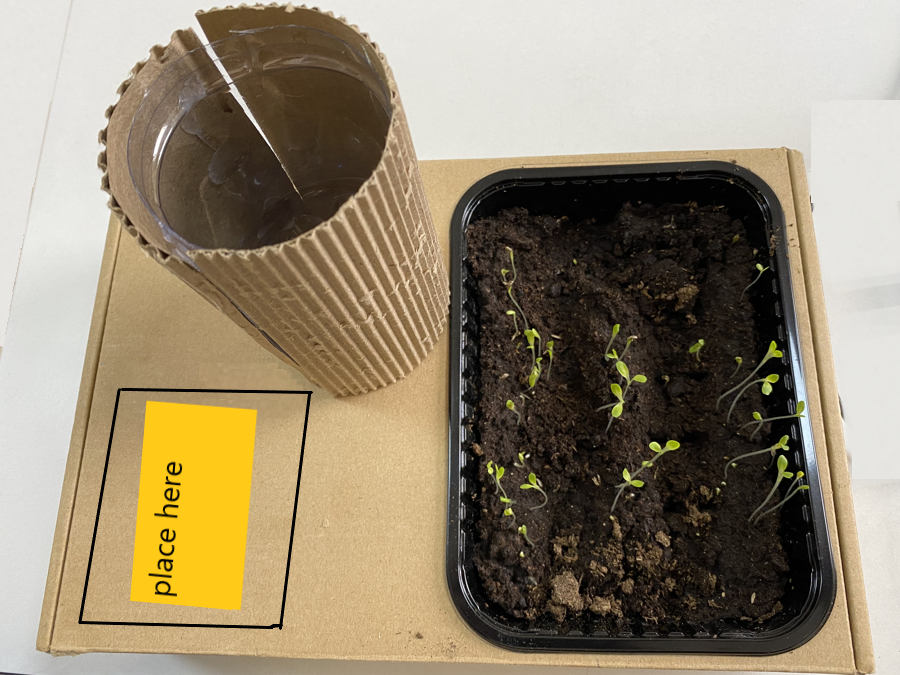
Place the resulting barrel next to the irrigation area and glue it to the box as shown in the picture
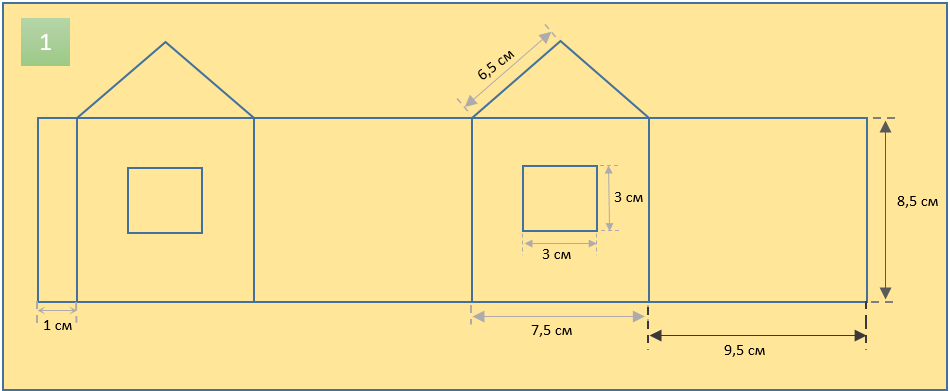
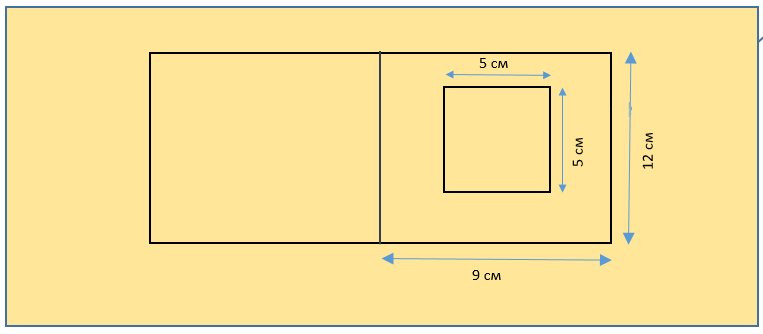
2.2 Making a house
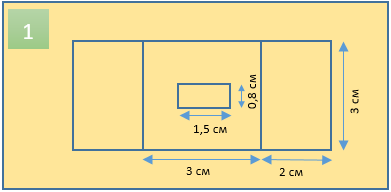
Draw a layout of the house on a piece of cardboard. The dimensions of the house layout are shown in the following figure.
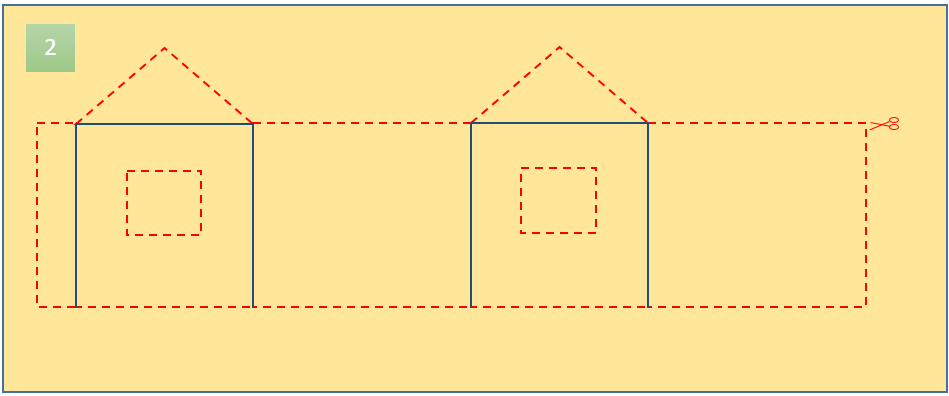
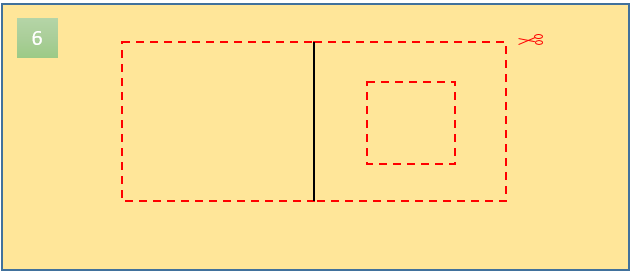
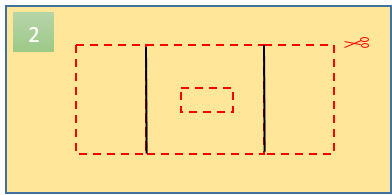
Cut out the layout of the house following the red lines shown in the picture.
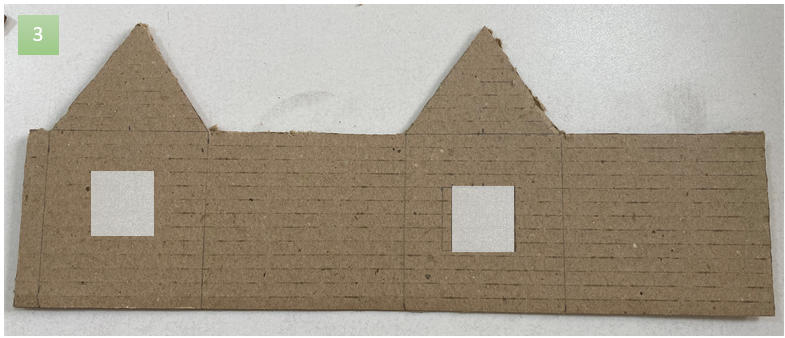
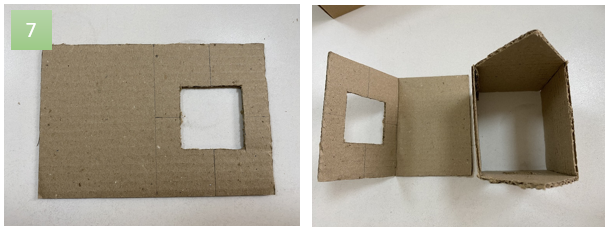
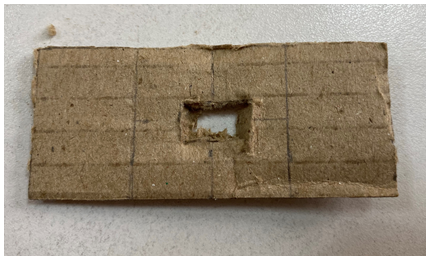
You should get the following detail
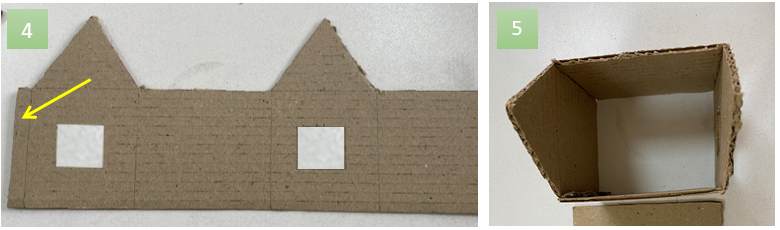
Assemble the body of the house by gluing the edge of the house (indicated by the arrow) to the inside of the house wall
On a piece of cardboard, draw a layout for the roof of the house. The dimension of the roof layout is shown in the following figure
Cut out the roof layout following the red lines shown in the picture.
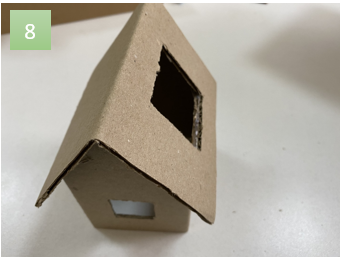
You should get the following detail (the hole on the right side of the roof is necessary for the solar panel cables).
Glue the roof to the body of the house
Glue the resulting part in the area indicated in the picture
2.3 Making a switch stand
On a piece of cardboard, draw a layout for the stand. The dimension of the layout is shown in the following figure
Cut out the layout following the red lines shown in the picture.
You should get the following detail
Glue the resulting part in the area indicated in the picture

2.4 Making irrigation pipes
Take a couple of juice tubes and make a tube of the following shape.
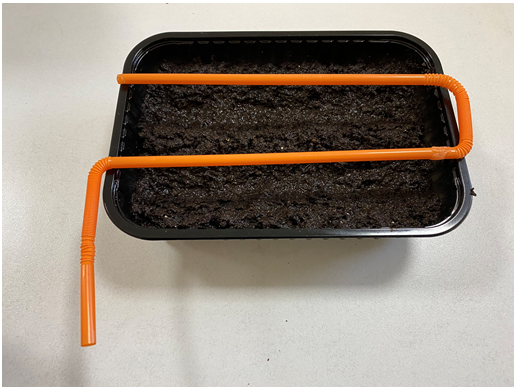
Thermoplastic glue can be used to glue the pipes. After each application of a layer of glue, wait approximately one minute for the glue to dry. This will allow the pipes to adhere well to each other.
