
Lesson 2
The practical part
This week you will continue to design water treatment facilities, launch the system and conduct physico-chemical analyses for water quality.
Step 1. Prepare materials and layout of water treatment facilities
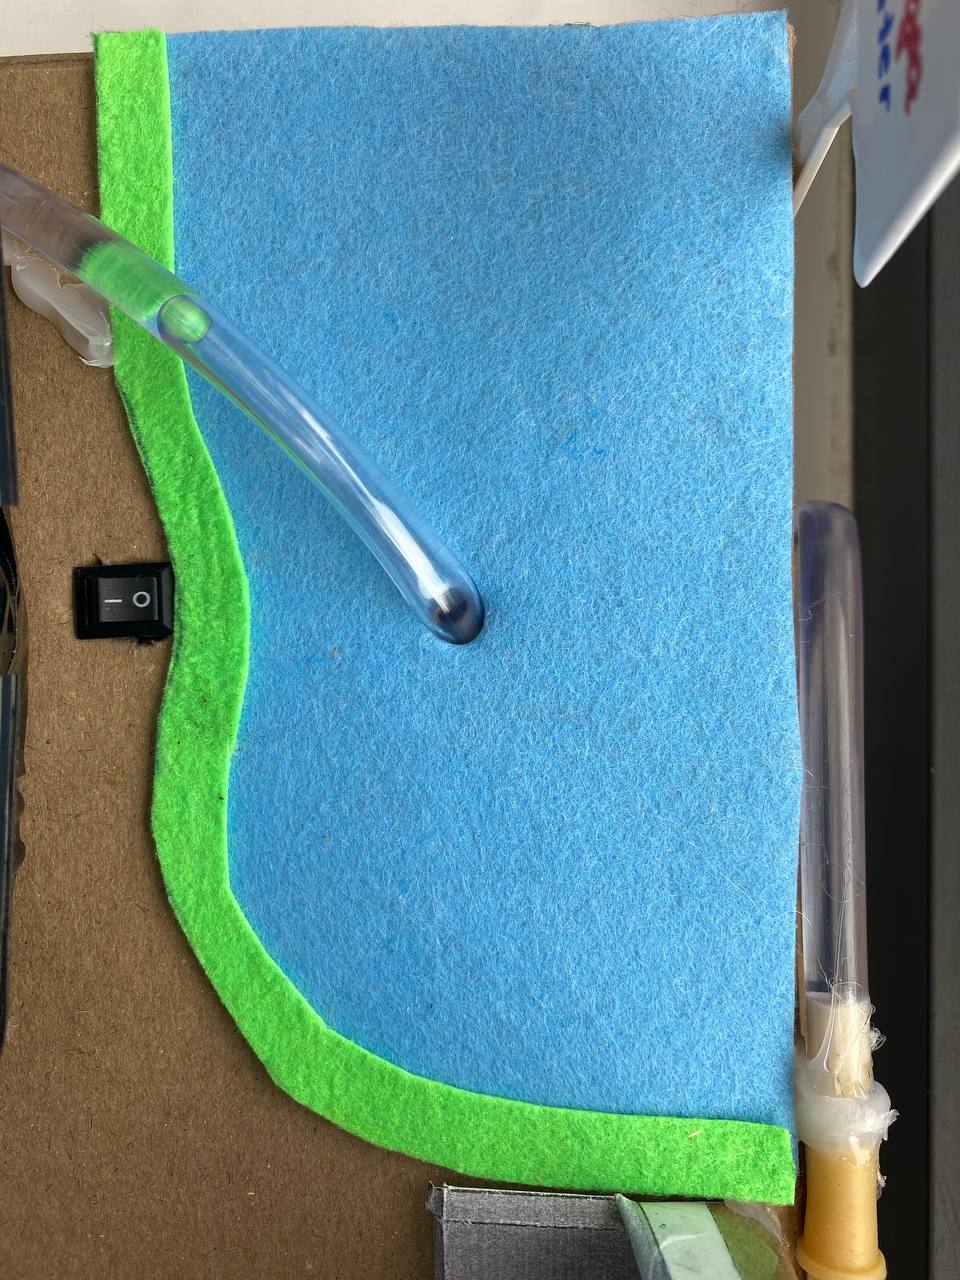
Step 2. Make a model of a reservoir (river, lake) out of blue paper (felt or cardboard), then glue it on the base, on the left side of the house layout
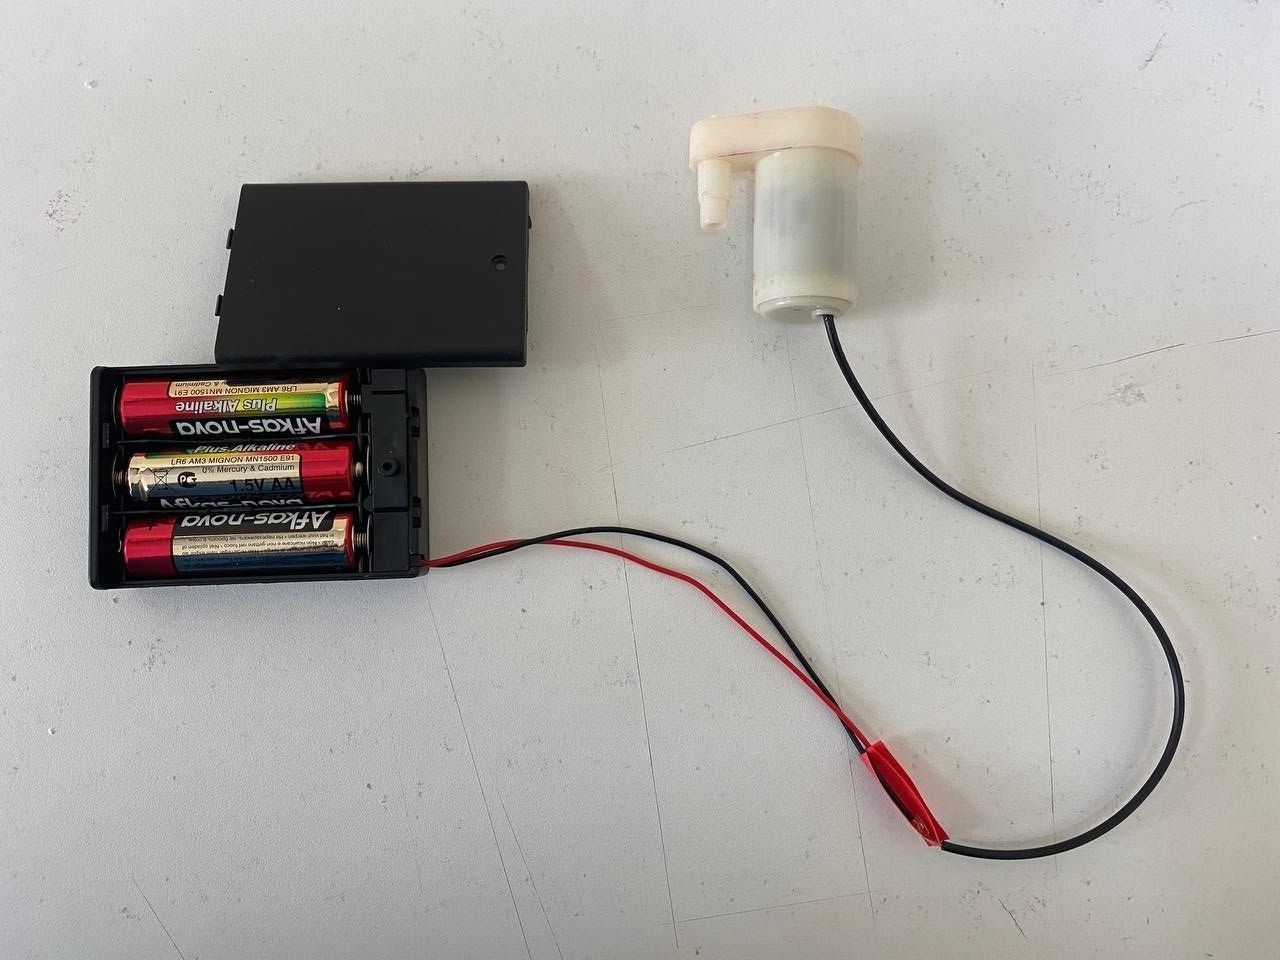
Step 3. Connecting pumps– take 2 pumps and 2 battery compartments with a switch- then connect the wires (red to red (anode+); black to black (cathode-))- you must have 2 pumps and 2 battery compartments
Step 4. Connecting pipelines- load the first pump into the container, which is located inside the base under the layout of the bathroom, and install the battery compartment next to the container- connect a silicone hose with a length of no more than 40 cm to it, and immerse this hose in a sump with a conveyor, it is necessary to fix the hose with hot glue so that there are no leaks– load the second pump at the bottom of the conveyor, and install the battery compartment next to the container- connect the hose connected by the upper part of the filtration to the second pump – then, having made a hole next to the filtration, pull out the silicone hose that is connected to the bottom (outlet) of the filtration, and pull this hose to the reservoir- after that, connect it to the hose from the shower stall
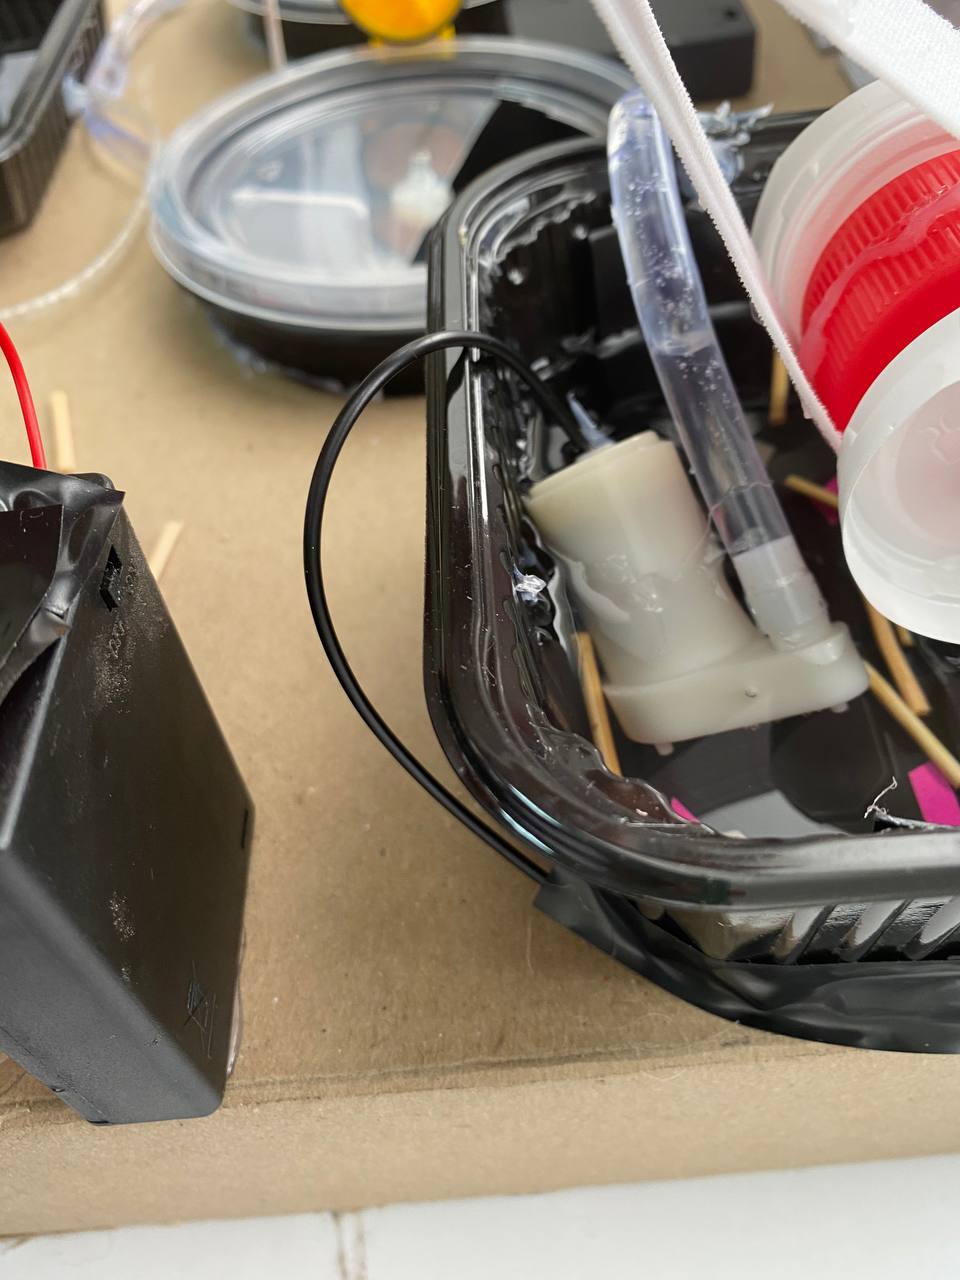
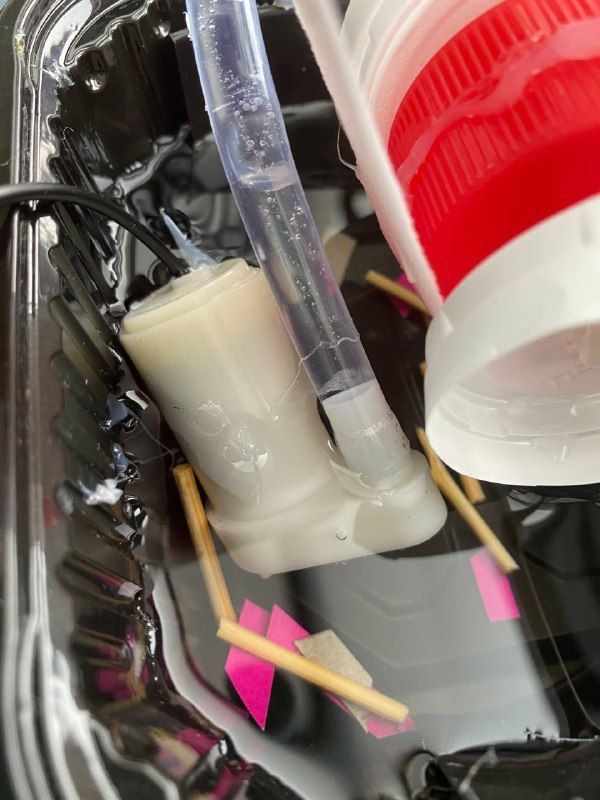
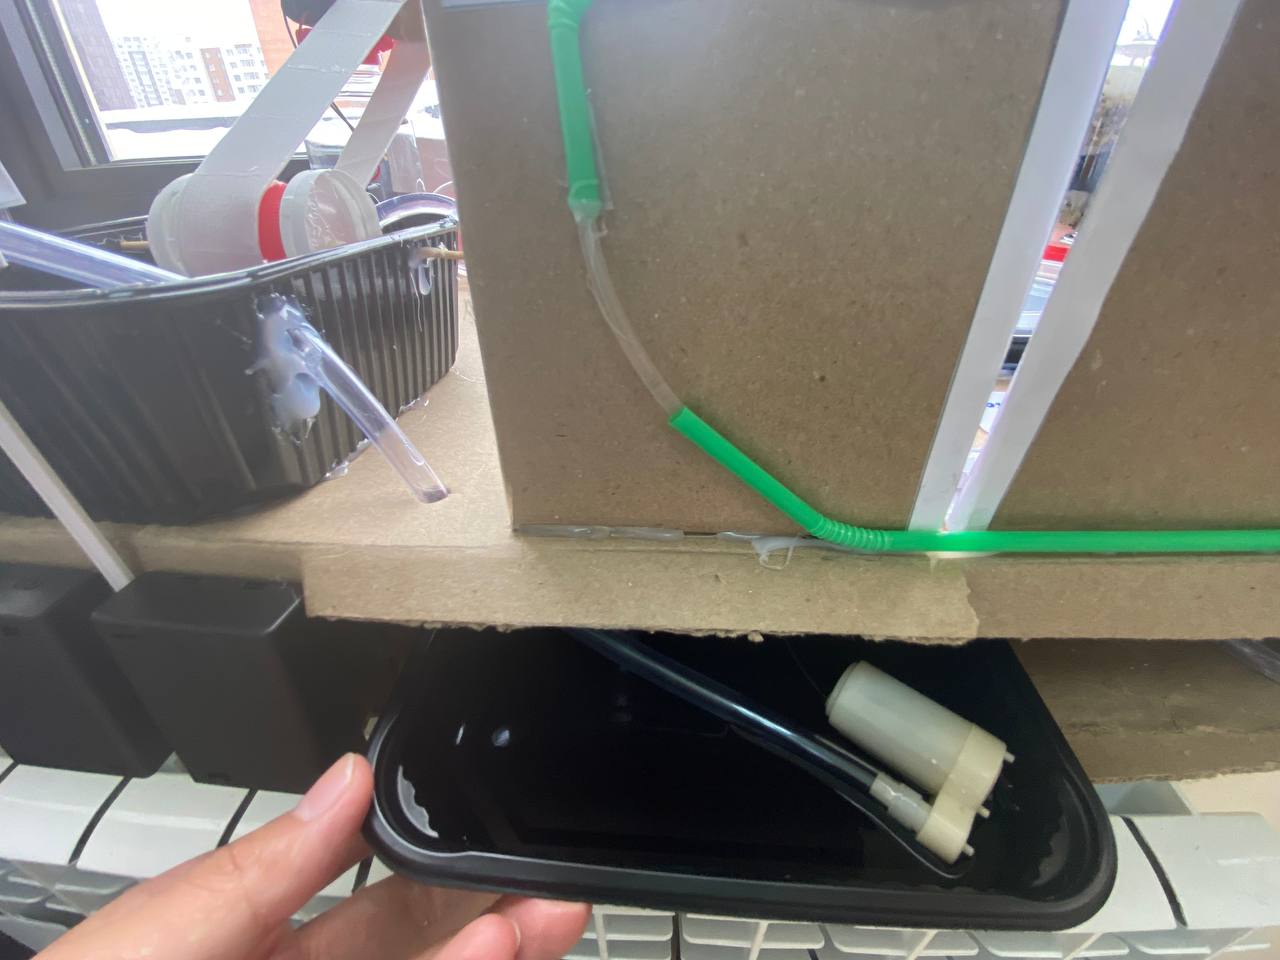
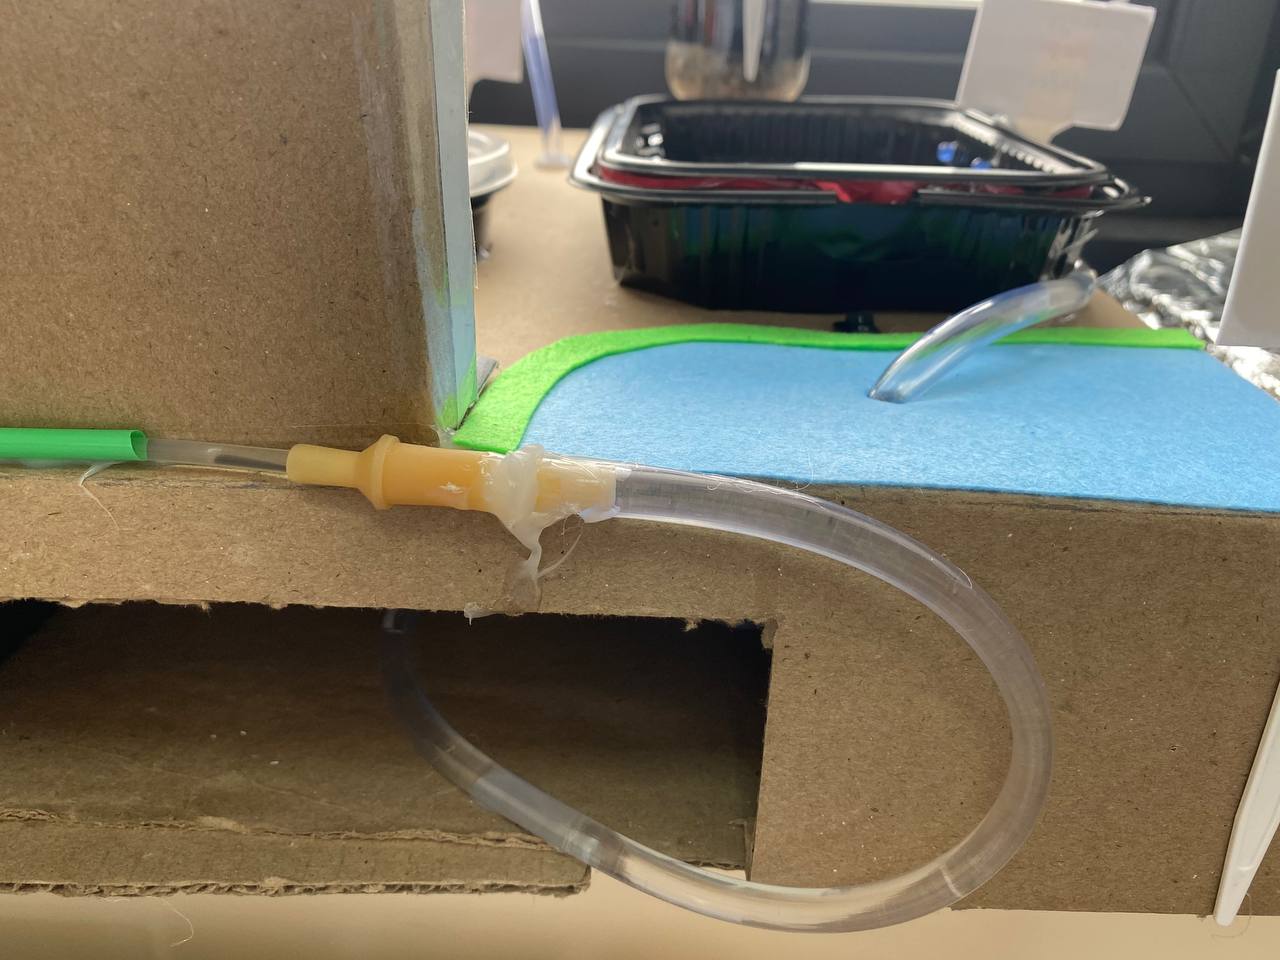
Step 5. Check all nodes– using hot glue, seal all connections- check the hoses so that there are no strongly curved lines
Step 6. Pour water from the tap:- aerotank- UV tank- primary and secondary settling tanks
Step 7. Prepare the solution:In 500 ml of water , put it to sleep:- a little soil- sunflower oil- a little orange juice, etc- Mix all this and immerse it in a tank where waste water is collected, (up to the grate)This solution (dirty water) will serve as sewage
Step 8. Test-start the system.– turn on UV disinfection- turn on the 1,2-septic tanks- turn on the conveyor- turn on 2 pumps!!!Attention! It is important to observe the process carefully!

Congratulations!!! Your mock-up of water treatment facilities is ready!
The experimental part.
 | It is recommended to carry out the research part of the project in chemistry classrooms (laboratories).Carefully study the safety rules for working with chemical utensils and reagents! |
Experience No. 1. Organoleptic analysis of water
Required materials:
– glass (test tube)
– sample No. 1-waste water (prepared solution/dirty water)
– sample No. 2-water after purification (from the hose after filtration/purified water)
Step 1. Put two samples in a test tube: waste water and purified water.
Step 2. Then fill in the table below by indicators:
1. Aggregate state: gaseous, liquid, solid (if there are impurities, then of what nature).
2. Transparency: transparent/slightly opalescent/opalescent/slightly cloudy/cloudy/strongly cloudy.
Transparency is set by the font method:
– Water is poured into a transparent cylindrical container 30 centimeters high and placed on a sheet with text. It is made in an average typographic font with a height of 3.5 mm. It is necessary to measure the thickness of the water through which the text can be clearly seen. Sometimes the turbidity of the liquid is determined by eye. To do this, water is collected into a test tube 10-12 centimeters high and visually examined for lumen, whether there are suspensions. For a more accurate assessment of the organoleptic qualities of water, a special device is used that makes a photometric analysis of the liquid.
3. Chroma
4. Smell
Physico-chemical analysis of water
Experience No. 2. Determination of the hydrogen index of water
Required materials:
– indicator paper
– glass (test tube)
– sample No. 1-waste water (prepared solution/dirty water)
– sample No. 2-water after purification (from the hose after filtration/purified water)
Step 1. Put two samples in a test tube: waste water and purified water)
Step 2. Immerse the 2 indicator papers in the samples (separately) for a few seconds.
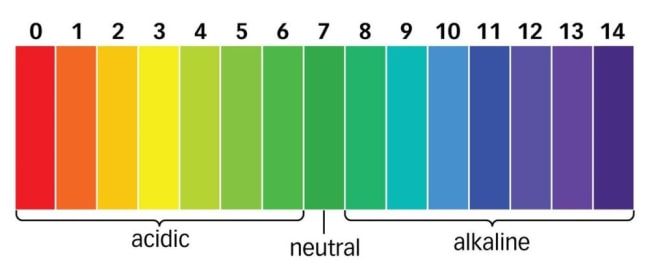
Step 3. Then, using the reference pH scale, determine the hydrogen index. Write down the received data in the table.
Experience No. 3. Determination of permanganate oxidizability of water
Required materials:
– potassium permanganate
– glass (test tube)
– sample No. 1-waste water (prepared solution/dirty water)
– sample No. 2-water after purification (from the hose after filtration/purified water)
Step 1. Prepare a saturated solution of potassium permanganate for analysis. In 25 ml of pure water, add half a teaspoon of potassium permanganate.
Step 2. Put two samples in a test tube: waste water and purified water of 50 ml each. In the test sample, apply 1 drop of a solution of potassium permanganate. Then leave for 20-30 minutes at room temperature. Do not allow direct sunlight on the test samples.
Step 3. Next, place the glass on a white sheet of paper and evaluate the color change of the tested solution. For comparison, a sample of pure tap water colored with potassium permanganate passed through a good filter can be used as a reference.
With an increased level of oxidizability of water in the glass, the water sample pales significantly, becomes yellowish-pinkish, a dark precipitate may form at the bottom of the cup. A high level of oxidizability will make the sample yellow or brownish (reddish and pink shades will completely disappear), sometimes it completely discolors, and a rich dark sediment forms at the bottom.
Experience No. 4. Determination of oxygen in water
Required materials:
– glass (test tube)
– sample No. 1-waste water (prepared solution/dirty water)
– sample No. 2-water after purification (from the hose after filtration/purified water)
Step 1. Put two samples in a test tube: wastewater and purified water of 50 ml each. Leave it for a day.
Step 2. After 24 hours, without stirring the glass, set the presence /absence of bubbles. Bubbles indicate the presence of oxygen.
Write down all the data in the table:
| Indicators | Sample No. 1 (waste water-before treatment) | Sample No. 2 (purified water) | |
| Date and time of sampling | |||
| Organoleptic indicators | Aggregate state | ||
| Presence of sediment | |||
| Transparency/Turbidity | |||
| Chroma | |||
| Smell | |||
| Physico-chemical indicators | Hydrogen pH index | ||
| Permanganate oxidizability | |||
| Availability of oxygen | |||
| Overall stiffness | |||
| Nitrates/Ammonia | |||
| Phosphates | |||
| Sulfates | |||