
lesson1
The title of the laboratory work: Identifying lever balance condition
Purpose of the work:
- Identify lever balance condition;
- Be aware of and follow the safety rules.
Expected results:
- The lever balance condition is in maintaining the force acting on the lever arm being inversely proportional to the arm length.
Teacher’s Guide:
- Divide the students to 3 students in each group.
- Before starting laboratory work, read the safety rules:
- To download the worksheet, please follow this link:
Theoretical part
The lever is in balance if the forces acting on it are inversely proportional to the arm lengths of these forces. This is called the laver balance condition and it can be described with the formula:
F1/F2 = d2/d1
где d1 – arm length of force F1; d2 – arm length of force F2.
The lever balance condition can be also expressed in terms of torque. If the torques applied on opposite sides of the fulcrum are equal in magnitude and opposite in direction, the level arm is at equilibrium. In other words, the clockwise torques equal the counterclockwise torques.
М1 = М2
where М1 и М2 are torques. Torque measurement unit is N*m. The formula is:
М = F d
Sources:
- Условие равновесия рычага. (2019). Физика. Учебник для 7 класса общеобразовательной школы.
Experimental part
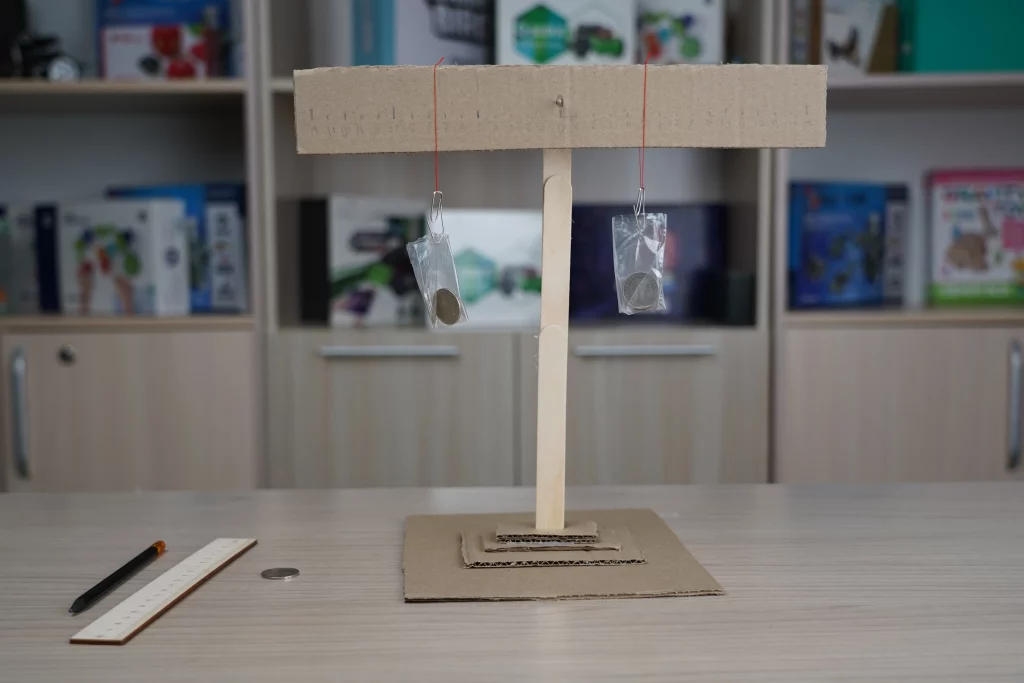
The lever.
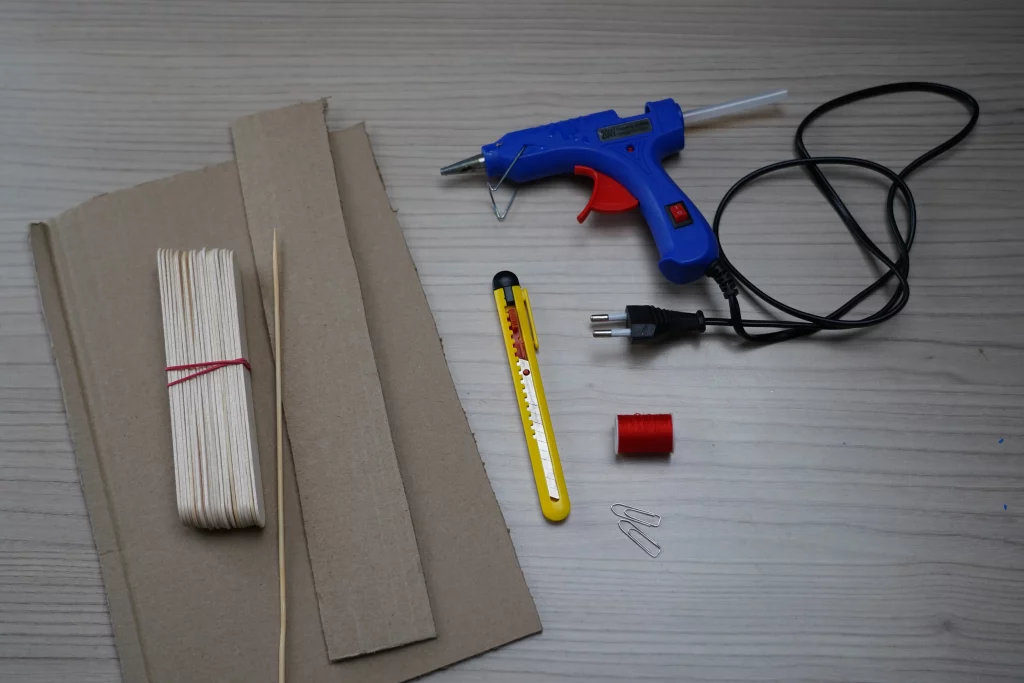
For this experiment we need a lever, it can be made from scratch using hands on materials. For this purpose, we need hot glue, wooden sticks, paper clips, cardboard, a thread and small plastic bags.
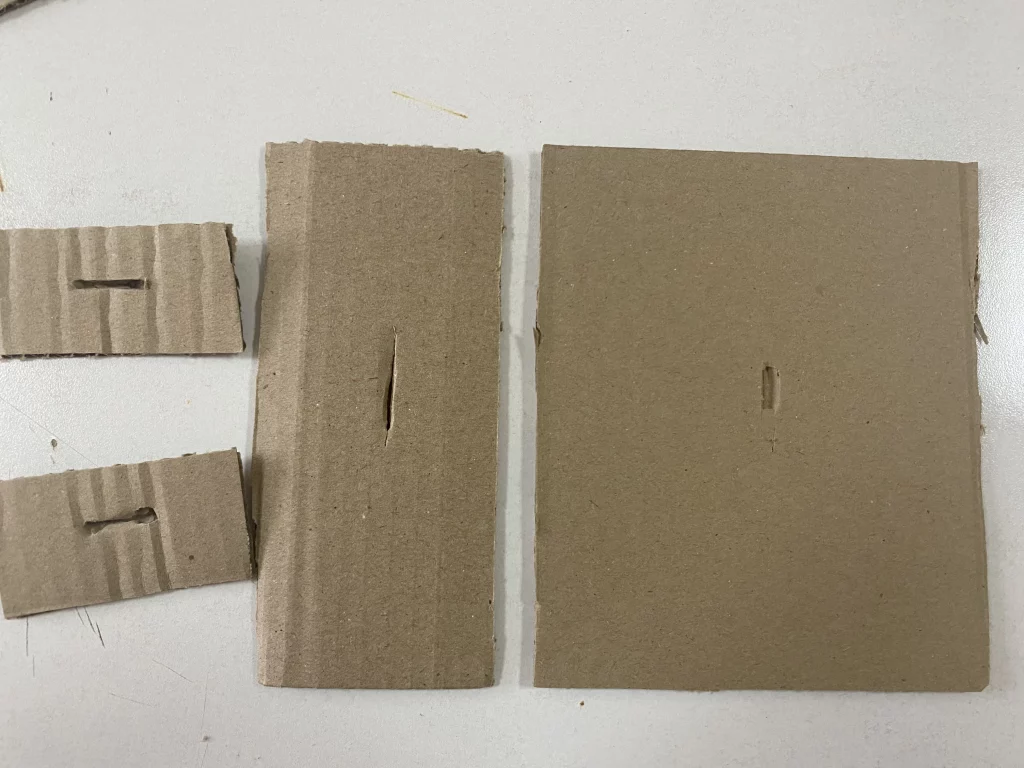
Step 1.
Cut rectangular shapes from the cardboard, they will serve as the fundament to the stand. Make cuts in the middle of the rectangles, so that the wooden sticks can fit in.
Step 2.
Use a hot glue to assemble the rectangles and wooden sticks.

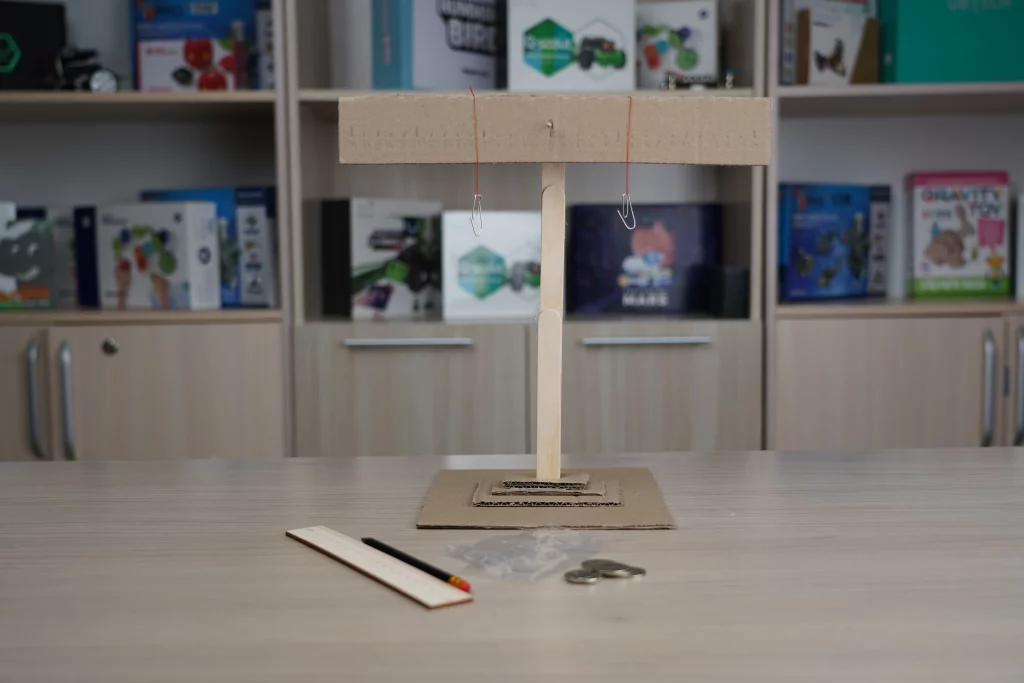
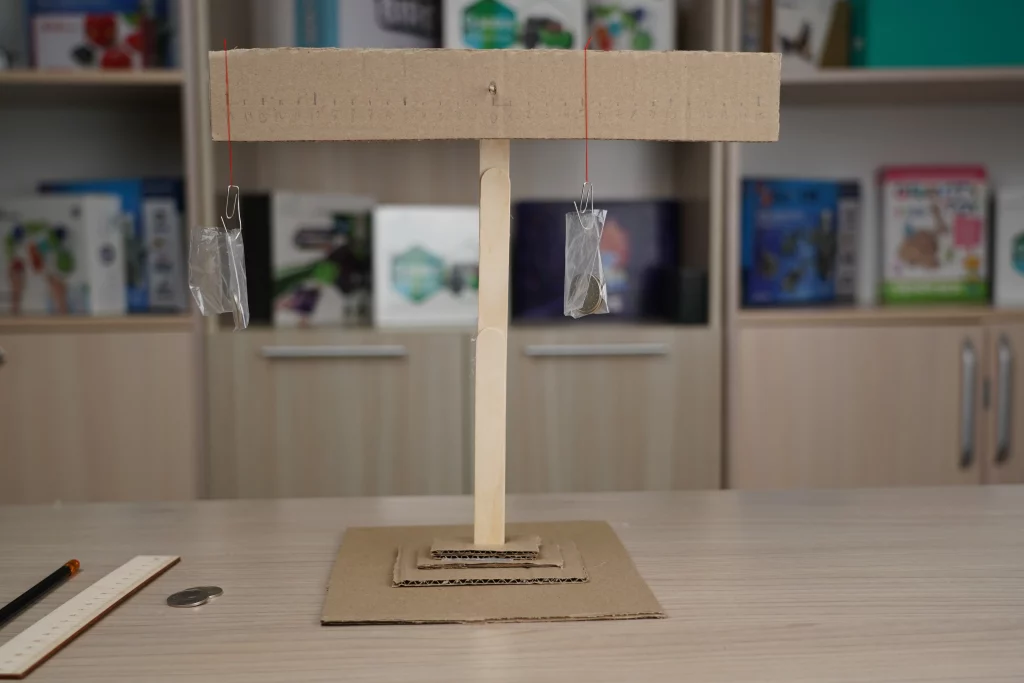
Step 3. Glue a round piece of stick to the top of the stand, it will serve as the pivot.
Step 4.
Take a rectangular cardboard of 32×5 size. Make a round cut in the middle of this rectangle. Make a scale on this cardboard. It will serve as a lever. Hang it to the stand.

Step 5.
Using a thread, plastic bags and paper clips make hangers for the lever. Hang them on the lever.

Experiment.
In this lab we need a laboratory stand, lever, 6 coins, pencil, ruler.
Procedure:
Step 1. Put the lever in equilibrium and hang to the left side of it 3 coins at the distance of l1= 6 cm from the pivot.
Step 2. Calculate the force acting on the left side of the lever:
F1 = m1 g
where m1 = 3 m, m – mass of one coin. Write down the data to the table.
Step 3.
To maintain equilibrium, hang one coin to the right side of the lever. Measure the distance from the pivot to the point where the coin was hanged, l2. Write down the data to the table.
Step 4. Calculate the force acting on the right side of the lever:
F2 = m2 g
Where m2 = m, а m – mass of one coin. Write down the data to the table.
Step 5.
Repeat the experiment hanging 2 coins from the right side.
Step 6.
Repeat the experiment hanging 3 coins from the right side.

Step 7. Calculate the ratios of forces F1/F2 and arm lengths l1/l2 for each experiment. Derive a conclusion.
Step 8. Calculate the torques for forces F1 and F2 for each experiment:
M1 = F1 l1
M2 = F2 l2
Derive a conclusion on the experiment results.
Research part
| № | l1, m | l2, m | F1 , N | F2, N | F1/F2 | l2/l1 | M1, N*m | M2, N*m |
| 1 | ||||||||
| 2 | ||||||||
| 3 |
When deriving conclusions, answer the following questions:
- What is the lever balance condition?
- Why should you put the lever to balance first before starting the experiment?
Conclusion
The lever balance condition is in maintaining the force acting on the lever arm being inversely proportional to the arm length.