Lesson
Project objectives
- Build a fun and engaging model called Newton’s Cradle.
- Demonstrate the scientific concept of momentum through a hands-on activity.
- Observe the transfer of force between objects in a collision.
Teacher’s Guide
– In the experimental part of the project, students work in groups of 4-5 people.
– Before starting experiments, make sure that students are familiar with the basics of force and motion in nature.
– Before starting the experimental part, familiarize and provide students with all the necessary materials.
– Give a short briefing on the safety rules when working with scissors, hot glue and marbles. Warning! Make sure that children do not put marbles in their mouths!
– At the beginning of the lesson, explain the PBL (project based learning) categories to your students. 4K skills (critical thinking, collaboration, creativity, presentation)
Theoretical part
Calling all young scientists! Today we’re going to build something awesome called a Newton’s Cradle. It uses marbles to show us a cool science idea called momentum.
What is momentum? Imagine you’re pushing a big, heavy box. It takes a lot of effort because it has a lot of momentum! Now, imagine pushing a small ball. It’s much easier because it has less momentum.
What will we build?
A swinging marble machine! When you pull one marble back, it bumps the next one, and the force travels all the way to the last marble, making it swing up high! It’s like a bouncing chain reaction!

Practical part
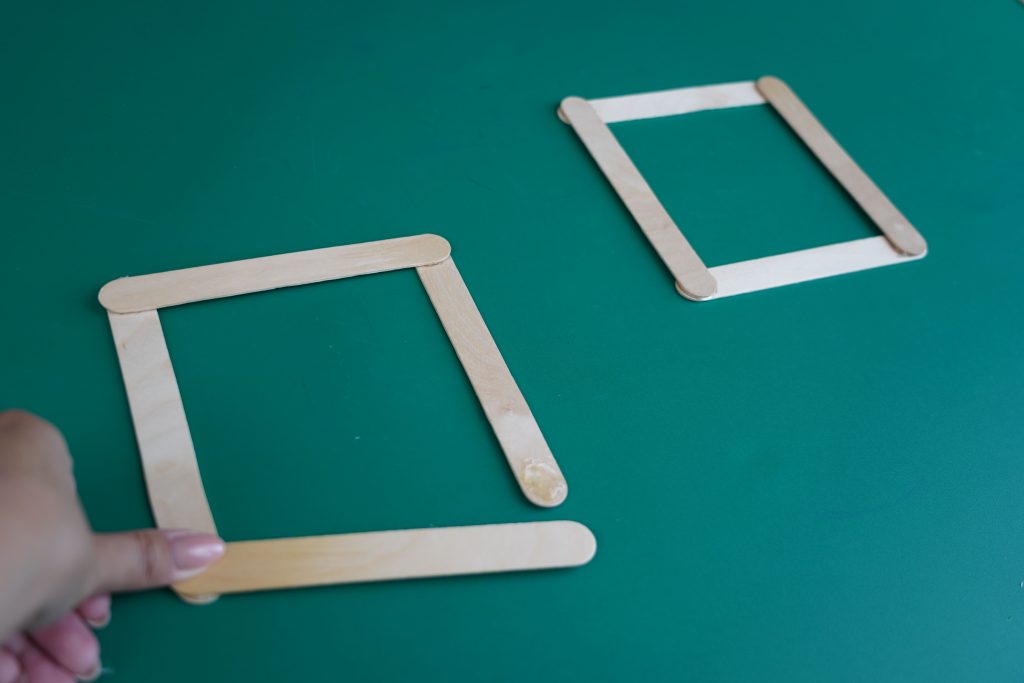
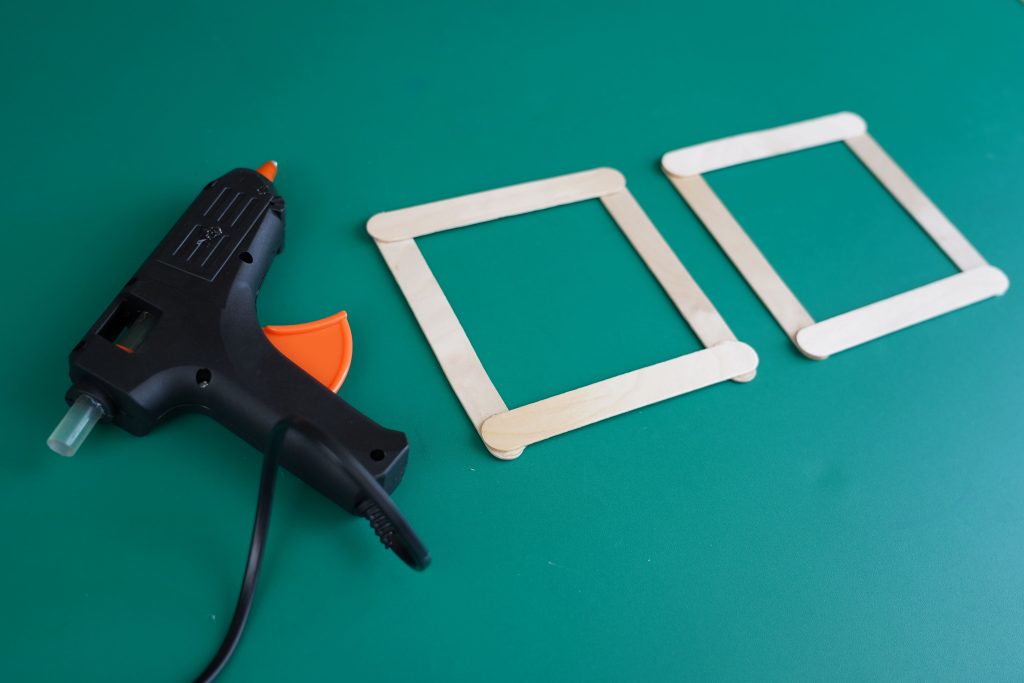
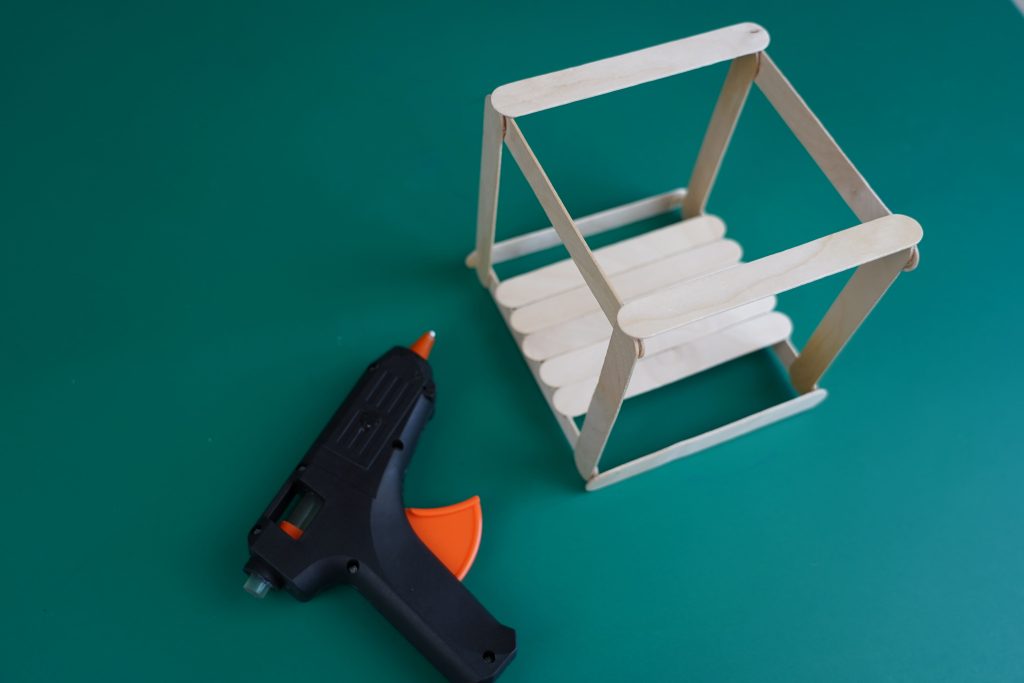
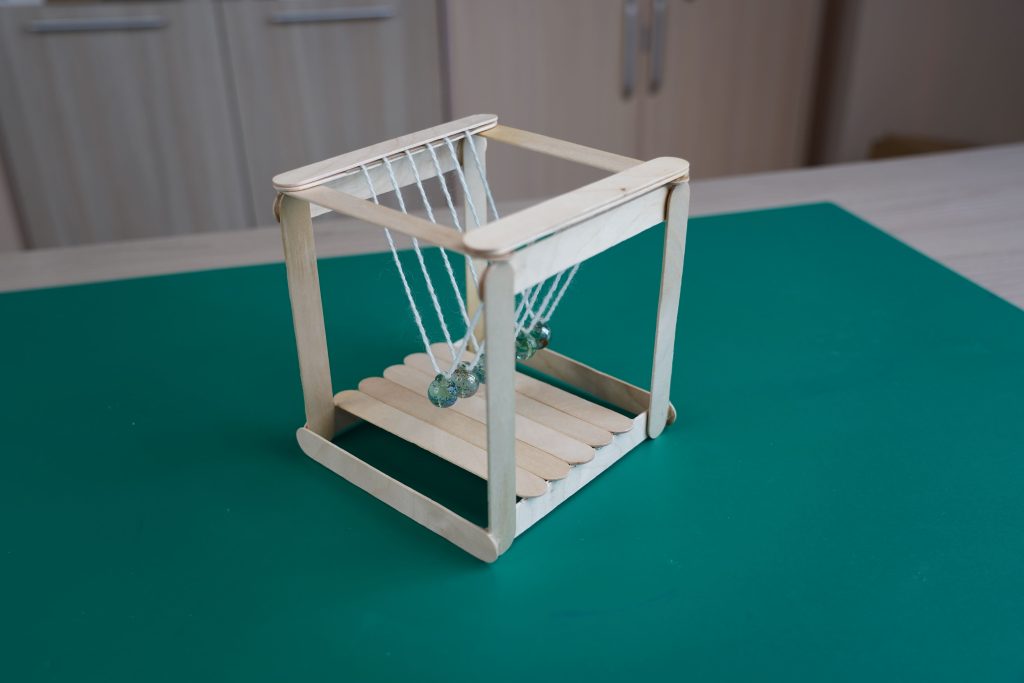
1.Square Up: We’ll need two square frames. Use the hot glue to connect 4 craft sticks together at the corners to make a square. Repeat for another square. Let them dry completely.
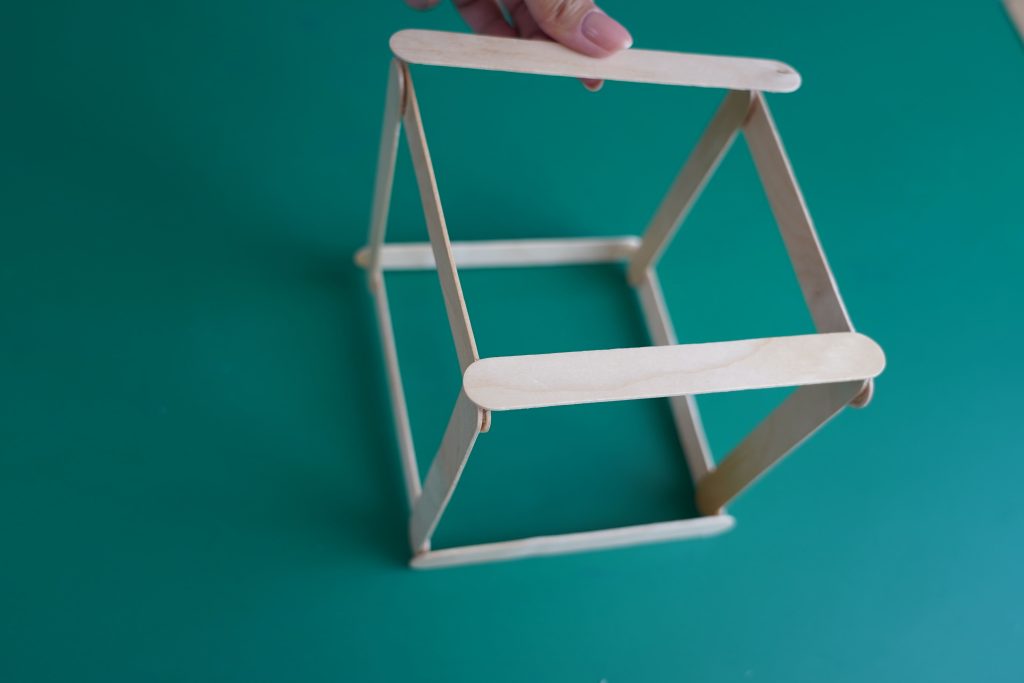
2.Frame Time: Use the hot glue to connect the two square frames together with perpendicular craft sticks at each corner, like building a box.
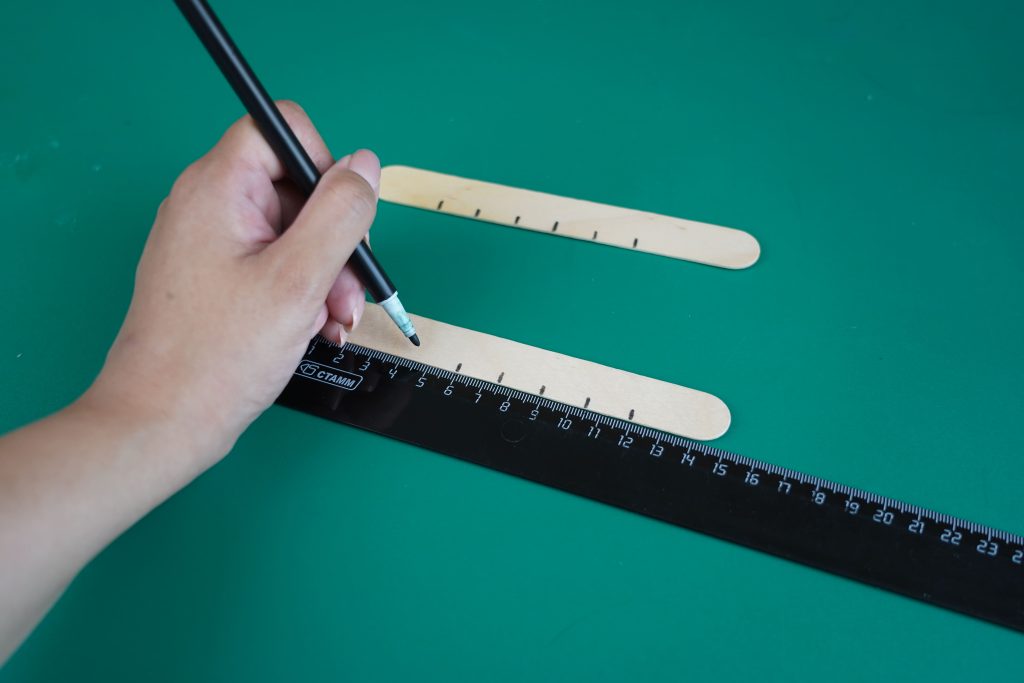
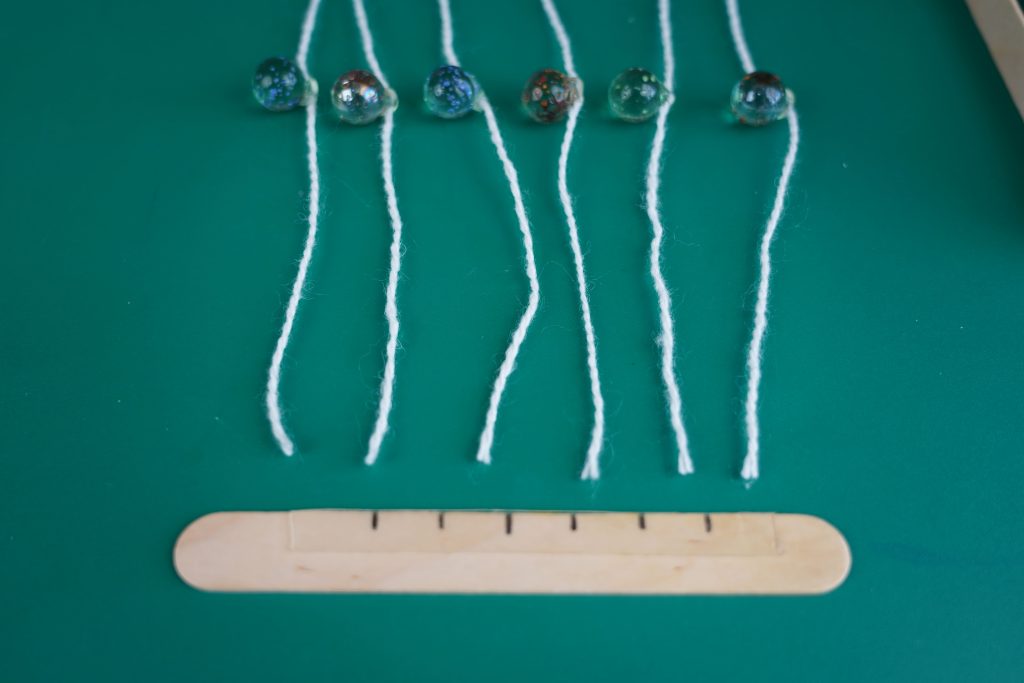
3.Marks & Sticks: Grab two craft sticks. Make 6 small marks along each one, spaced about 15 mm apart.
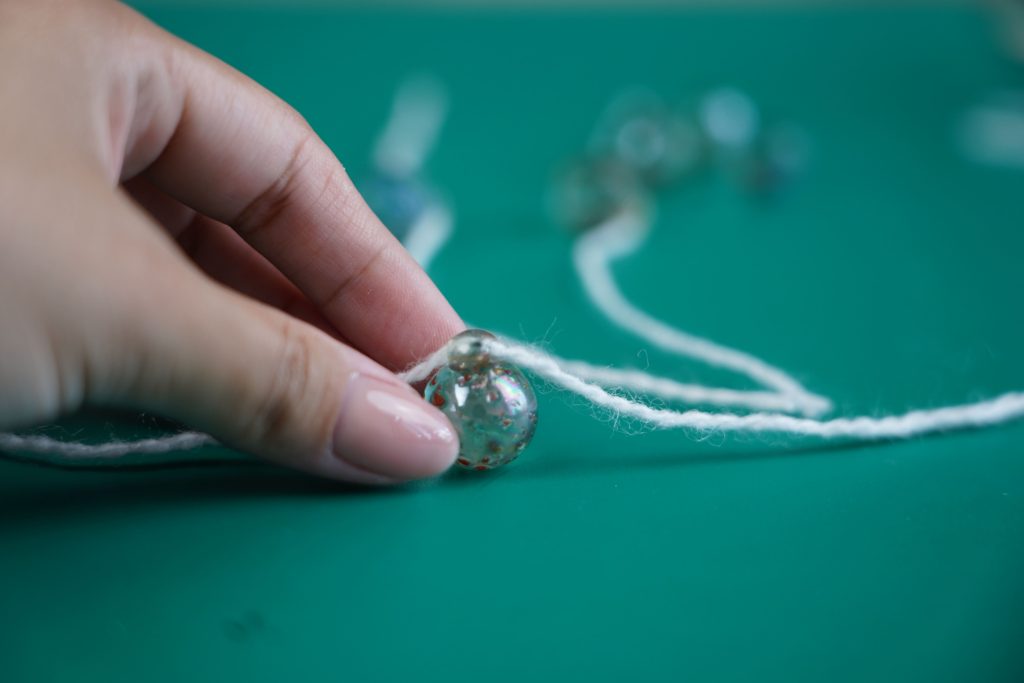
4.Stringy Marbles: Cut the string into 6 equal pieces. Hot glue a marble to the center of each string.
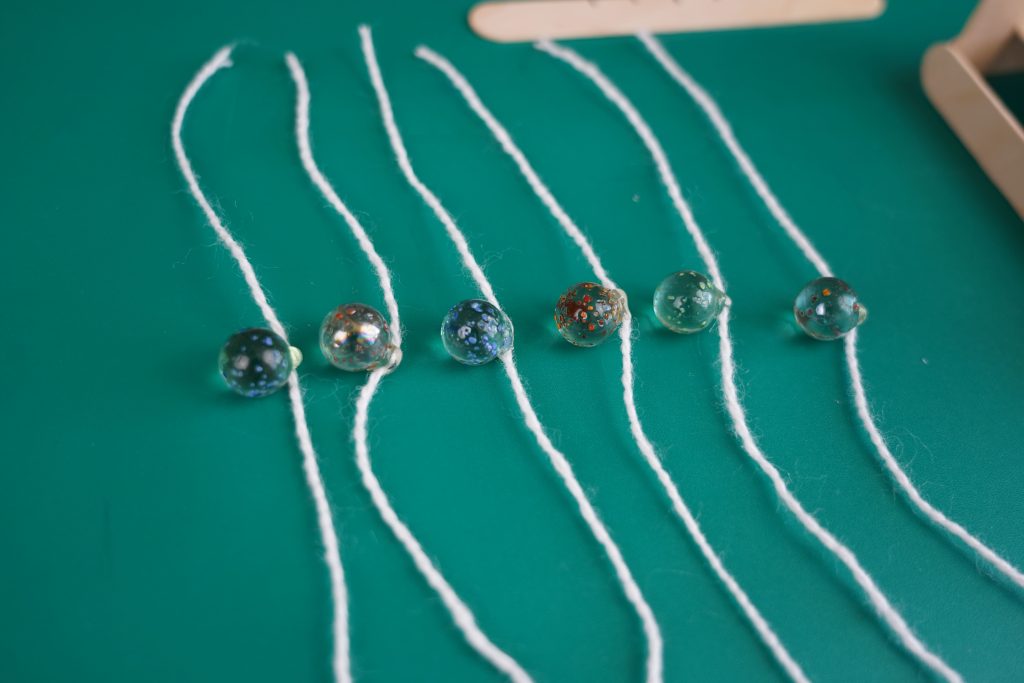
5.Marble Lineup: Tape one end of each string with a marble to a mark on one craft stick. Make sure the marks are centered. Set this aside.

6.Marble Holders: Hot glue one marked craft stick (with string ends) to one side of the frame. Glue the other marked stick to the opposite side.
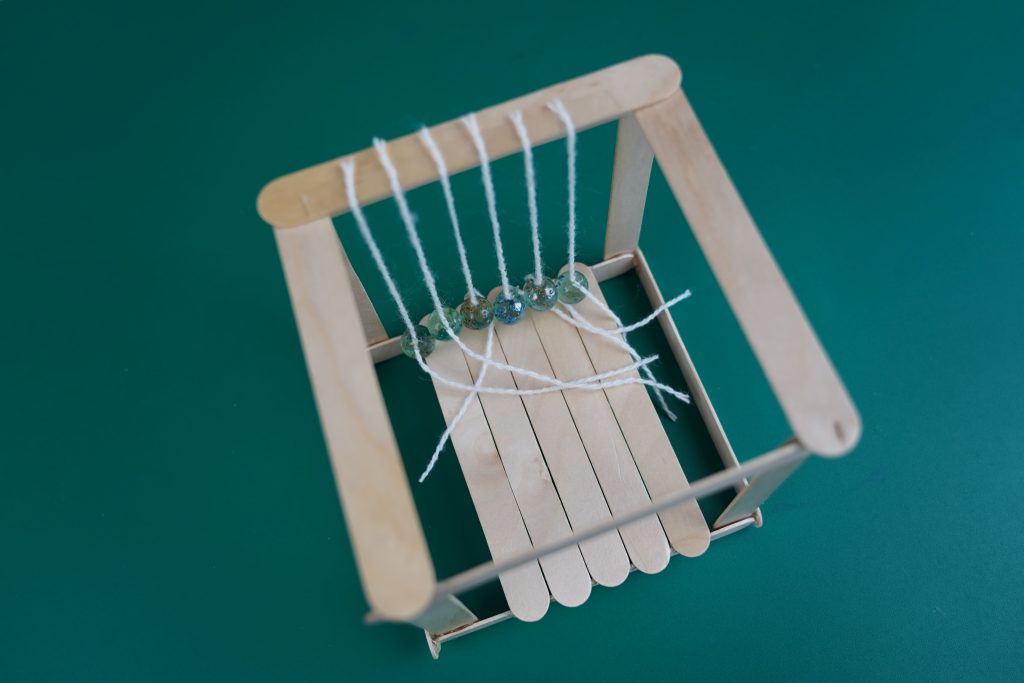
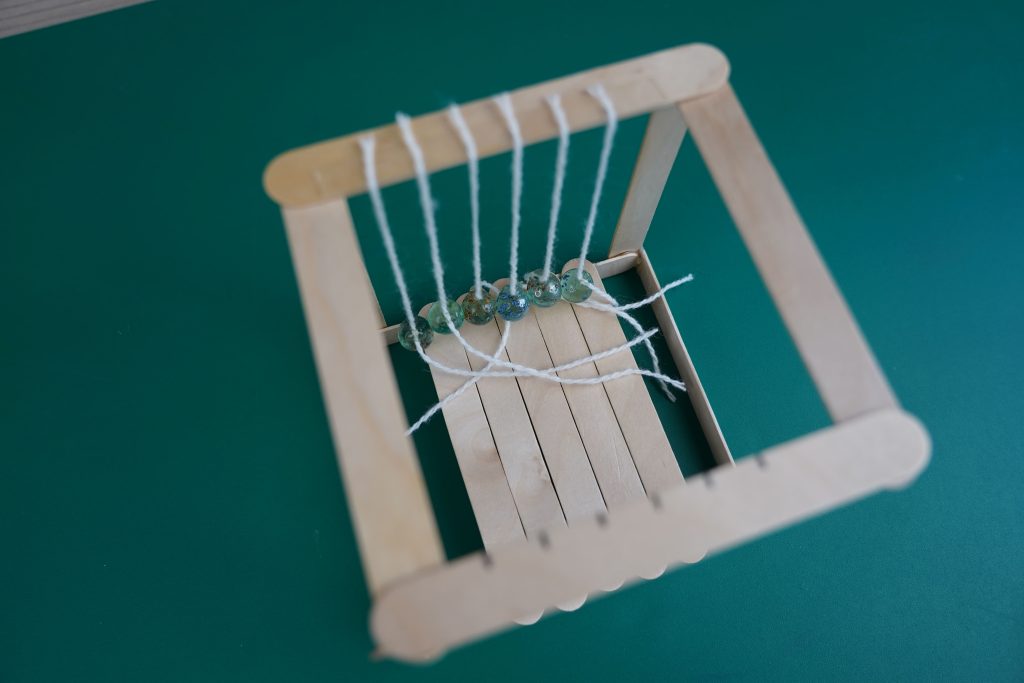
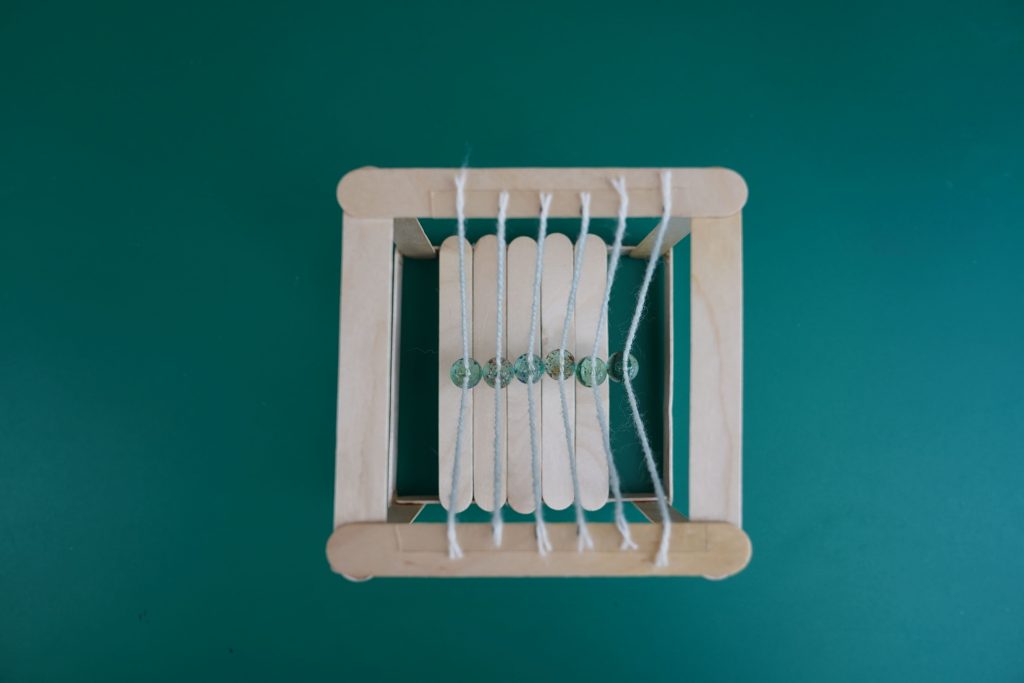
7.Last String: Tape the loose end of each string with a marble to the marks on the other craft stick. Gently pull the strings to make sure all the marbles are lined up in a row, both from the front and the top.
The Grand Finale!
Pull one of the end marbles up and let go! Watch as the force travels through the marbles, making the last one swing high!

Congratulations! You’ve built your own Newton’s Cradle!
Remember: The more force you use to pull back the first marble, the higher the last one will swing.
Science Takeaway:
This project shows us how momentum works. When the first marble bumps the next one, it transfers its force. This keeps happening until the last marble swings up with the same amount of force, even though it’s lighter! Pretty cool, right?
Conclusion
This project allows you to build your own Newton’s Cradle and witness the transfer of momentum firsthand. By pulling back a marble and watching the chain reaction, you’ve explored how force travels through objects!

On this project, each student is awarded a STEAM title, in several categories:
– By building this project, you’ve become a true Science Master! You’ve explored how force travels through objects. That’s some serious scientific thinking!
– Look at those fantastic Newton’s Cradles! You used your building skills and problem-solving abilities to create a working model. Congratulations, you’re an Engineering Expert!
Evaluation