
Lesson 1
Project objective
– Explore some types of minerals: coal, marble, clay, chalk, lime, oil, nail, copper wire
– Make a yurt-shaped piggy bank with national elements from clay
Teacher’s Guide
– in the research part, pupils work in groups of 3-4.
– In the experimental part of the project, each pupil will work individually or in pairs if they wish.
– The students should be introduced to the topics like minerals, natural resources, types of minerals, applications
– Before beginning the experimental part, introduce and provide the students with all the necessary materials.
– Provide brief instructions on how to work with the clay
– clay can be worked with without water. Only use water when the clay is very stiff.
– Do not allow the clay to dry during work. Wrap the clay with a damp cloth if it dries.
– At the beginning of the lesson, explain the PBL (project based learning) rubrics to the students. Skills 4K (critical thinking, collaboration, creativity, anticipation)
Safety in Steam lessons
It is recommended that teachers are fully aware of the safety procedures before the beginning of the lesson. If necessary (if they are using items specified in the PPE guidelines), brief the students. Visit Safety in Steam lessons Safety
Theoretical Part
Dear students, answer the questions:
– Why are minerals called “useful minerals”?
– Which minerals are so rich in our country?
There are different groups of minerals.
Coal, peat, oil, and natural gas are called petroleum minerals.
Ore (metallic) minerals include minerals which contain metals; for example, copper ore and iron ore.
Non-metallic minerals can be defined as ores (limestone, clay, sand, granite), potash, rock salt and others.
The minerals can be solid, liquid or gaseous. Most of them are solid, oil is liquid and natural gas is gaseous.
Practical part
Research .
1. Divide into groups (3-4 people each).
2. In front of you lie the minerals.
Name them.

3 Examine each object, say what properties it has, answering the questions below:
1. What colour is each object?
2. Describe the aggregate state.
3. What is the odour?
4. You have been given a nail, try using the nail to pierce hard objects.
What did you get?
5. Now, put (pour) the object in water.
Your observation, what dissolved and what didn’t?
6. Find on the map (in the book) what minerals are produced on our land and in which regions.
4. Draw the table on the sheet as shown below and record all your answers in the table.
| № | Name/Parameters | Coal | Chalk/Lime | Iron (nail) | Clay | Copper (wire) | |
| 1 | Visualinspection | Colour | |||||
| Aggregate state (solid, liquid, gaseous) | |||||||
| Smell | |||||||
| 2 | Water solubility | ||||||
| 3 | Location (in Kazakhstan) | ||||||
| 4 | Application (write where and how it is used) | ||||||
| 5 | *** | ||||||
***Add your parameters you would like to investigate.
5. The most flexible of all the items you have is Clay.
Now, using all the materials you need, make your own clay product that will serve you well in the future.
Now think about it.
Practical part
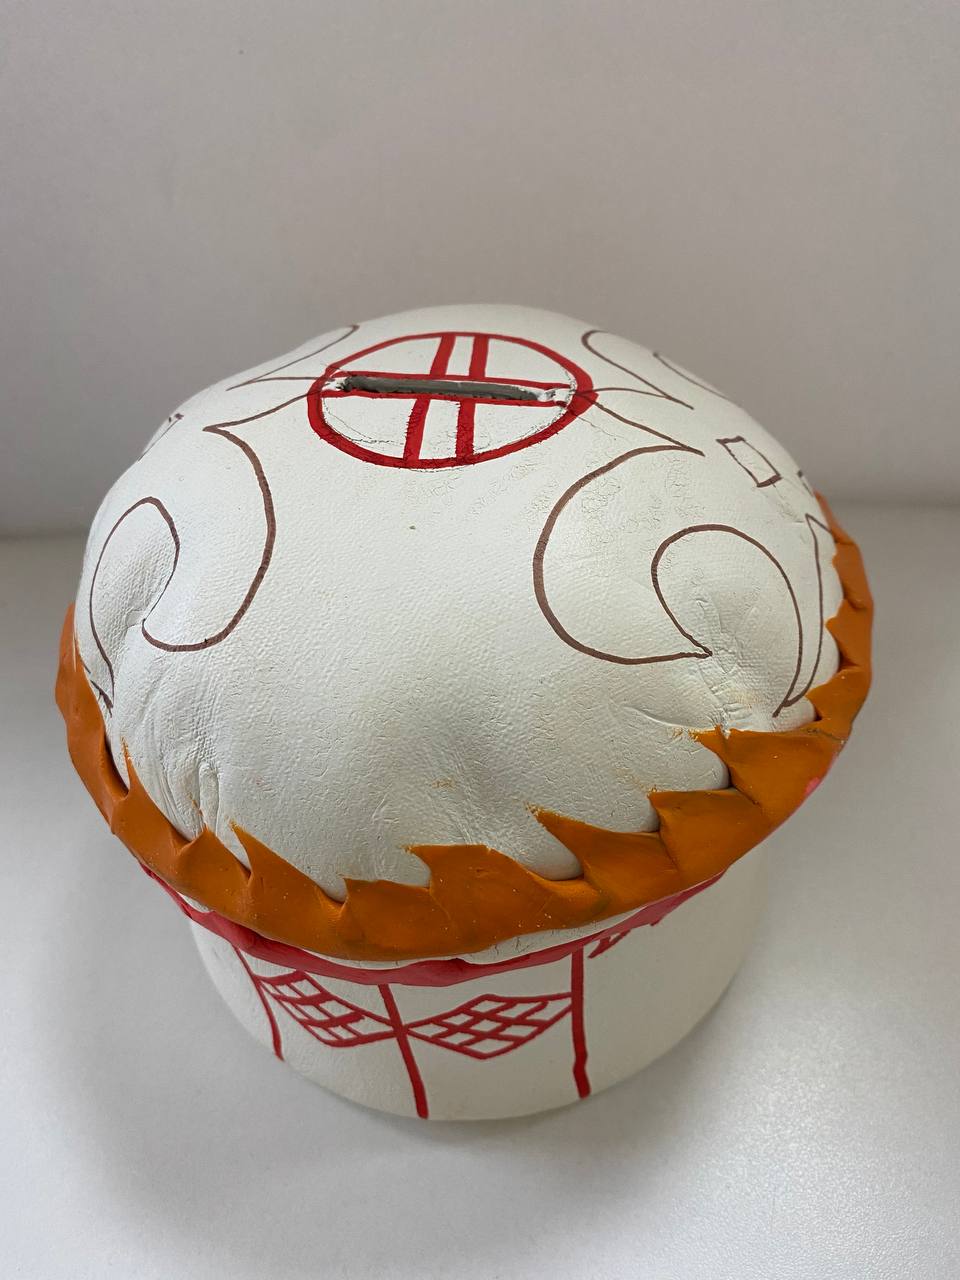
For this project we propose to make from clay a money box in the form of a yurt with national elements.
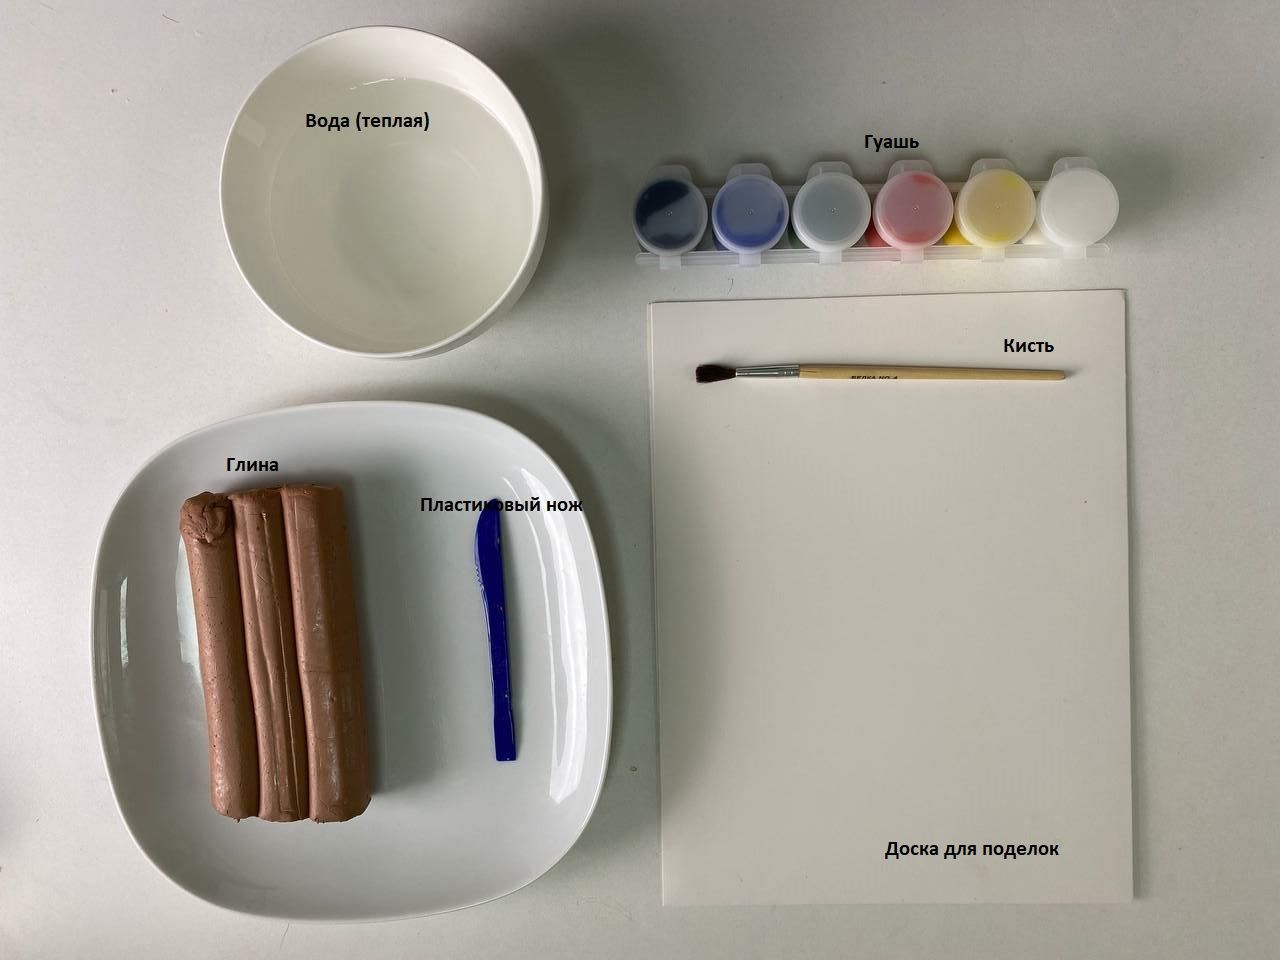
Step 1: Prepare all the necessary materials on your workbench
You will need:
1. A bowl of warm water
2. Clay
3. a modelling knife
4. A mat or board for modelling.
5. Rolling pin
6. Gouache and brush
7. Stainer
8. Disposable utensils (oval – in the shape of a deep cup)
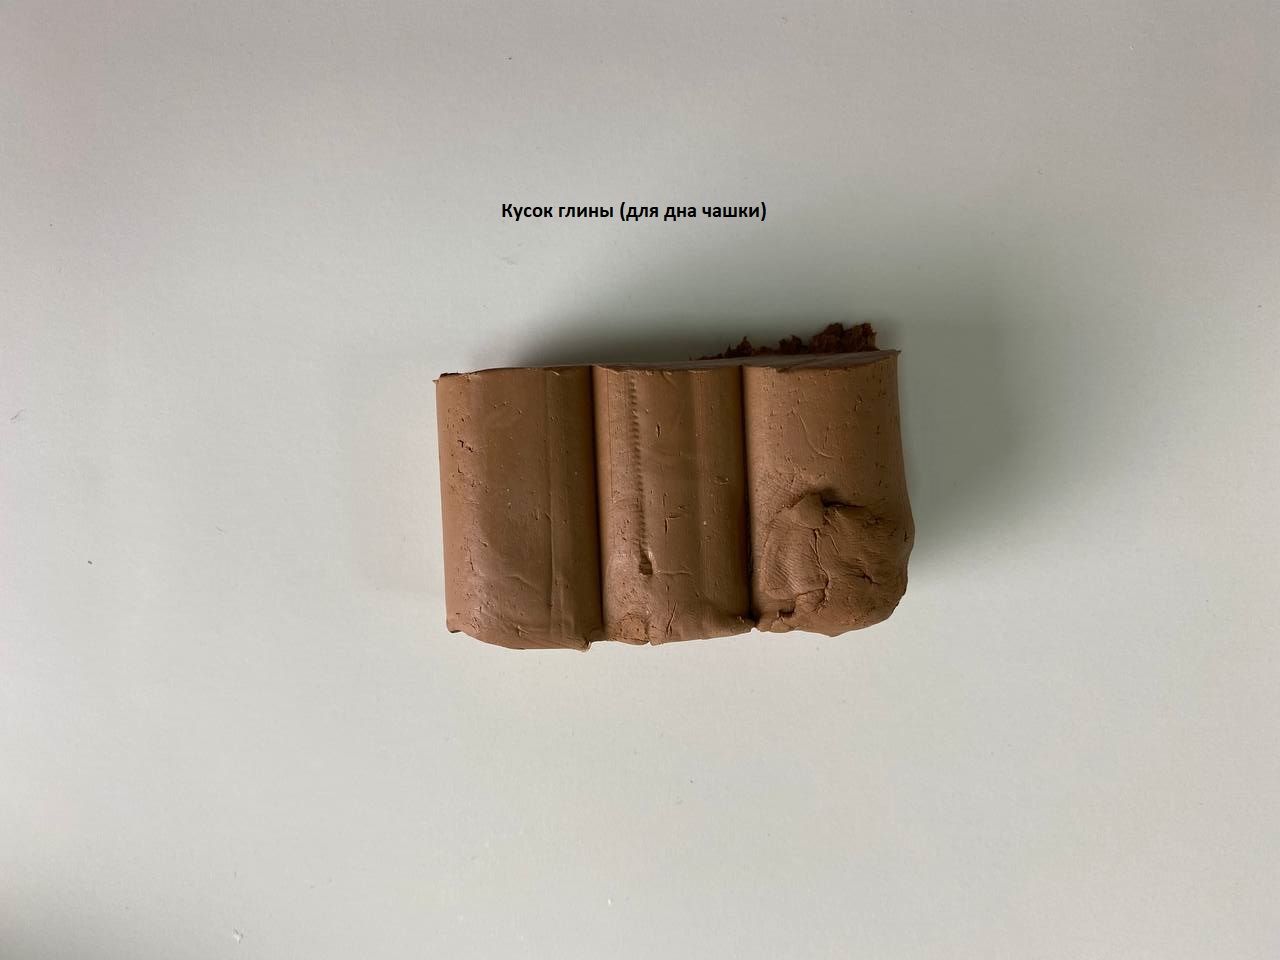
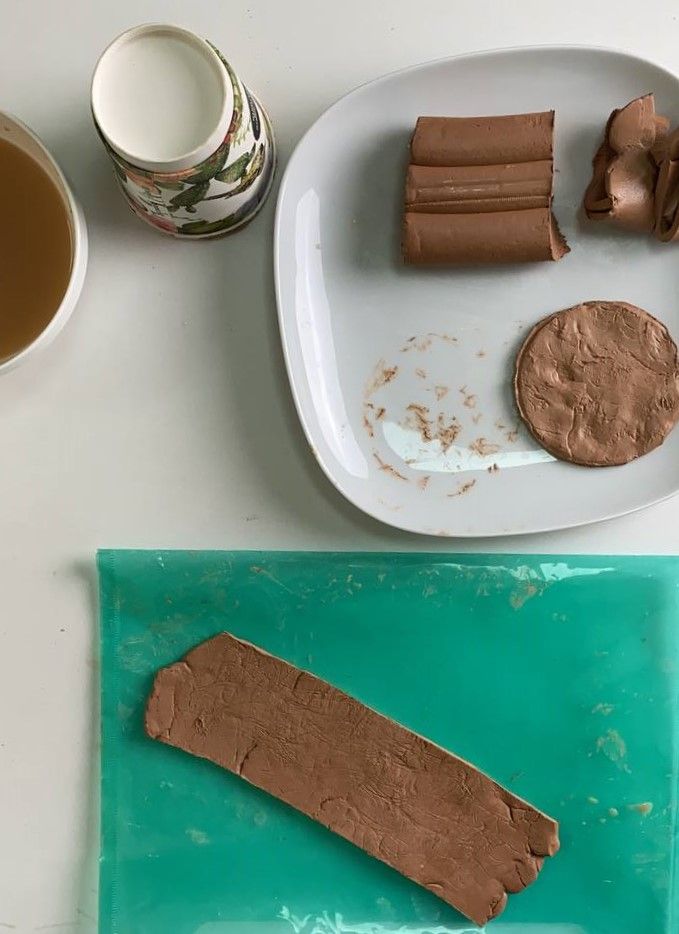
Step 2: Cut a piece of clay and roll it out with a rolling pin. It should be at least 0.5 cm thick and no thicker than 1 cm.
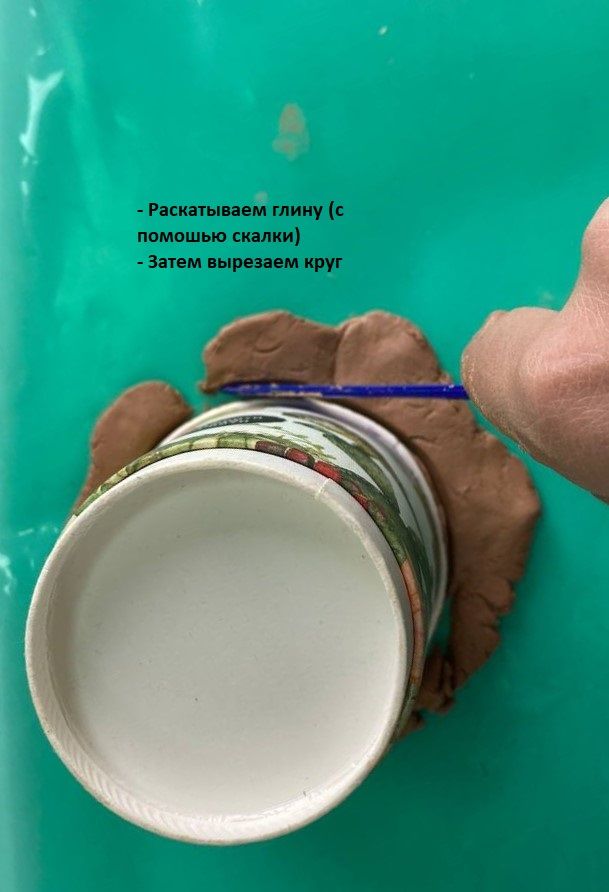
Step 3: Using a glass, mark out a circle and cut it off with a knife. This makes a circle. With a diameter of 14-15 cm. This is the bottom of the piggy bank.
Step 4: Next, mould the hull (Kerege). Prepare a sketch of the body on paper, it will be a rectangle of 48cm*10cm. Cut it out with a pair of scissors. Then cut off a piece of clay and roll it out to a thickness of at least 0,5 cm. On the rolled out clay, place a sketch of a rectangle and cut it out on the clay measuring 48*10cm. Remove any excess clay pieces.
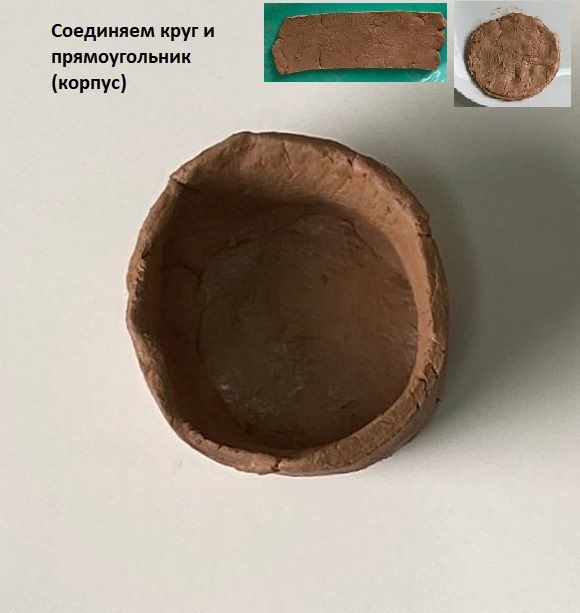
Step 5: Join the bottom (circle) to the body (rectangle).
Straighten the uneven surfaces by smoothing out the clay. And join the seams.
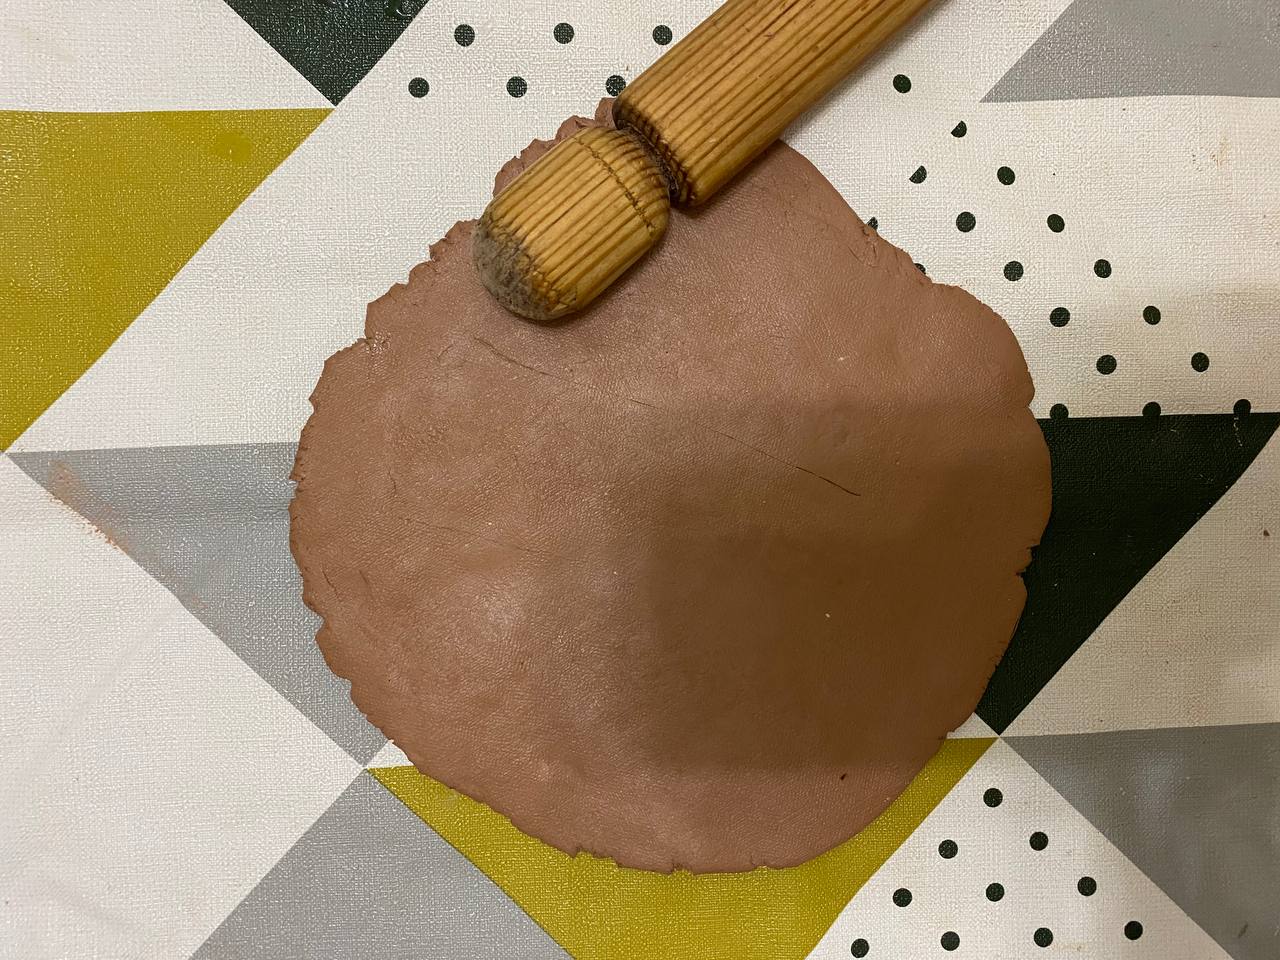
Step 6. Next you need to make the roof (shanyrak). Cut a small piece of clay. Roll out a circle on the table with a rolling pin. Place plastic film inside a disposable tableware in the shape of a shanyrak (hemisphere). The foil is needed to prevent the clay from sticking to the dish. Then place the clay (circle) in the dish and smooth out the uneven surfaces with your hands.
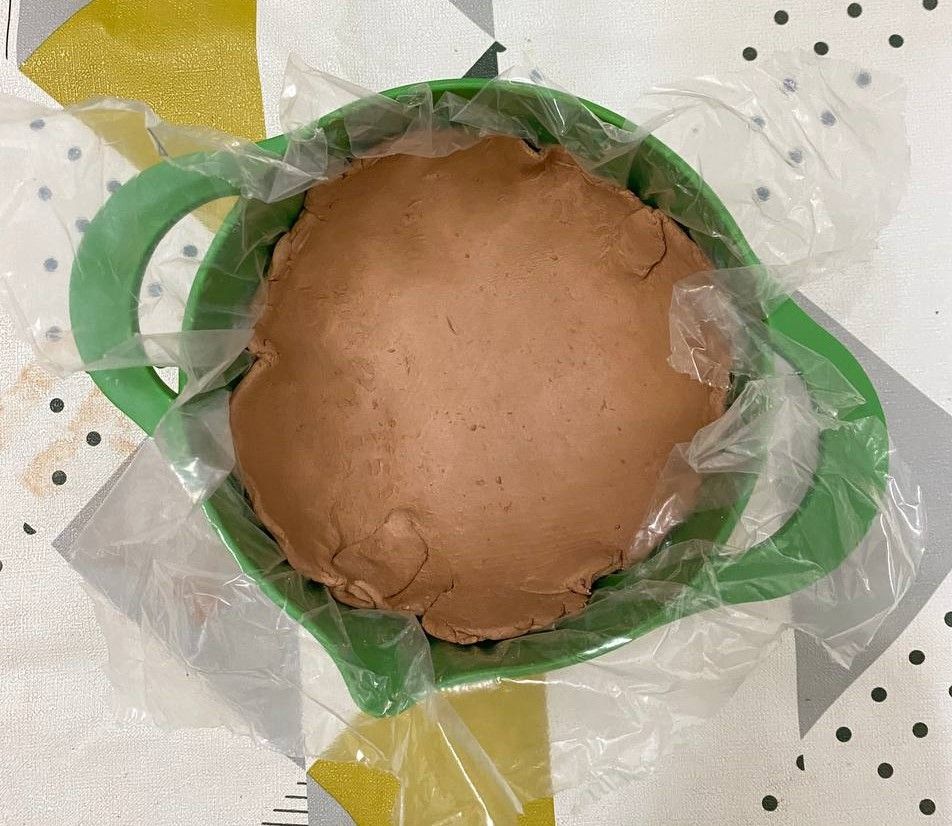
After that, you need to cut a coin hole 4-5 cm long, no more than 0.5 cm wide.
Step 7. Leave your piece outdoors until it is completely dry (2-3 days).

Work at home
1. leave your product in the cabinets to dry.
2. Think about what musical instruments you can make with clay (sassernai, etc.)
3. in the next lesson, you will continue modelling and colouring your pieces. Think about what colours and creative ideas you would add.