
Week 2
Work on the creation of a model of astrosocks and space simulator
Students assemble the model according to the instructions
You can additionally offer a mini-competition for the most creative model
Create your own spaceship
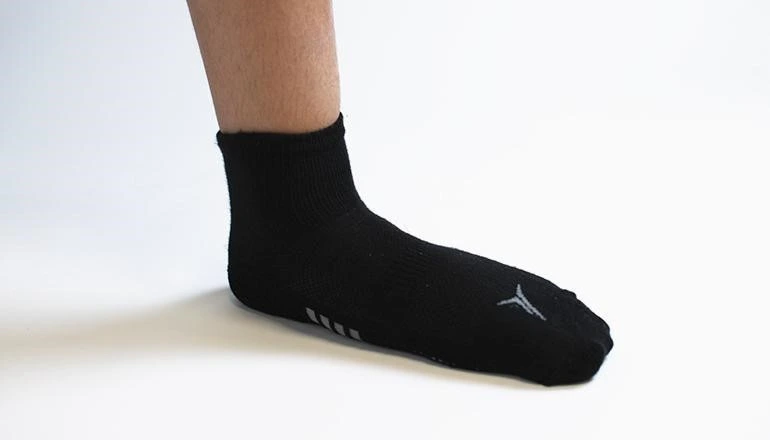
Put the astro sock on the leg or on the mannequin (leg mannequin can be made from paper or cardboard)
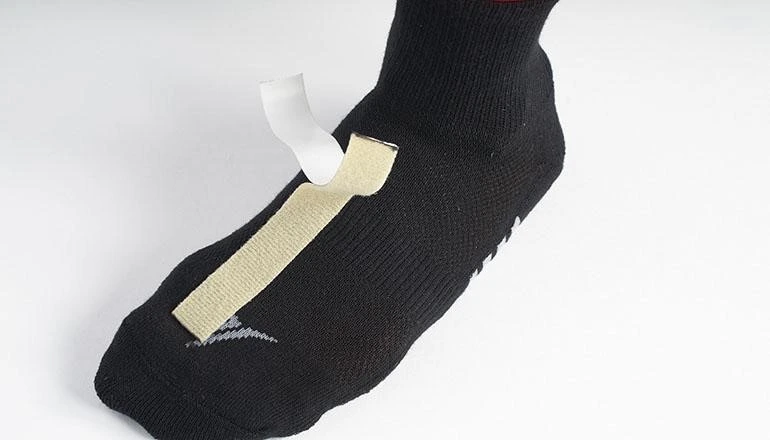
Attach double-sided tape to the sock, measuring the distance from the top of the foot to the big toe, cut off the required amount and stick to the sock
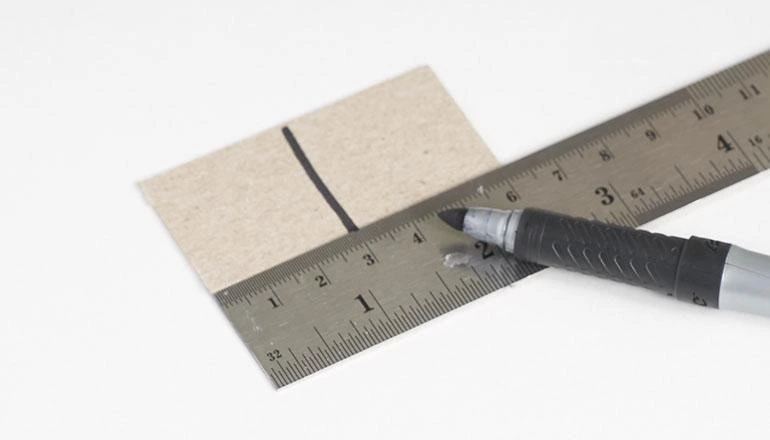
Take a piece of cardboard or thick paper measuring 3 x 6 cm and mark the center of the cardboard at a distance of 3 cm
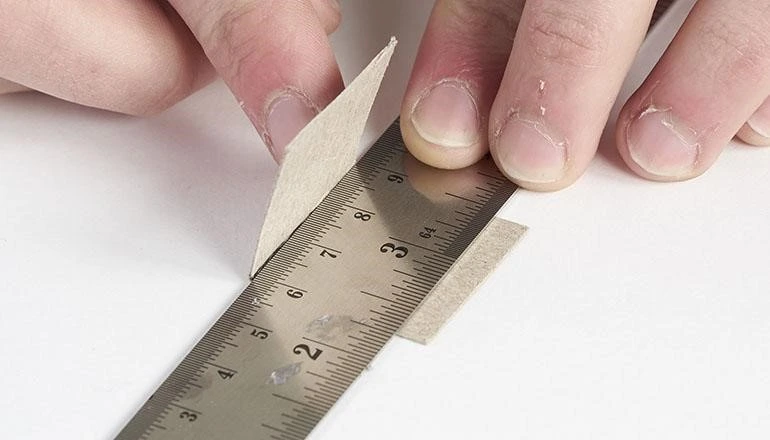
Place a ruler on the line in the middle and fold the cardboard along the line.
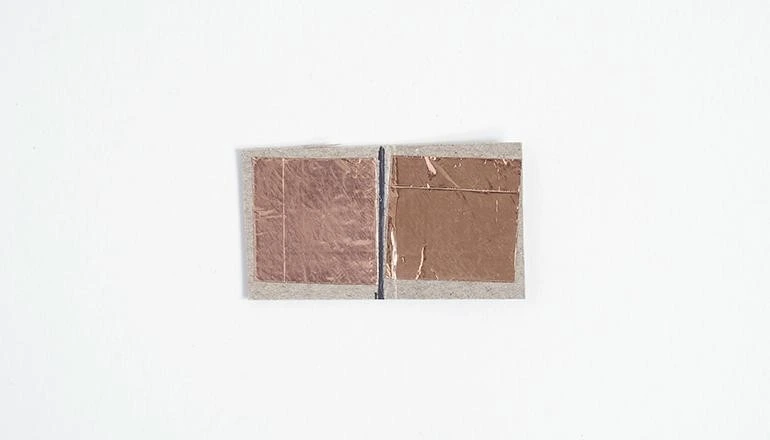
Strip and stick two pieces of copper/aluminum tape, one on each side of the line. There should be a gap of about 1 cm between the pieces of copper tape.

Remove 2 cm of insulation from the cut ends of the wires and straighten them carefully.
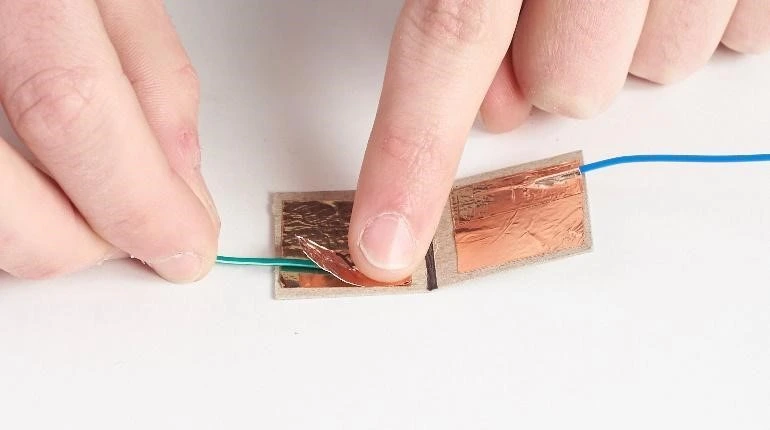
Attach the bare wire to the outer end of the square piece of copper tape with another piece of copper tape. Press down on the tape.
Make sure the wiring arrangement matches the image above.
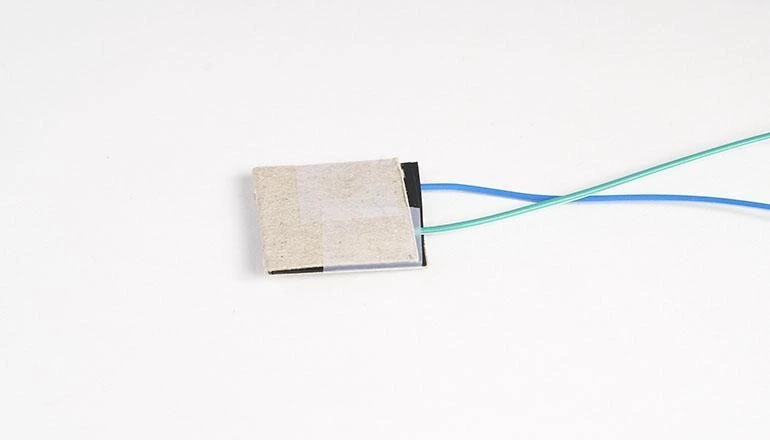
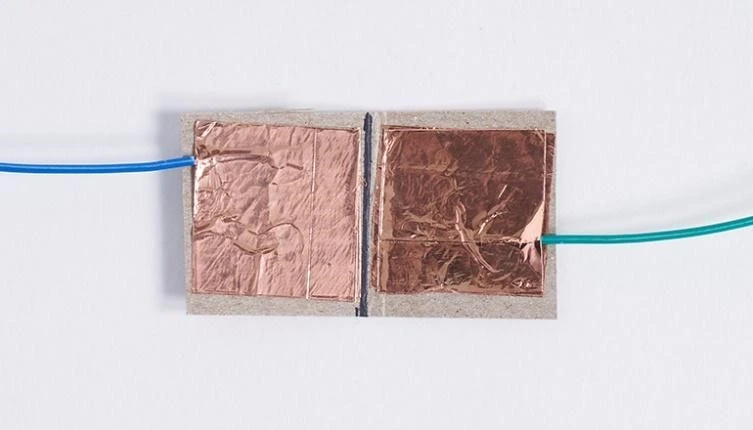
Fold the cardboard over to connect the layers of the bikestat and tape the side with the exposed wires together. Make sure some of the tape is covering the wires. This is your pressure/touch sensor.

Repeat the steps for a total of 4 sensors.
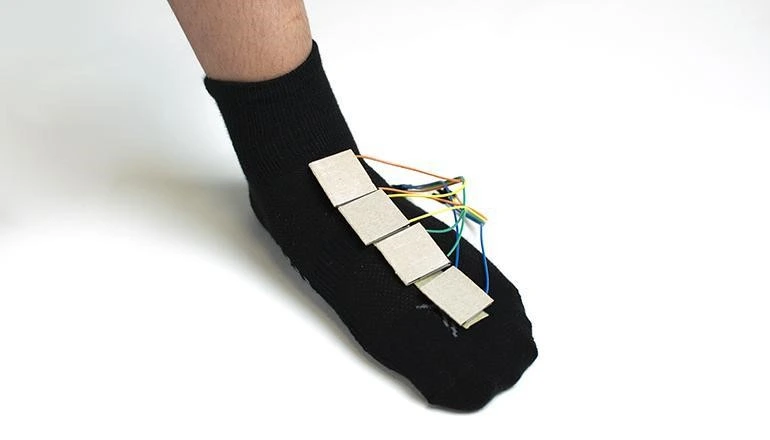
Attach one sensor to the sock just above the toes (at the knuckles) and one directly below the ankle (ankle sensor). Place the remaining two sensors at an equal distance between the first two (metatarsal and tarsal sensors).
Assemble your space simulator
The space simulator is a small mount, in the form of a horizontal bar, which the astronaut will cling to with his foot. Therefore, there are no big restrictions in its assembly, you can make your own simulator, taking the picture below as an example.

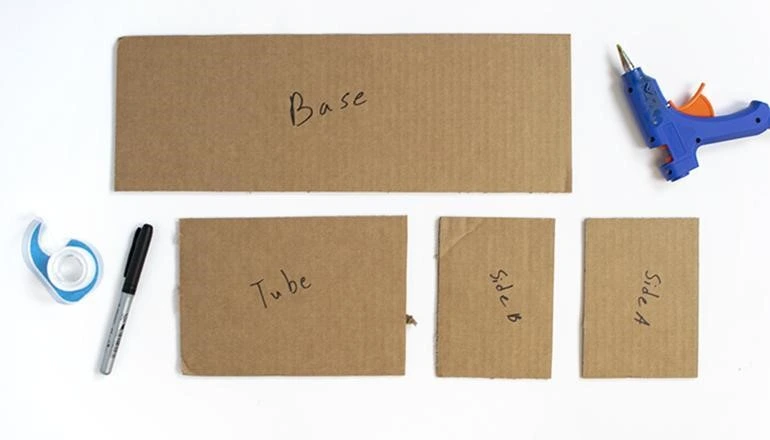
Prepare materials for your space simulator. Sign a piece of cardboard measuring 14×50 cm “Base”. Sign two pieces of cardboard measuring 14 x 10 cm “Side A” and “Side B”. Then sign a 14 x 20 cm rectangular piece of cardboard “Tube”.
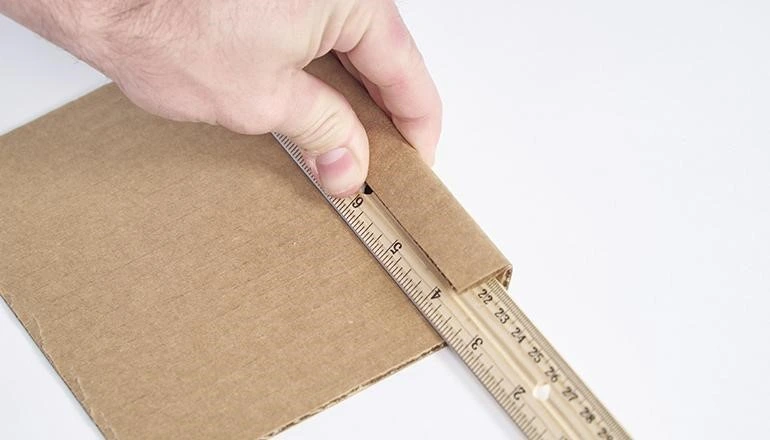
Take a piece of cardboard labeled “Tube” and roll it into a small tube using a ruler.
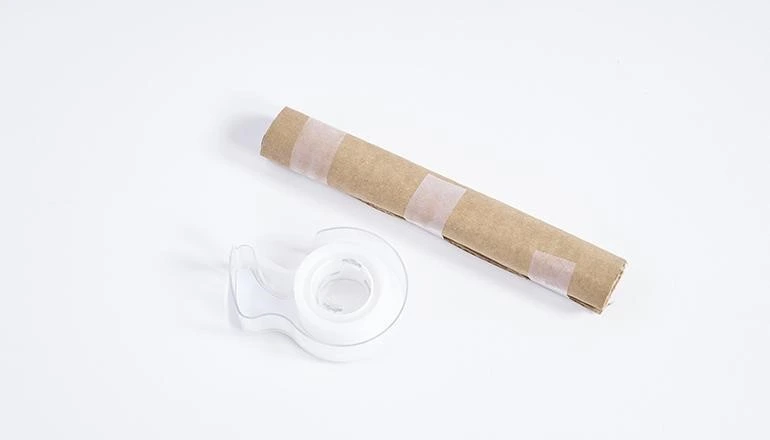
| Glue the cardboard roll with tape |
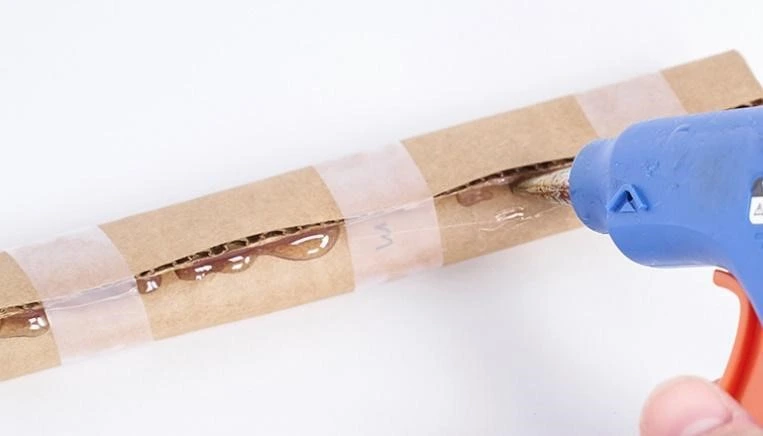
Tape the seam.
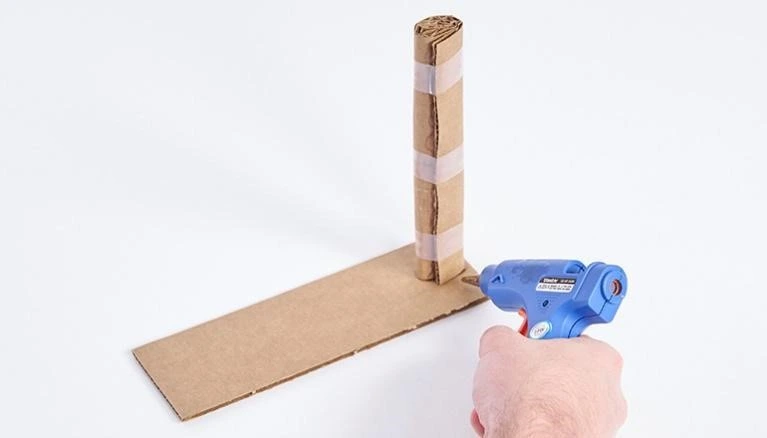
Glue the cardboard roll to the top of the piece of cardboard labeled “Side A”.
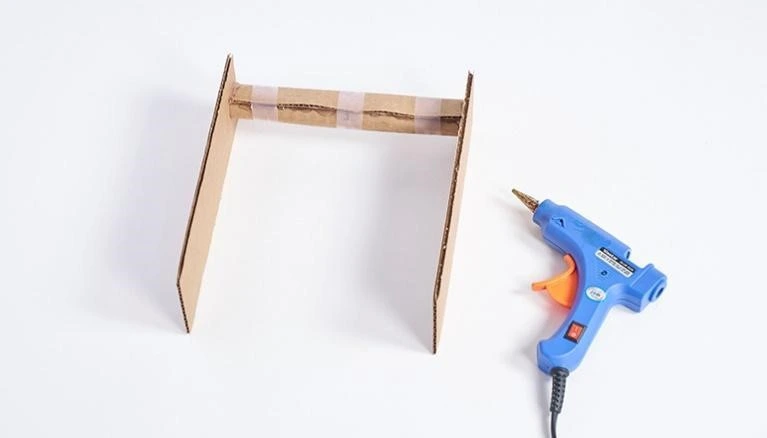
Glue the piece labeled “Side B” to the cardboard roll so that it is parallel to “Side A”.
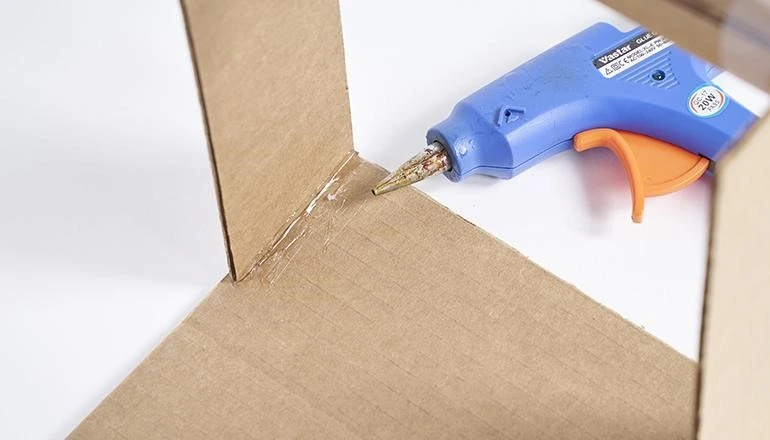
Glue the bottom edges of “Side A” and “Side B” to the edges of the piece of cardboard labeled “Base
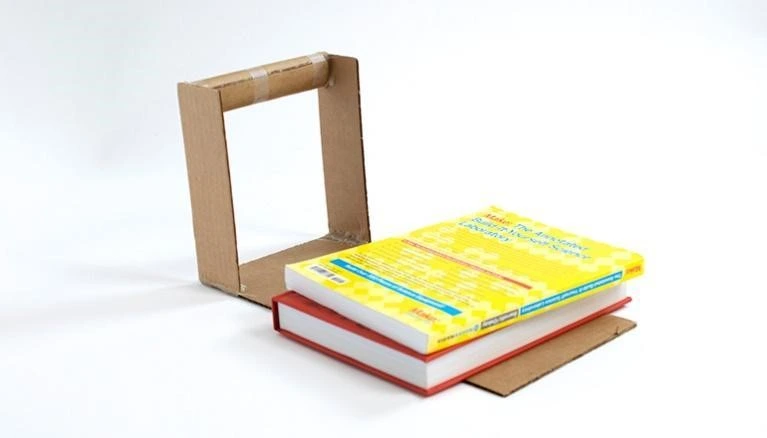
Your space simulator is ready. Lay 2-4 textbooks on a flat gym surface as weights