
Lesson 1
Aim
Create your own home “smart” weather station which will measure accurate temperature, pressure, humidity, carbon dioxide levels.
Expected results
After studying the project, students will be able to:
– acquire the skill of cooperation with a teacher and work in a group, in pairs
– analyze and summarize the information received
– a responsible attitude towards learning will be formed
– communicative competence will be formed in the process of educational activities
– learn how to work with the device (board) Arduino UNO
– acquire basic skills in automation and skills in working with electronic devices
– acquire the ability to use ready-made applied computer programs
– get acquainted with the term meteorology, the principles of operation of meteorological stations and the main indicators of weather conditions
– independently build logical reasoning and make a conclusion
Interdisciplinary communication:
– Computer science (programming languages, work with a PC, Arduino)
– Physics (work with electronics, automatics)
– Technology/Art (manufacturing, installation and device use)
– Geography (weather stations and indicators of weather conditions)
Teacher guidance
At the beginning of the lesson, it is recommended:
– to arouse interest in the project, ask a few “suggestive questions”, such as:
– Do you know what SMART functionals are? List
– What is a SMART weather station? Does someone have a home weather station at home?
– Why do we need to measure the weather? What are the weather conditions in the region where you live? and etc.
– to familiarize students with the aspects of what a weather station is and how a weather station works
– to familiarize with the basic indicators of meteorological measurements
– to acquaint students with the Arduino UNO device (description, principle of operation)
– to familiarize with the Arduino IDE program
– to familiarize students with the basic safety rules for working with electronics
– provide ready-made code values and general drawings, instructions on how to connect electronic components to the Arduino board
– after the manufacture of the weather station, check the serviceability (operability) of the already finished device
– make a case for a SMART weather station using:
– 3D printer
– BEN-maker – a machine for working with wood (before starting work, explain to the students the basic safety rules for working with the machine)
– cardboard or plastic box (recommended)
– in conclusion, conduct meteorological research with the whole team on this device, and evaluate the students according to the STEAM.KZ grading criteria.
Introduction
The global factor that affects every person is weather conditions. Currently, weather conditions can be viewed on the Internet or watched (listened) on TV. But you can get the most accurate information through your own SMART weather station.
Why not?!
So, let’s, together, we will make a compact household appliance – a home SMART weather station.
SMART-meteorological station – this will be your personal device that will allow you to carry out meteorological measurements and research, thereby measure of the current weather outside. The SMART weather station can continuously observe weather conditions.
Description
Meteorology (from the Greek metéōros – lifted up, heavenly, metéōra – atmospheric and celestial phenomena) is a scientific and applied field of knowledge about the structure and properties of the earth’s atmosphere and the physical and chemical processes taking place in it, in other words, the science of the atmosphere and the processes occurring in it [1]
A meteorological station is a special institution that has a meteorological site that satisfying certain requirements, on which standard instruments are installed for continuous meteorological measurements (observations of weather and climate) at a specified time using a single methodology in a specific sequence, and transferring the collected data to the Hydrometeorological Center. [2]
There are two types of meteostations: classic and digital weather stations.
The classic (analog) weather station has:
Digital weather stations:
1. Road meteorological stations
2. Forest meteorological stations
3. Hydrological meteorological stations
4. Household home weather stations
Household home weather stations appeared on the market relatively recently. The functionality of a home weather station is similar to a weather station, only much less data is processed that comes from one or more sensors installed outside the window and in other rooms. They work both from the electrical network and from replaceable batteries.
SMART Weather Station is the integration of a home weather station with the Smart Home system.
Since the weather forecast from synoptics is not very accurate, and has significant errors, and for the correct operation of smart home equipment, accurate and most relevant information about the state of the weather at a given time is required. Only its own weather station will be able to provide the central brain of the “smart home” with the necessary information online.
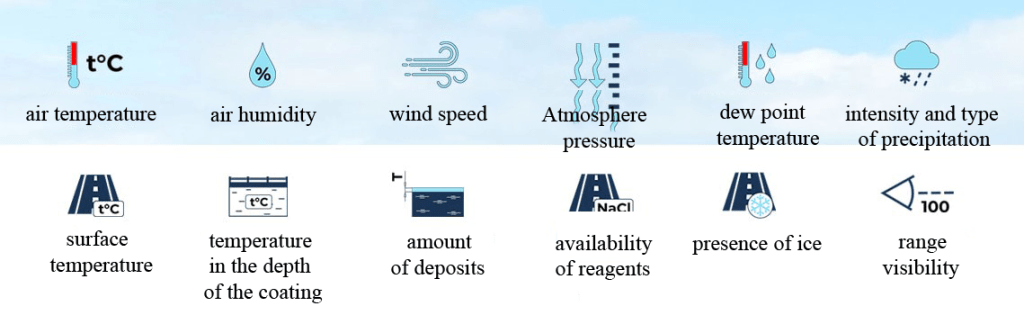
The home weather station is equipped with various sensors that are installed in different places on the site. These detectors determine the following data:
– Air temperature
– Humidity
– Carbon dioxide level
– Wind strength and direction
– Sunlight level
– Atmosphere pressure
All information collected by external sensors is sent to the central unit installed inside the building. It, in turn, using Wi-Fi or radio communication, connects to the central hub of the “smart home”. Special controllers, drivers and programs for processing the received information are installed inside the block. The electronic unit of the weather station sends the information transmitted by the sensors to the central hub.
Based on the information received from the meteorological station, the main controller of the “smart home” independently gives commands to the devices associated with it. If necessary, the hub turns on the lighting, turns on or off the split systems, shades the room with curtains, and executes other commands. [3]
After the students collect (make) own “smart” weather station with the help of Arduino, it is necessary to set optimal and permissible norms of temperature, relative humidity and carbon dioxide levels in the air of residential premises. To do this, it is necessary to follow GOST 30494-2011 RK.
According to GOST, indoor microclimate parameters:
| Parameters on the weather station display | Air temperature, 0С (+/-30С) | Air humidity, % (+/-15%) | Carbon dioxide level, ppm |
| Optimal/acceptable parameters | at least 18no more than 28 | at least 30%no more than 60% | High air quality: less than 400 ppmThe air quality is low: more than 1000 ppmOptimal: 800 ppm |
When providing microclimate indicators at various points of the serviced zone , it is allowed:
– the difference in air temperature is not more than 2 ° C for optimal performance, and 3 ° C – for acceptable;
– change in relative humidity – no more than 7% for optimal values, and + (-) 15% for acceptable values.
1.Matveev L.T. Fundamentals of General Meteorology. Physics of the atmosphere. – 2nd ed. – L .: Gidrometeoizdat, 1984. – P. 7–8. – 751 s.
2.Meteorological station // Meteorological dictionary
3.https://newsmarthome.ru/umnye-gadzhety/umnaya-meteostantsiya
The experimental part
Today you have familiarized yourself with such concepts as meteorology, weather station and Smart functionality.
To make your own Arduino device, we recommend that you follow the instructions.
Step 1. Learn the Arduino IDE program
Step 2. Familiarize yourself with the necessary materials and tools:
| № | description | picture |
| 1 | Arduino UNO board |  |
| 2 | temperature and humidity sensor DHT11 | 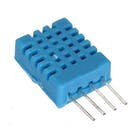 |
| 3 | barometric pressure sensor GY-BMP180 | 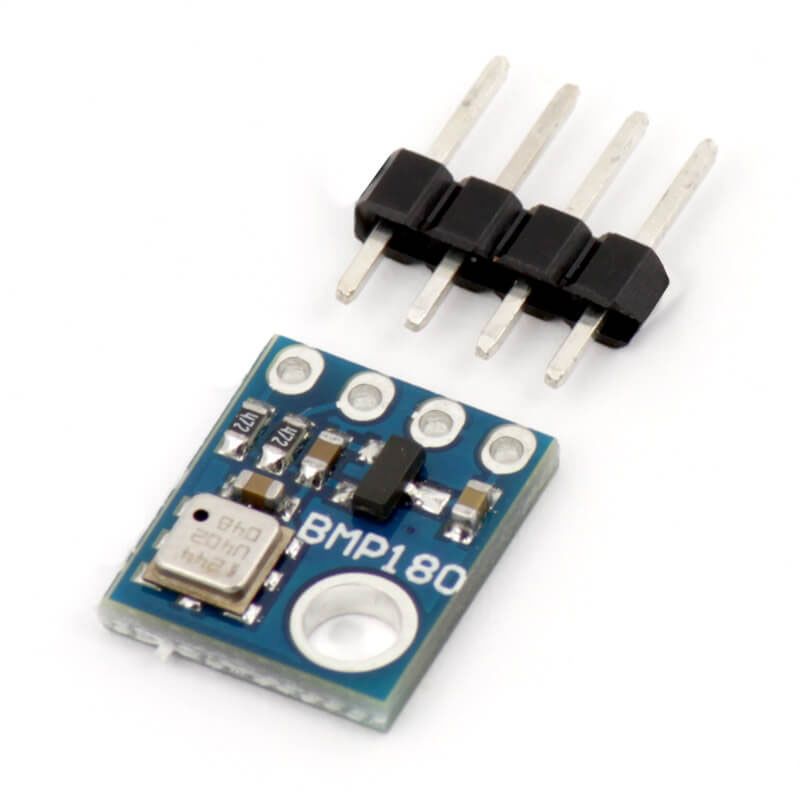 |
| 4 | carbon dioxide level sensor MQ 135 | 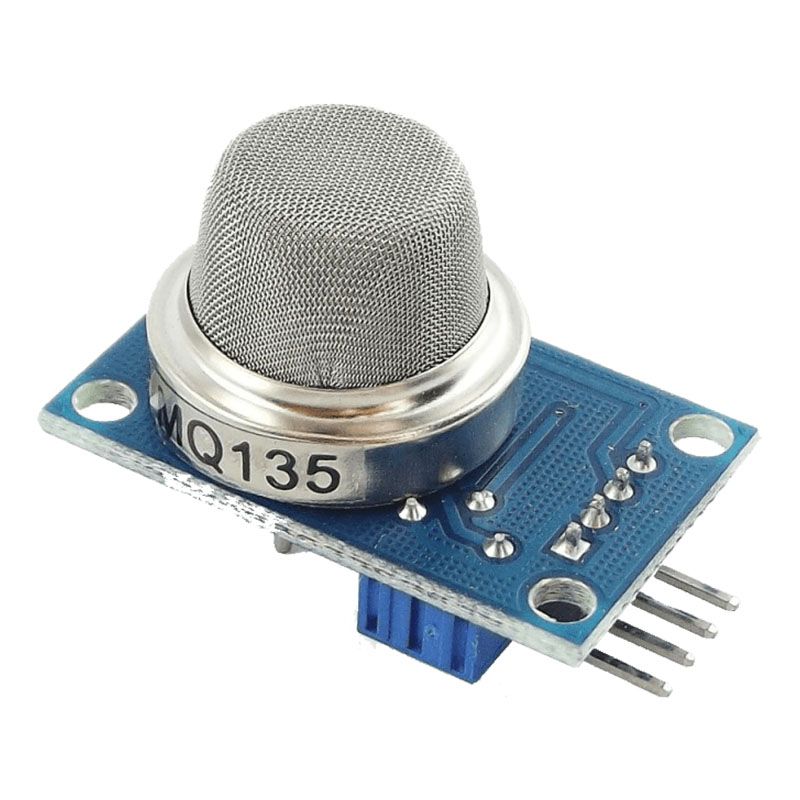 |
| 5 | GSM-module and SIM-card |  |
| 6 | batteries or power unit (9V-2A) – 2pcs |  |
| 7 | LCD display 2004 с I2C | 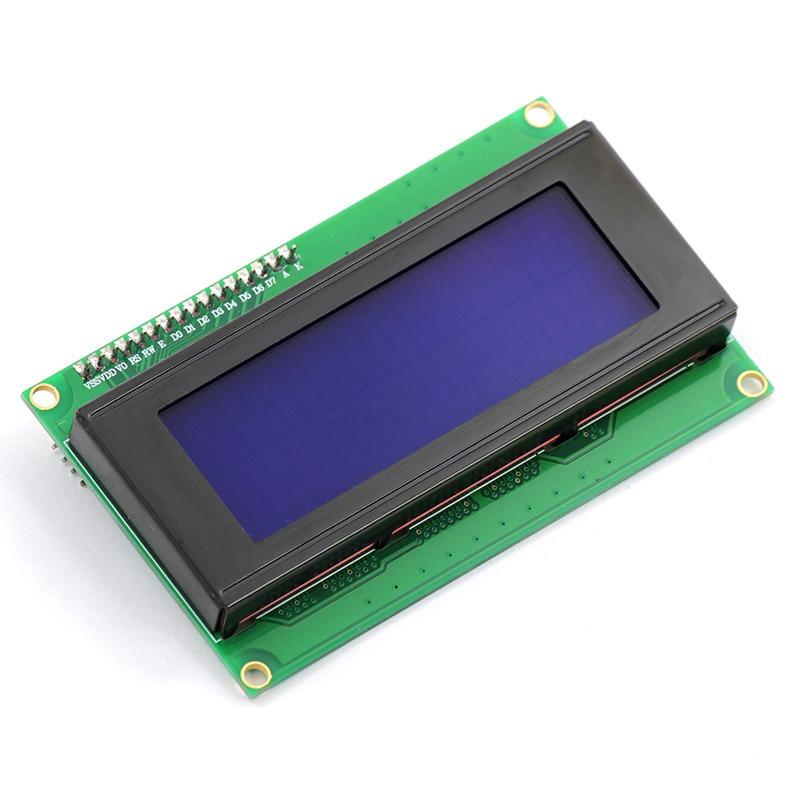 |
| 8 | wires (male-male, female-female, female-male) – note the difference | 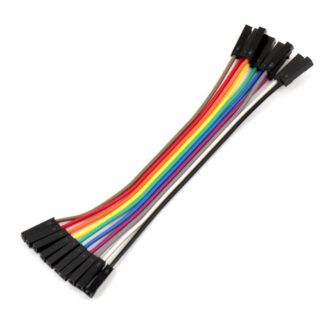 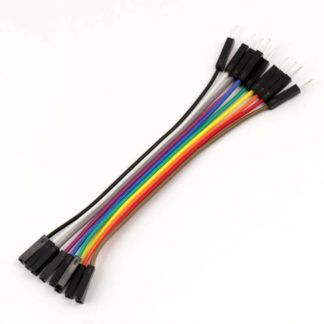 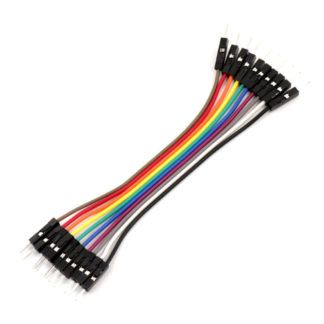 |
Conclusion
In week 1, the students got acquainted with the design of the weather station and got acquainted with the necessary materials for making their own smart functionality