
Lesson
Project objective
– To introduce students to the starry sky;
– To develop students’ 4K skills ;
– To make a map with constellations.
Guidelines for the teacher
– In the practical part of the project, the students work in pairs.
– Pupils should be introduced to topics like astronomy/ constellations.
– Before starting the experimental part, introduce and provide the students with all the necessary materials.
– Give a brief instruction on how to work with scissors and a skewer.
– Explain the PBL (project based learning) rubric to the students at the beginning of the lesson. Skills 4K (critical thinking, collaboration, creativity, presentation)
Safety in Steam lessons
Before we begin the lesson, teachers are advised to familiarise themselves with the safety procedures. If necessary (if using items specified in the PPE), brief the students. Go to Safety in Steam lessons
Theoretical part
Constellations, areas into which the celestial sphere is divided for ease of orientation in the starry sky. The stars that make up a constellation are at relatively small angular distances from each other, but the distances between them in space can be very large.

The word constellation (from the Latin constellatio) means ‘collection (or group) of stars’. In ancient times, ‘constellations’ were expressive groups of stars that helped us remember the pattern of the starry sky and use it to navigate through space and time. Every nation had its own traditions of dividing stars into constellations. Constellations used by modern astronomers are, for the most part, named and include bright stars traditionally found in European culture.
There are over 100 billion stars in our galaxy. About 0.004% of them are catalogued and the rest are nameless or even uncounted. However, all bright stars, and even many of the faintest, have a proper name in addition to their scientific designation; these names they have received in ancient times. Many of the currently used names of stars, such as Aldebaran, Algol, Deneb, Rigel, etc., are of Arabic origin. Now astronomers know about three hundred historical star names. Often these are the names of the body parts of those figures that gave the name to the entire constellation: Betelgeuse (in the constellation Orion) – “giant’s shoulder”, Denebola (in the constellation Leo) – “lion’s tail”, etc.
It should be understood that a constellation is not a specific region in outer space, but only a certain range of directions from the point of view of an Earth observer. Therefore it is incorrect to say, “A spaceship flew into the constellation Pegasus”; it is correct to say, “A spaceship flew in the direction of the constellation Pegasus”. The stars which form the constellation pattern are located at different distances from us. In addition to the stars in a particular constellation you can also see very distant galaxies and close objects in our solar system, all of which belong to that constellation at the time of observation. But over time, celestial objects can move from one constellation to another. This happens fastest with close and fast-moving objects: the Moon spends no more than two or three days in one constellation, the planets spend a few days to a few years; and even some close stars have crossed constellation boundaries in the last century.
Practical part
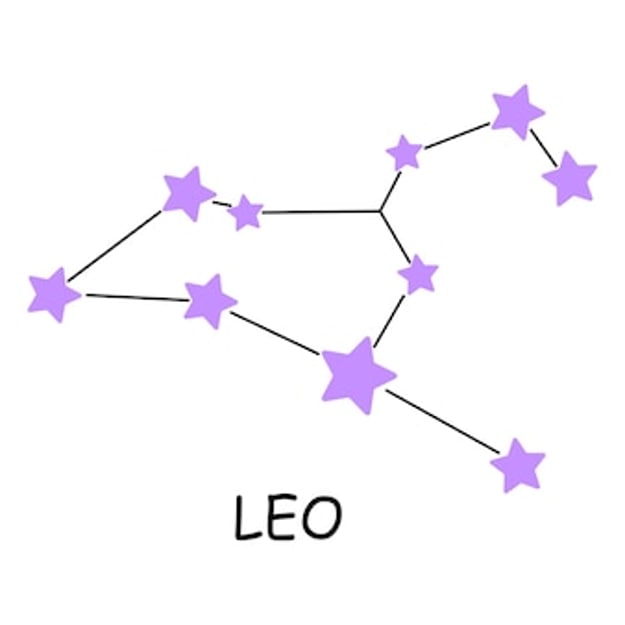
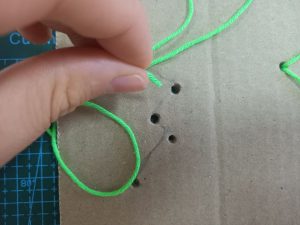
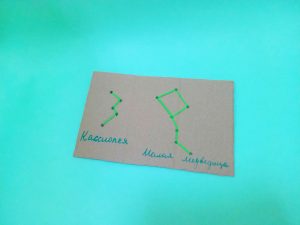
Step 1. Draw a constellation on cardboard, exactly as in the picture, and make a hole right above the picture with a wooden stick

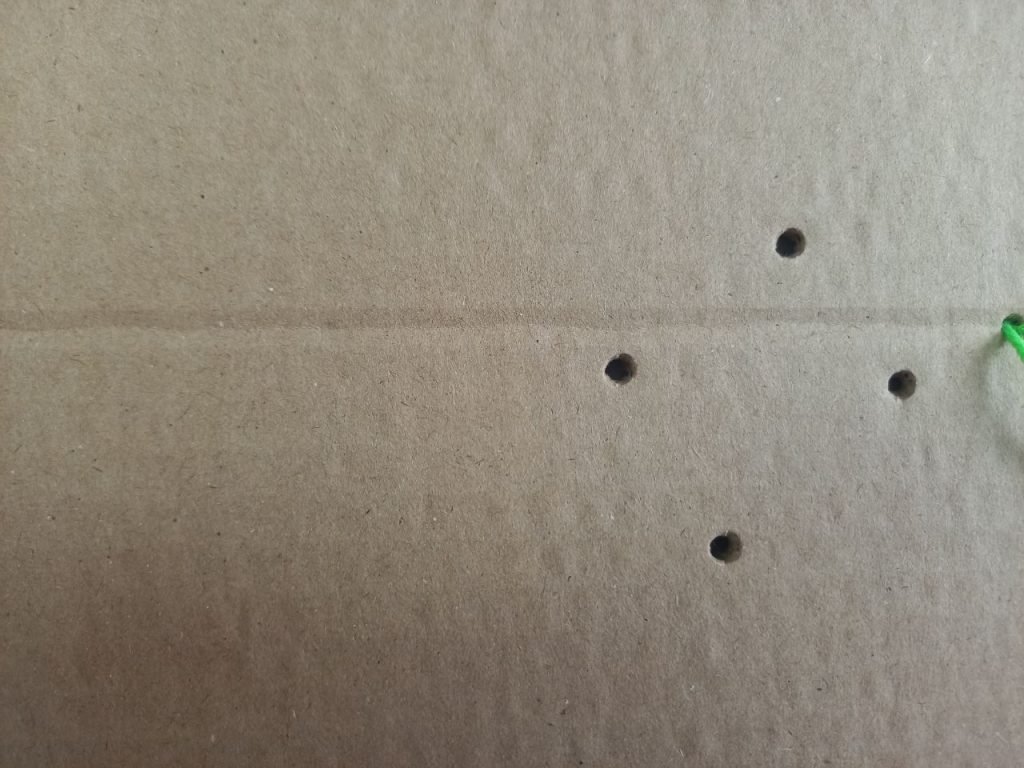
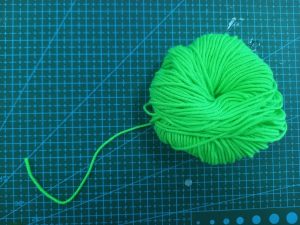
Step 2. Pass the thread through these holes. After passing the thread, connect the ends of the thread on the next cardboard surface by passing one after the other
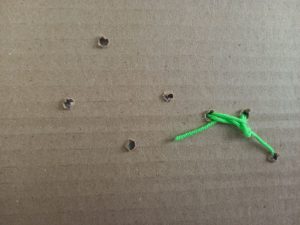
Step 3. The picture should show the constellations as if they are looming. Remember to write the names of the constellations underneath the images
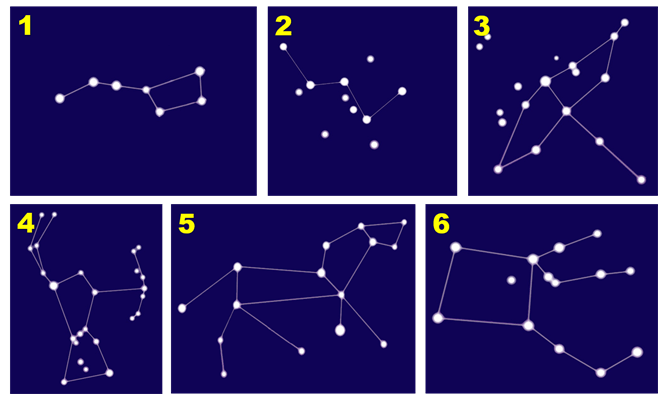
Show pictures of constellations, with names, on the interactive whiteboard. Take turns showing the pictures to the students, with one minute for the students to remember the constellation with the name. Then display the name of the constellation, without the picture. The students should draw a diagram of this constellation. This task will help improve the students’ memory
The constellation drawings can be found at this link: https://drive.google.com/drive/folders/1wGvwEh1g9QBKW8HVaT682SQRwqLIRRy6
Conclusion
In this lesson the students have been introduced to the starry sky and have made a map of the constellations.

In this project, each student will be awarded a STEAM category title:
– You, having studied the celestial world and mapped the constellations you are a true – astronomer!
– You, through practical work, have shown your creativity and qualifications.
Evaluation
