Lesson 1
Teacher’s Guide
– In the practical part of the project, students work in groups;
– Students should know what sound is, how it occurs and what is a sound barrier;
– Before starting the practical part, familiarize and provide students with all the necessary material;
– Draw up a brief instruction on how to work with hot melt adhesive (used only by the teacher).
Project Goals
– Studying the principles of work and creation of a national instrument.
Theoretical part
Dear students, please answer the following questions:
1) What Kazakh national instruments do you know?
2) What is a wind instrument?
3) Do you have national or foreign instruments in your houses?
4) Does anyone from home play musical instruments?
5) Who wants to learn how to play and what instrument?
– Well, let’s try to find the sound of Kazakh national instruments. (Click on the blue link to listen to the sounds of the instruments):
We will try to make the last tool ourselves.
Practical part

Step 1. Attach tape to two tubes.

Step 2 Rotate the tensioner to both sides.

Step 3. We attach a small tube with tape to secure the heads of the tube facing the sides.

Step 4. Put the tubes in the pre-perforated bottle.

Step 5. We cut off one side of the tube so that we can blow it from the same incision point later. Do not shorten it too much, because the tube should reach the bottle

Step 6. Cut off a long tube so that it extends slightly beyond the bottle (as a result of this tube touching the ball, a sound appears).

Step 7. Cut out the ball from the middle.

Step 8. Close the neck of the bottle.

Step 9. Cut out the inflatable part of the balloon.

Step 10 We use the neck of the ball as an additional reinforcement.

Step 11. The tube should stick out of the balloon-like this in the photo.

Step 12. We also fix it with rubber.

Step 13. To prevent the tubes from moving, we glue the places where air penetrates the bottle with hot glue.

Step 14. We put another tube on the uncut head of the tube so that it resembles a real musical instrument, and sounds different.

Step 15 We bend the tube and cut only a small corner, not too big and not too small.

Step 16. So we make holes as desired along one straight tube.

Step 17. We check the sound blowing and close the holes one by one.

Step 18. It is enough that the holes are as in the picture.

Step 19. Having finished making holes in the tube, each student, if desired, can make holes one by one and blow through them (by the hygienic requirements that each student must make individually from the pipe for sybyzgy).

Step 20. Thus, our tool is ready.

 In this project, each student will be awarded a STEAM title in three categories:
– You managed to explain the origin of sound and the obstacles in sound, you are a real scientist – a future physicist!
– You learned the tools yourself and were able to create one, you can become a real blacksmith – instrument maker!
– You managed to distinguish the sound of hidden instruments, and you can become a music lover – a future music critic!
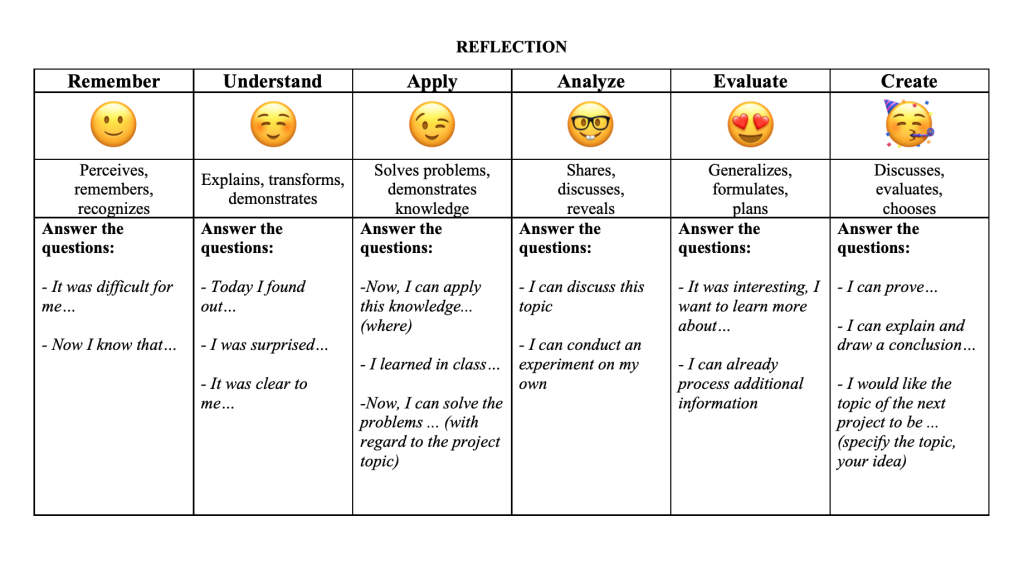
Evaluation
PBL grading criterion:
Project-based learning is a learning method in which students acquire knowledge and skills by working on a single project to explore and find an answer to a genuine, interesting, and complex question, problem, or challenge.