
Lesson

Purpose of the work:
- To construct a DNA model using simple materials.
Expected results:
After completing the work, students can:
- develop teamwork skills
- be able to analyze and summarize the information received
- draw logical conclusions
Teacher’s Guide:
- The task is performed in groups of 3-4 people
- Before starting laboratory work, please read the safety rules by following the link:
- To download the worksheet, follow the link:
Theory
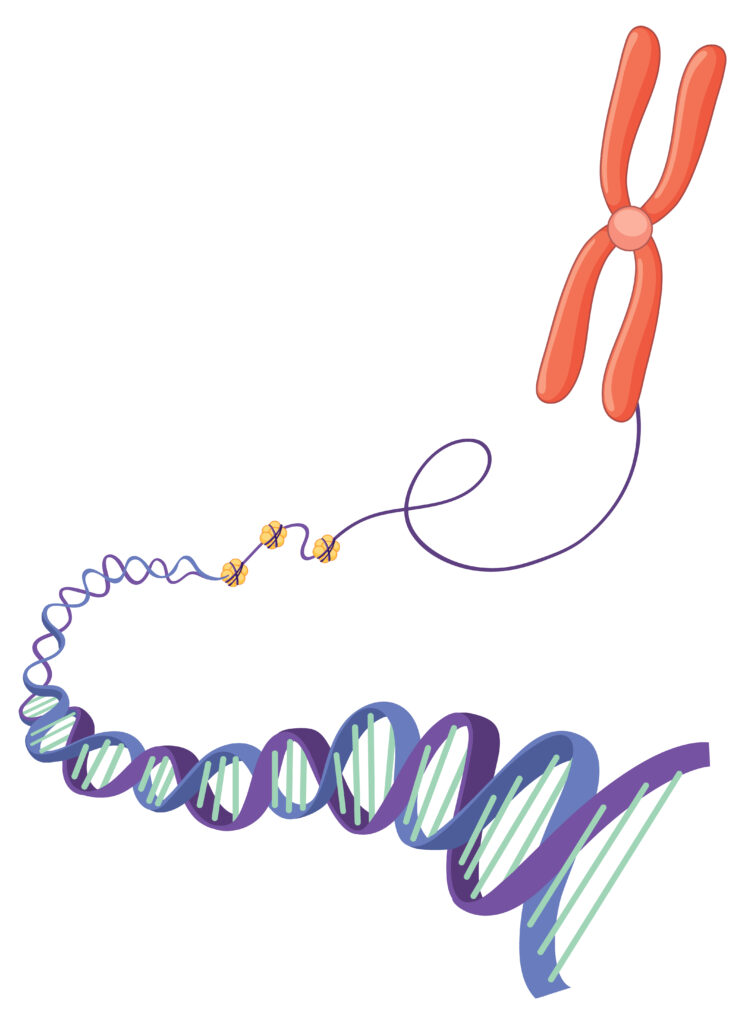
Deoxyribonucleic acid (DNA) is a biopolymer that stores the hereditary information of living organisms. Its structure is based on the double helix, discovered by James Watson and Francis Crick in 1953.
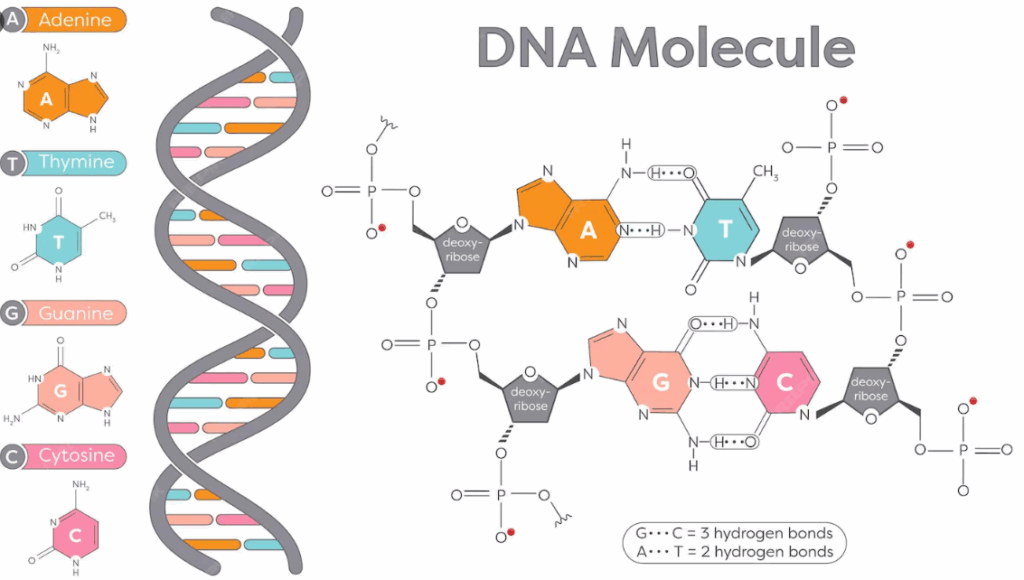
DNA monomers are nucleotides. Each nucleotide consists of:
- deoxyribose (sugar),
- a phosphate group,
- one of four nitrogenous bases: adenine (A), thymine (T), guanine (G), or cytosine (C).
The nitrogenous bases pair according to the principle of complementarity:
- adenine always pairs with thymine (A–T),
- guanine pairs with cytosine (G–C).
These pairs form the “steps of the ladder,” while the sugar and phosphate groups form the “sides.” The spiral twisting creates the characteristic DNA double helix.
Practical part
Step 1. Use a ruler to measure and mark the places with a spacing of 2.5 cmБ where the sticks will be glued.
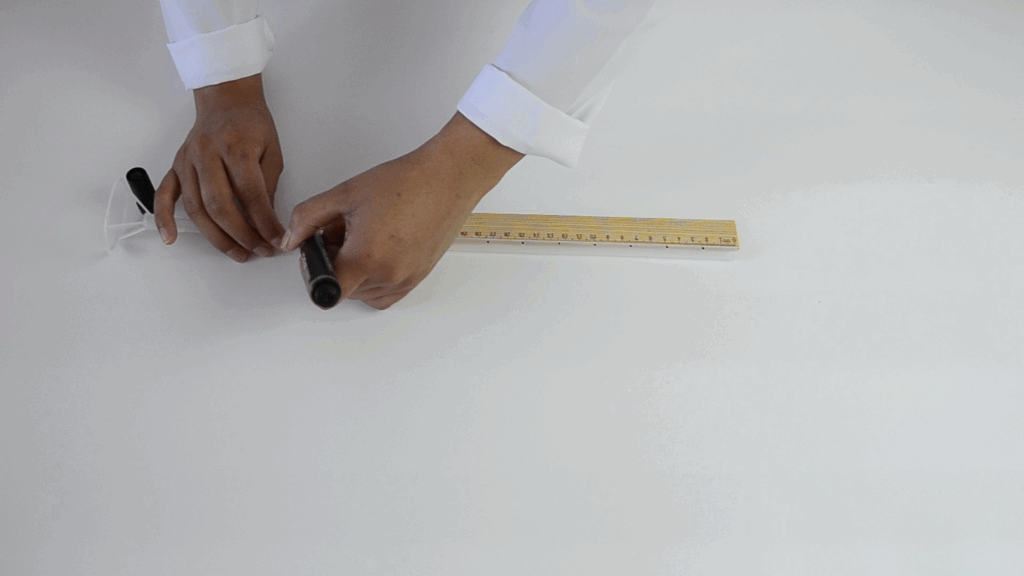
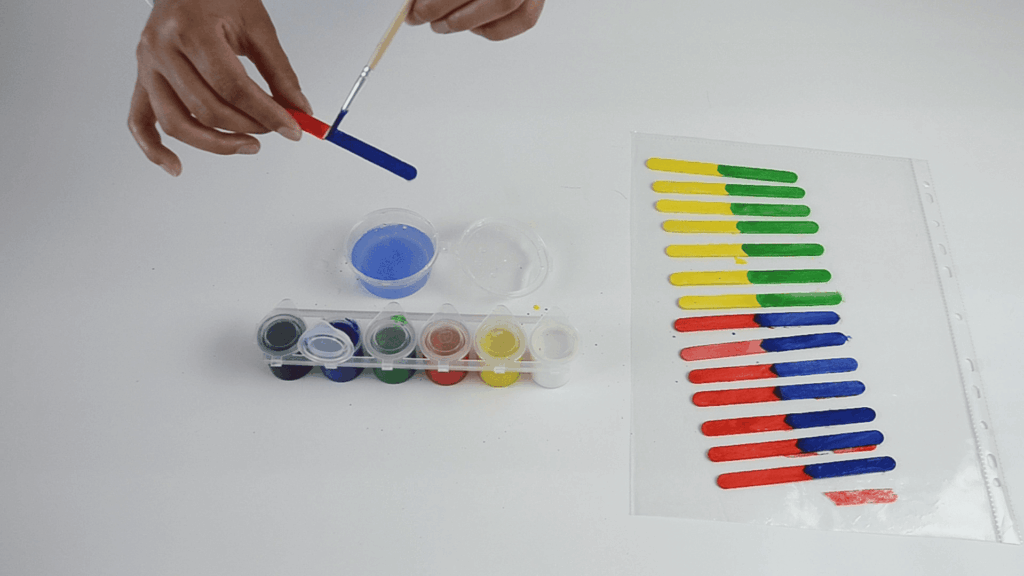
Step 2. Take 16 ice cream sticks and mark their middle with a pencil.
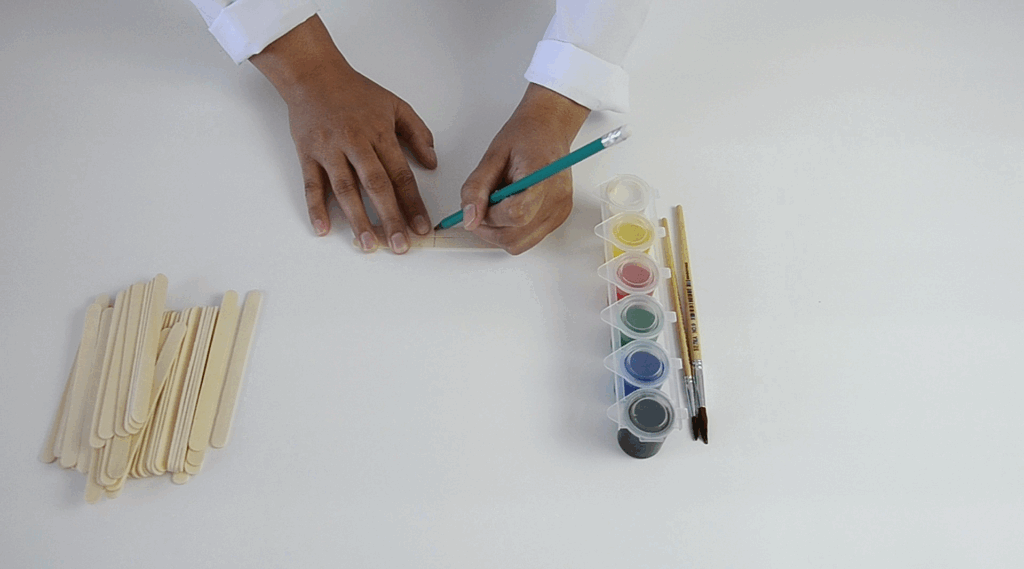
Step 3. Color each nitrogenous base in a different color:
- Adenine – red
- Thymine – blue
- Cytosine – green
- Guanine – yellow
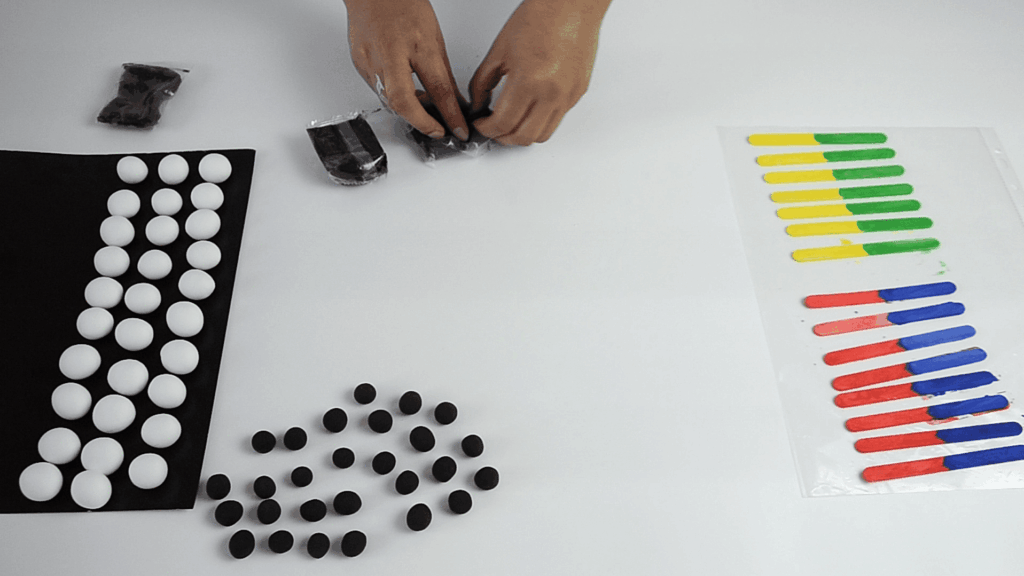
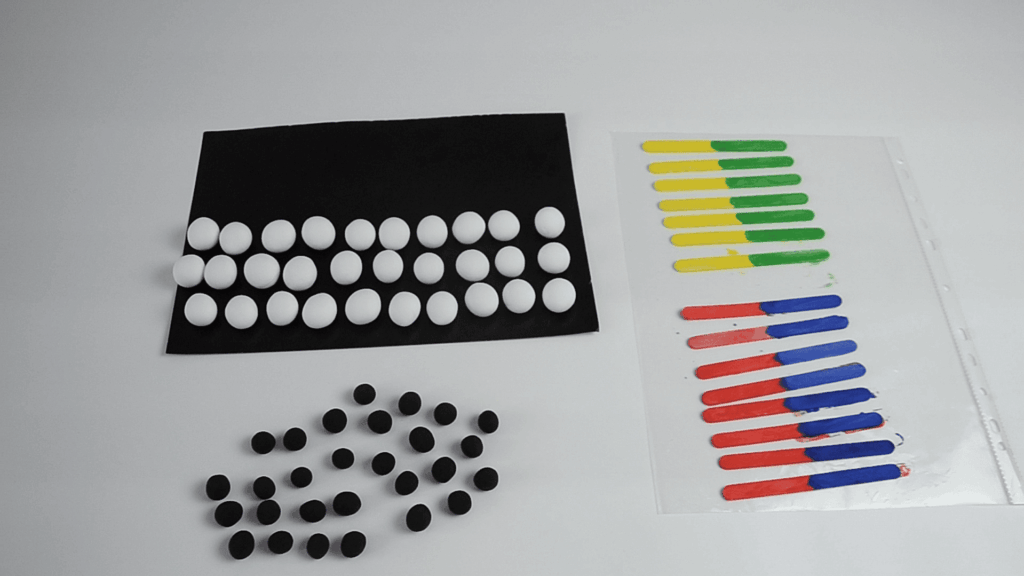
Step 4. Roll large balls from white clay – these represent deoxyribose molecules (about 30 pcs).

Step 5. Make smaller balls from clay of another color – phosphate groups (about 28 pcs).
Step 6. Let the details dry. Then attach the white balls (deoxyribose) to both sides of the painted sticks.
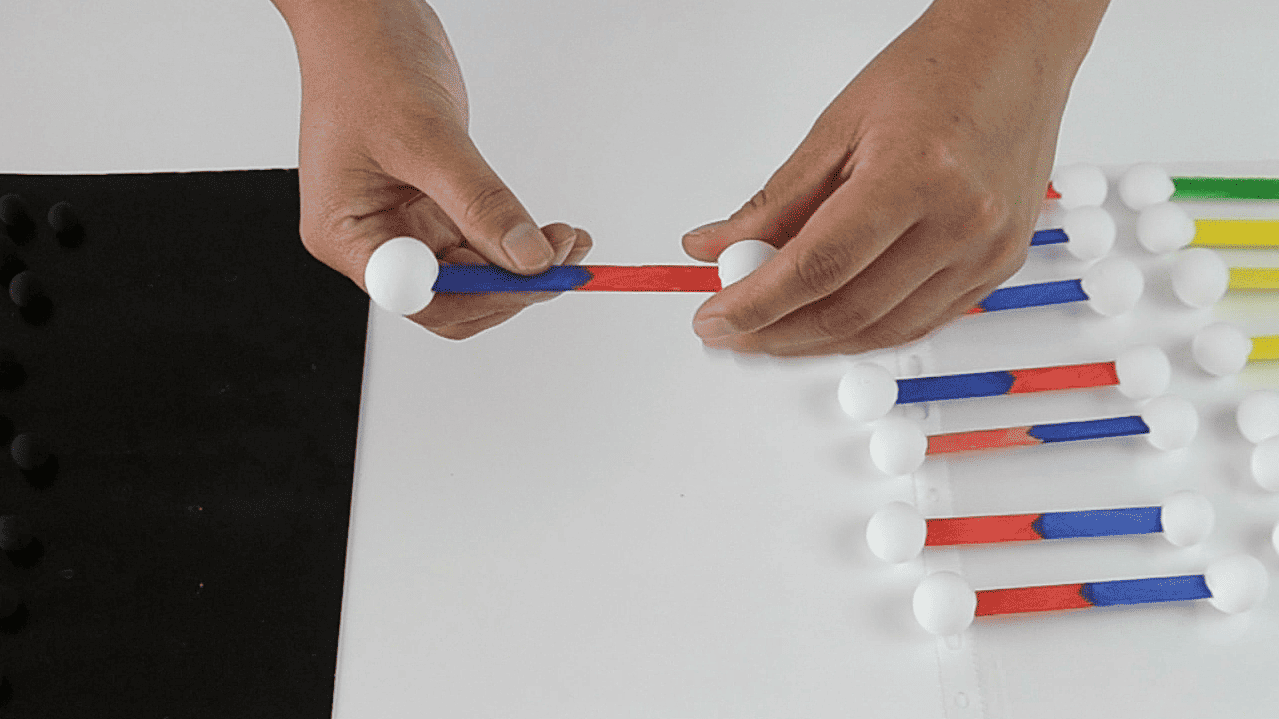
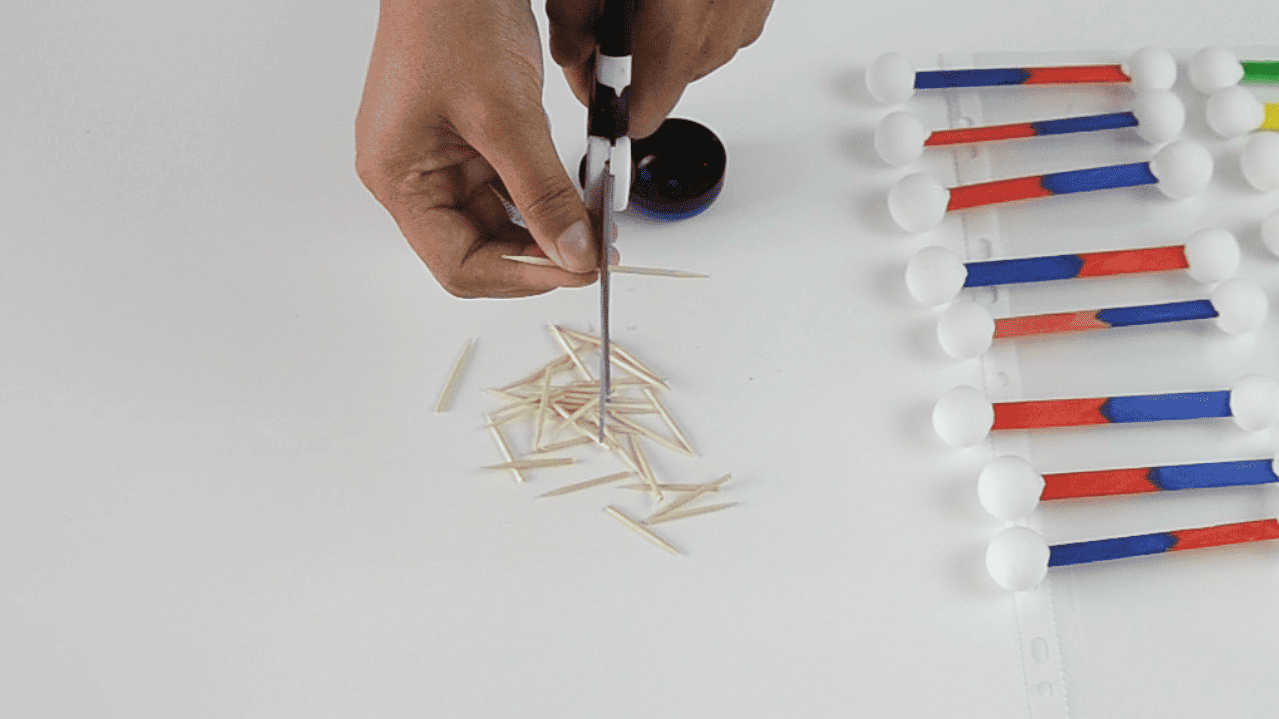
Step 7. Break the toothpicks in half to connect the phosphate groups.
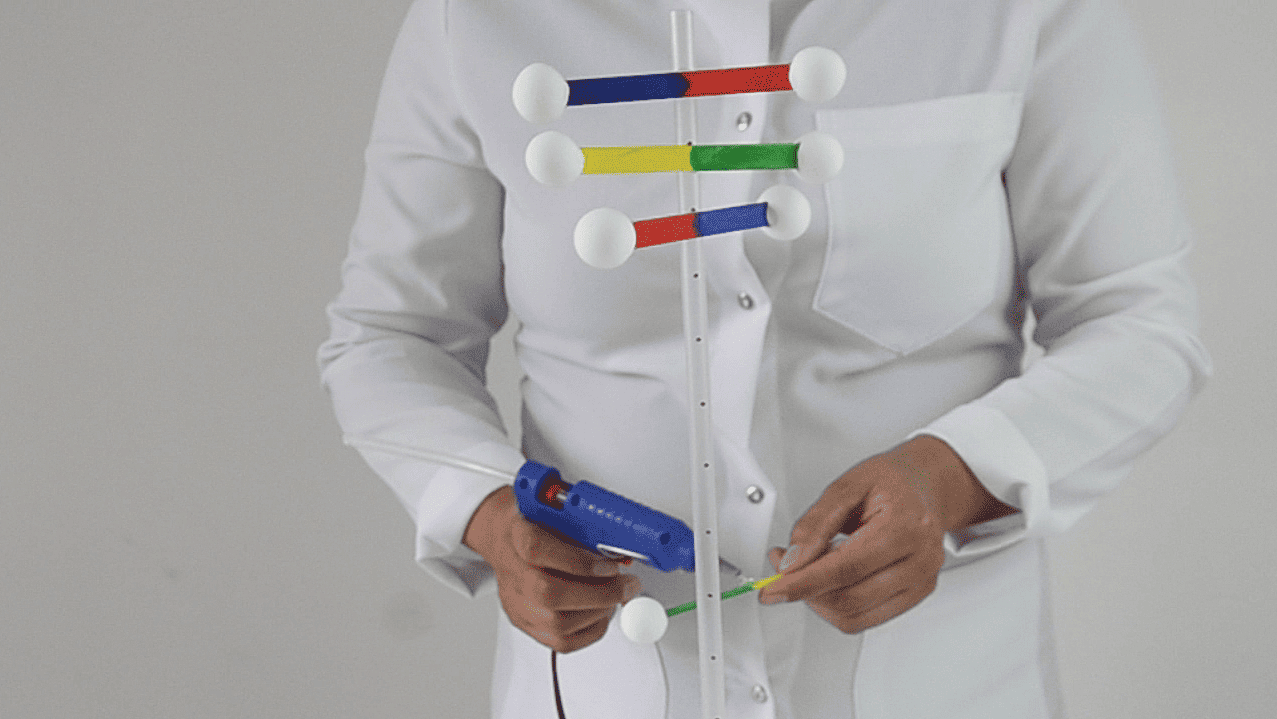
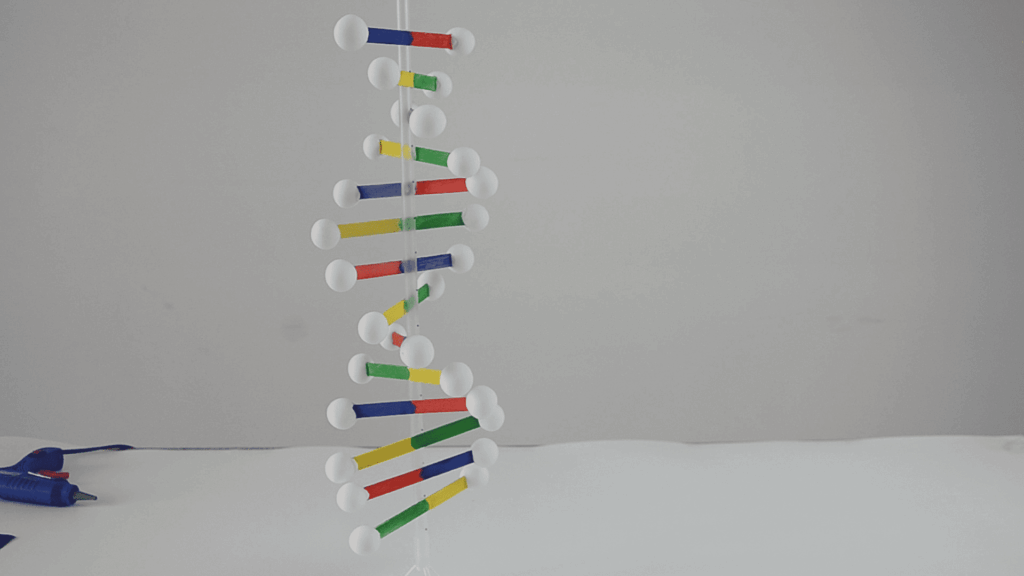
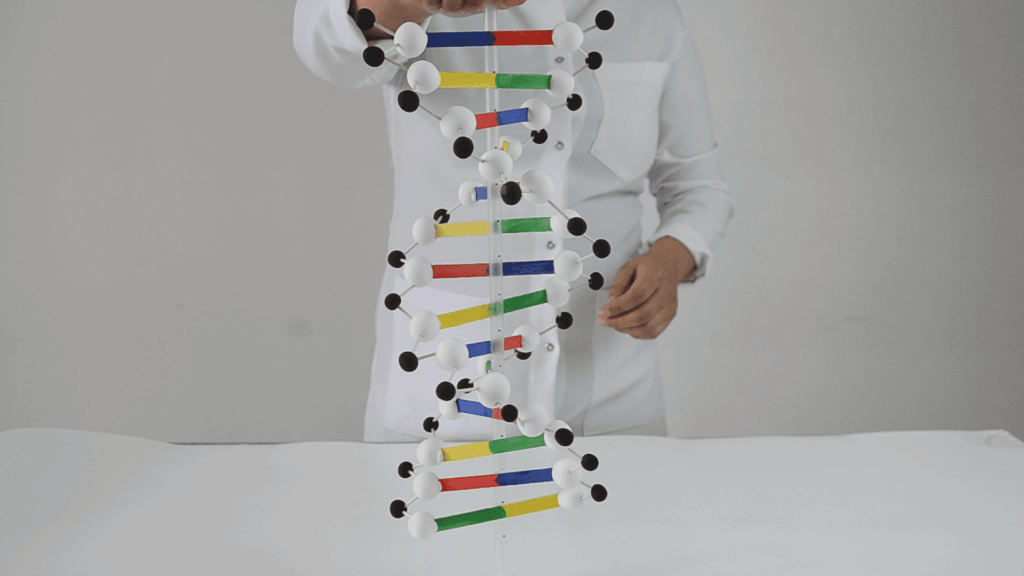
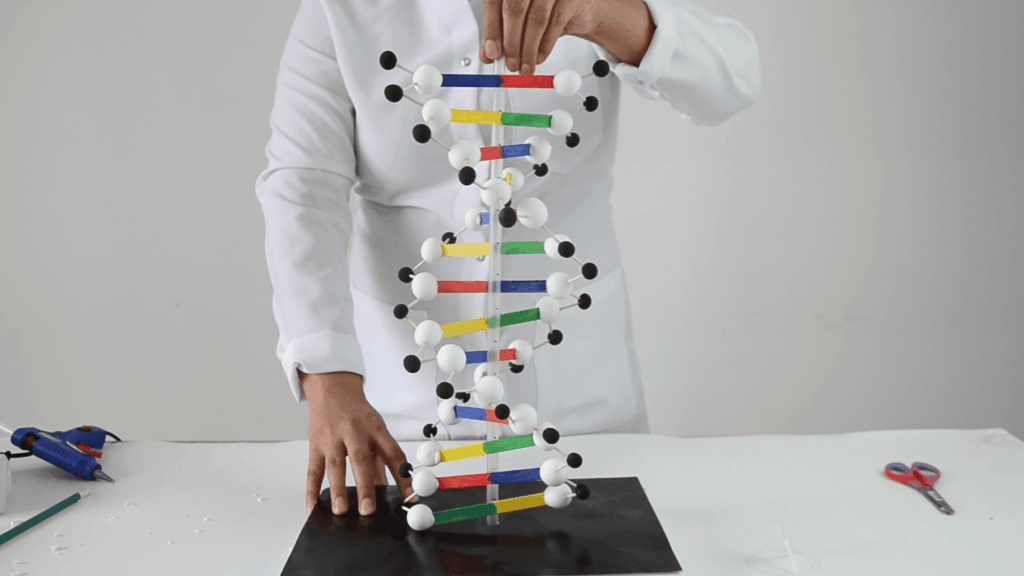
Step 8. Start assembling the DNA molecule: glue the sticks with bases onto the rod at a slight angle to form a spiral.
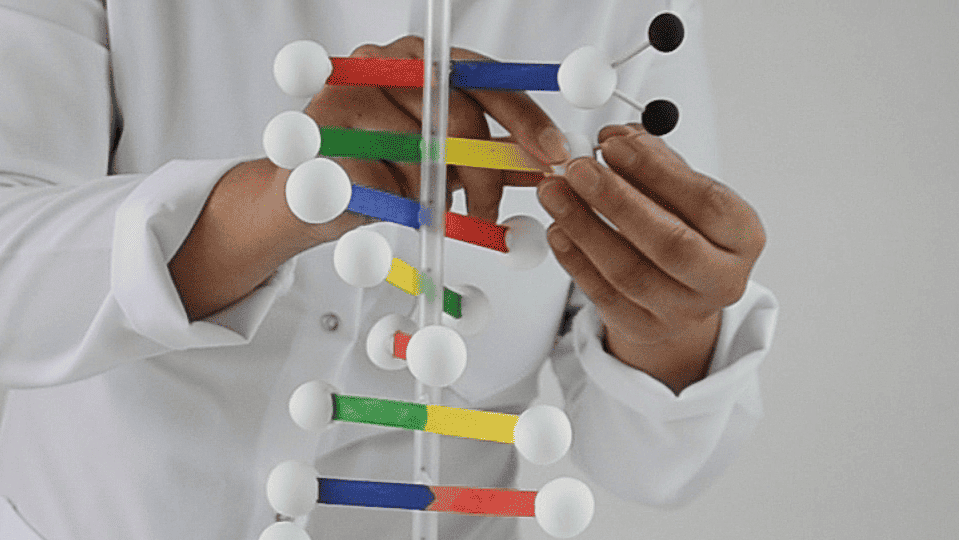
Step 9. Connect phosphate groups to deoxyribose using toothpicks. Remember: one phosphate group links two sugar molecules.
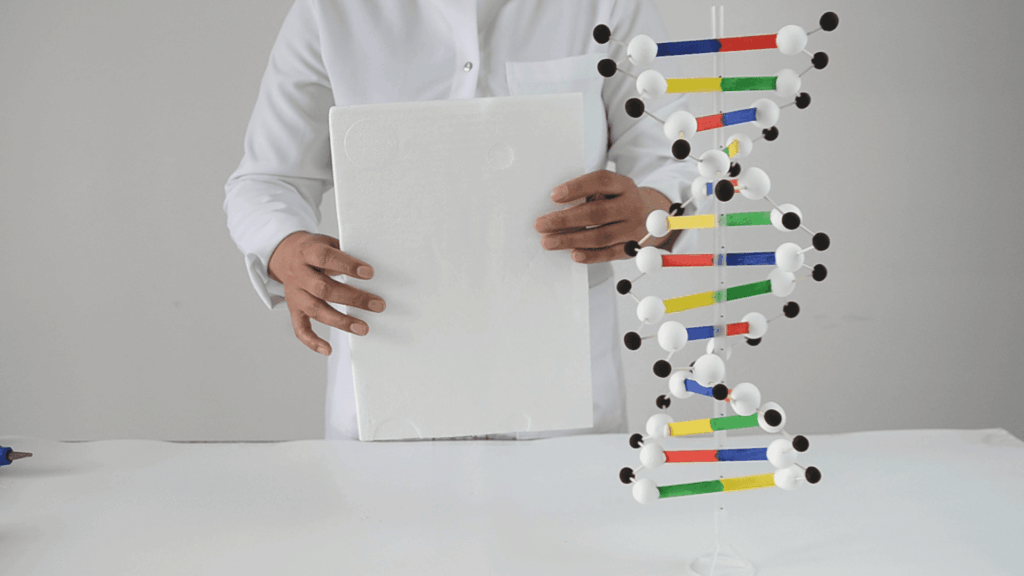
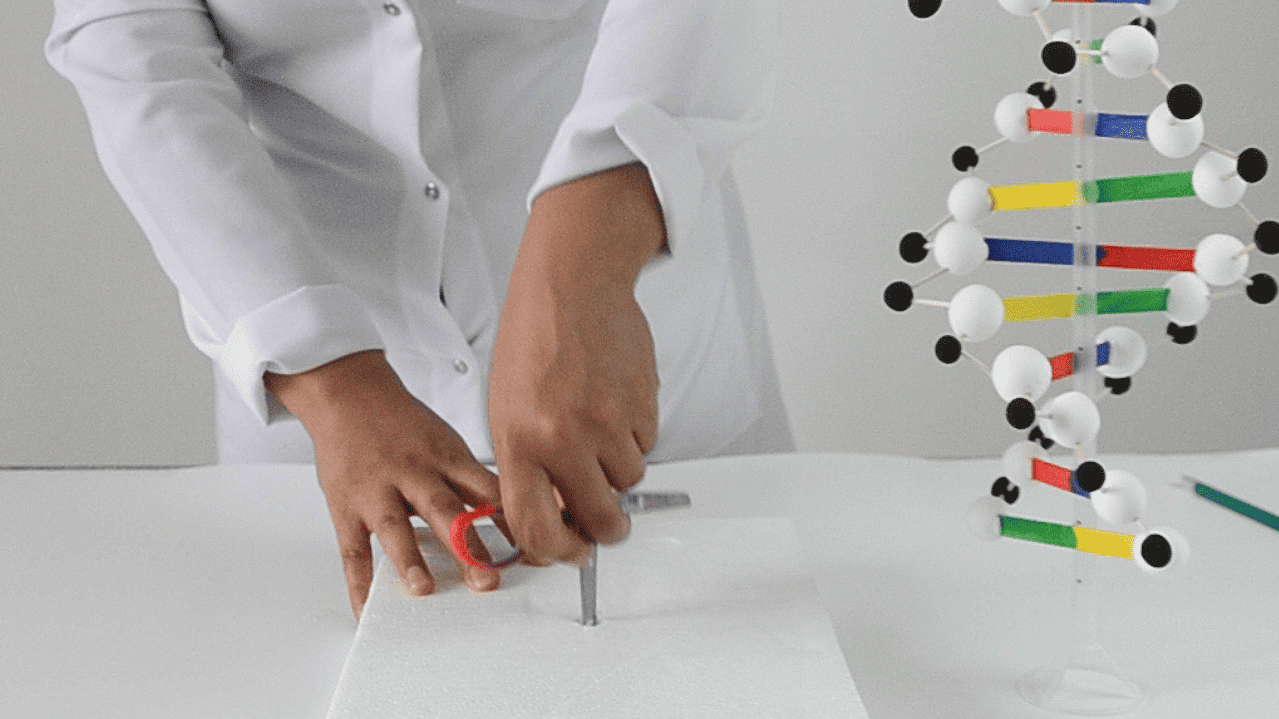
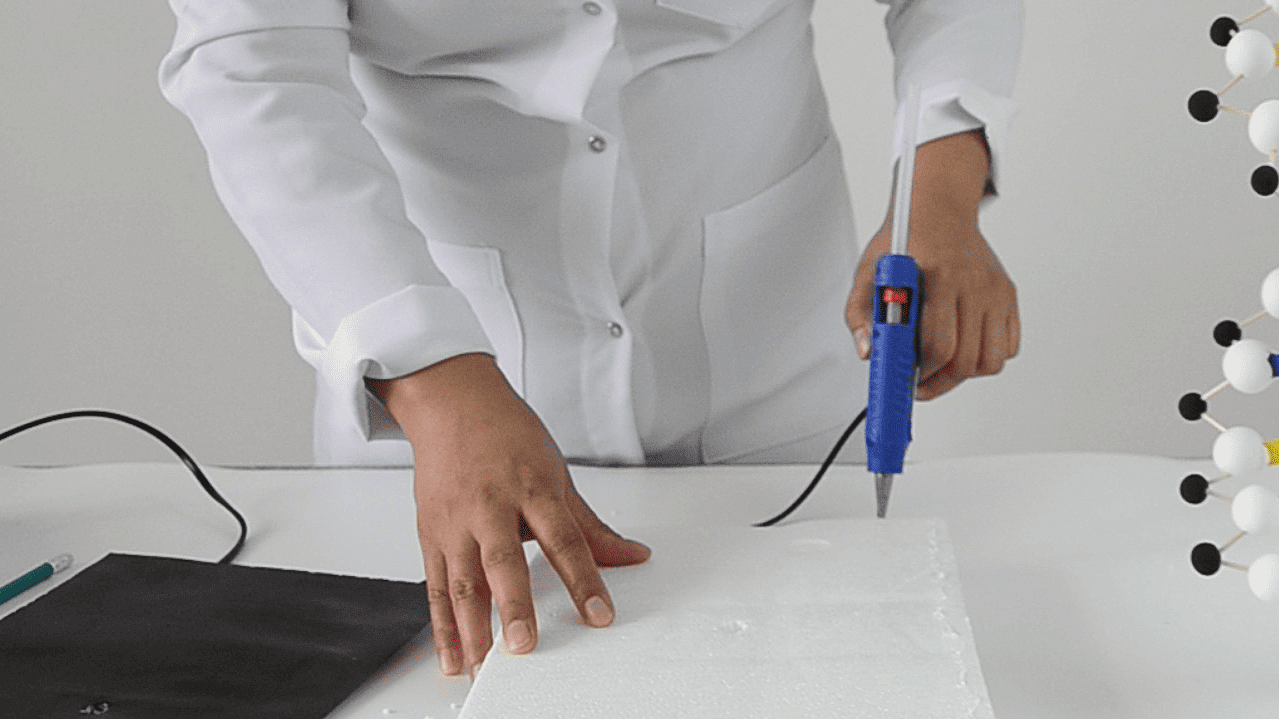
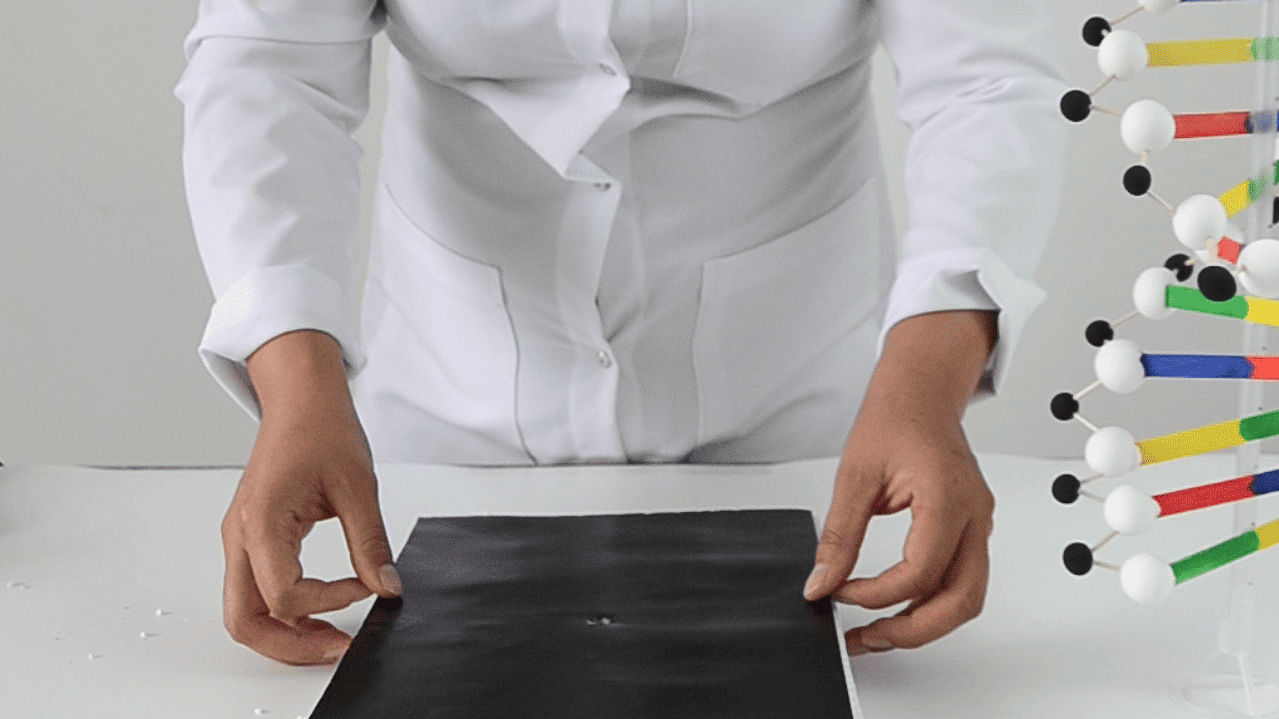
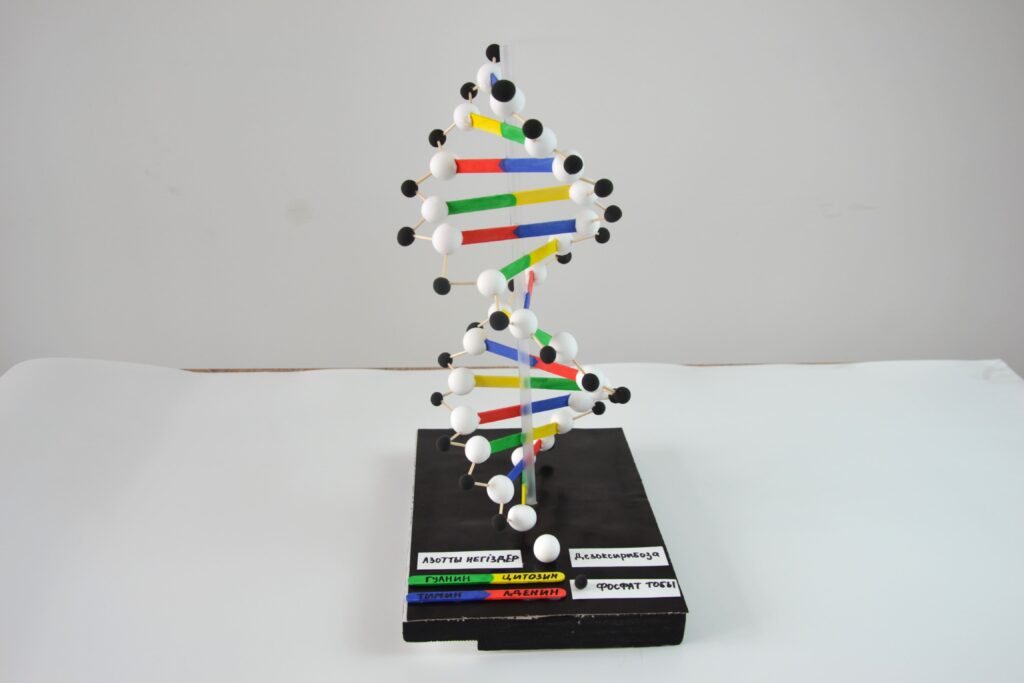
Step 10. The DNA model is ready! To make a stand, take an A4 foam board and make a hole in the center.
Step 11. Cover the foam board with colored cardboard.
Step 12. Done!
Step 13. Label the parts of the model if necessary.
Conclusion
In this work, students created a DNA molecule model with their own hands, learned about its main elements and the principle of base complementarity. The activity reinforced their knowledge of DNA structure, developed teamwork and creativity skills, and encouraged interdisciplinary connections.