
Week 1
Project Objective
1. to study numerical and alphabetic expressions.
2. Make an addition table on your own (hint). Use the table to solve problems.
Teacher’s guide.
– In the practical part of the project, pupils work in pairs.
– Pupils should be familiar with the topics as number and letter expressions and represent and apply in the form of a letter equality the relationship between addition and subtraction: a+b=c, c-a=b, c-b=a.
– Before starting the practical part, familiarise and provide the students with all the necessary materials.
– Give brief instructions on how to use the stapler.
– At the beginning of the lesson explain the PBL (project based learning) rubrics to the students. Skills 4K (critical thinking, collaboration, creativity, pre-setting)
Safety in Steam lessons
Before we begin the lesson, teachers are advised to familiarise themselves with the safety procedures. If necessary (if using items specified in the PPE), brief the students. Visit Safety in Steam Lessons
Theoretical Part
Dear students, answer the questions:
– Do you know what numerical expressions are?
– And what are letter expressions?
A numeric expression
– is a notation which consists of numbers and the signs of the arithmetic between them.
Numerical expressions are all around us – not only in maths class, but also in the shop, in the kitchen or when we count the time. Simple examples where you have to calculate the difference, the sum, the result of multiplication or division – these are all number expressions.
For example:
2+3=5 10+15=25 20-8=12
Recall the types of arithmetic operations you have gone through.
+ – addition sign, find the sum.
– subtraction sign, find the difference.
Letter expressions
Alphabetic expressions contain numbers, arithmetic signs and letters.
It turns out that a letter expression is a numeric expression that has not only numbers but also letters.
For example:
а+0=а а+2=8 a+b=c x+10=15 c-b=a
Single-digit addition table
allows you to quickly find the sum of any two numbers (from 1 to 10 or more).
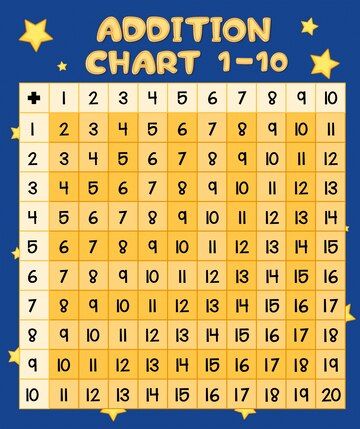
Consider how to use the addition and subtraction table.
1. To find the sum of two numbers, e.g. 4 and 8, find the number 4 in the first column and the number 8 in the top row. At the intersection of the corresponding row and column is the number 12 – this will be the sum of the numbers 4 and 8:
4 + 8 = 12.
The same result will be obtained if you find in the first row the number 4, and in the first column the number 8, at their intersection will also be the number 12.
2. To find the difference between two numbers, e.g. 17 – 9, you should find in the first column the number 9, and looking through the row in which it is located, go to the decreasing 17, and from it up to the first row. The number 8 is there – it will be the difference:
17 – 9 = 8.
Sources:
1. https://skysmart.ru/articles/mathematic/chislovye-i-bukvennye-vyrazheniya
2. https://izamorfix.ru/matematika/arifmetika/tablica_slozheniya.html
3. https://www.freepik.com/premium-vector/mathematics-addition-chart-one-ten_2270970
Practical part

Step 1. Familiarise yourself with all the necessary materials
- White board
- Crayons – 2 colours
- Scissors
- Glue pencil
- Ruler
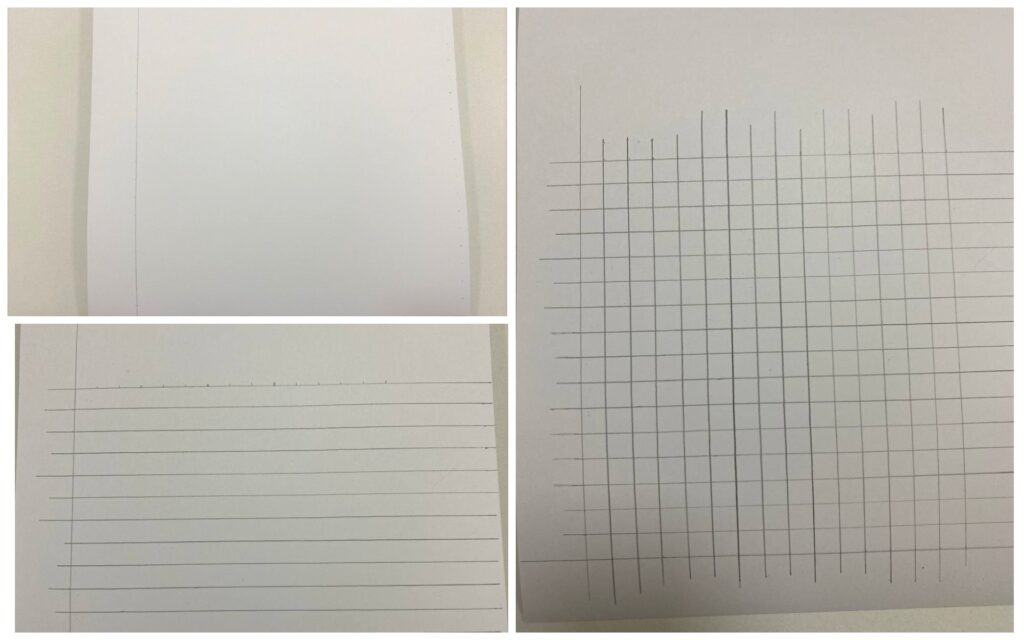
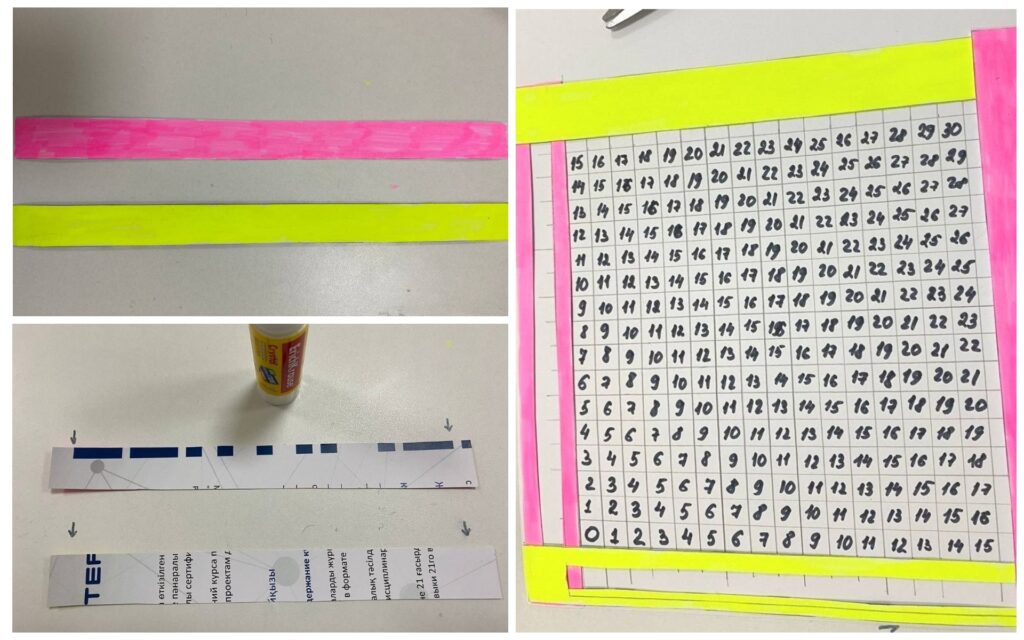
Step 2. Take cardboard and use a ruler to draw lines 1 cm apart.
There should be 19 lines horizontally and 19 lines vertically.
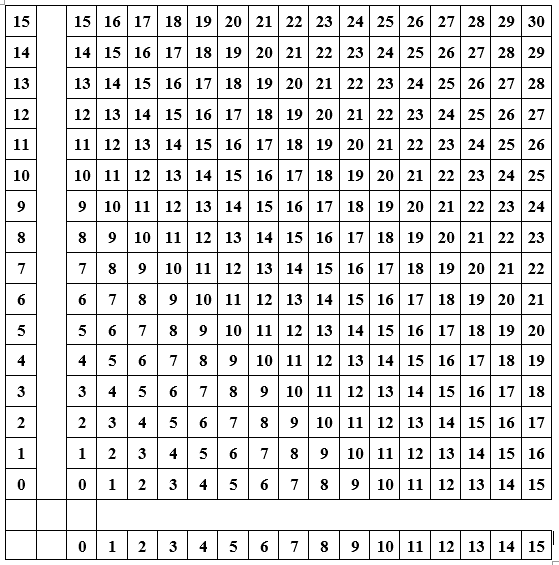
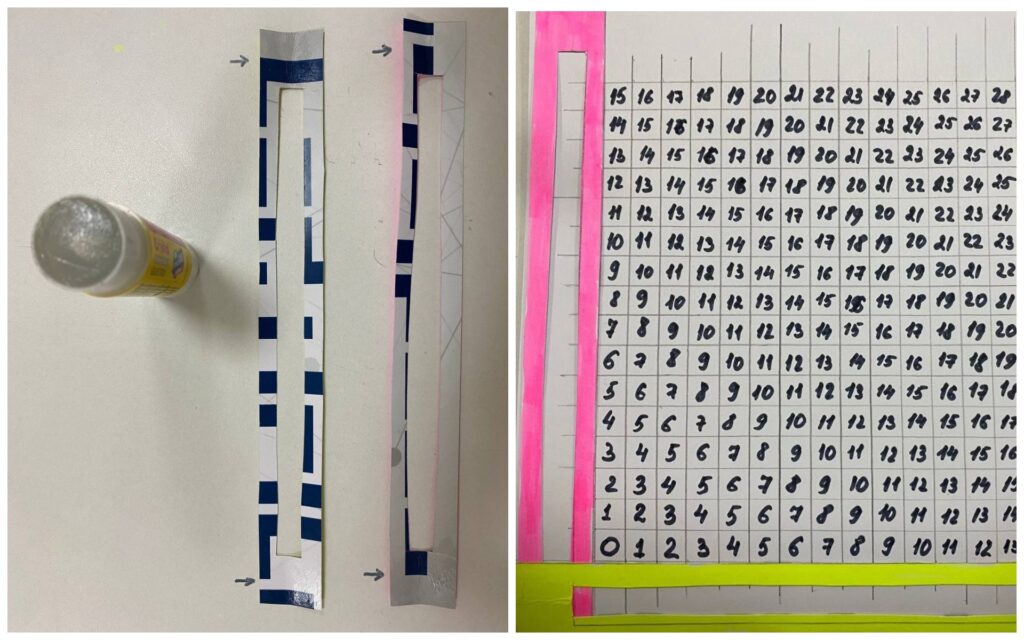
Step 3. Fill in the table. Start at the bottom left-hand corner from 0 to 15.
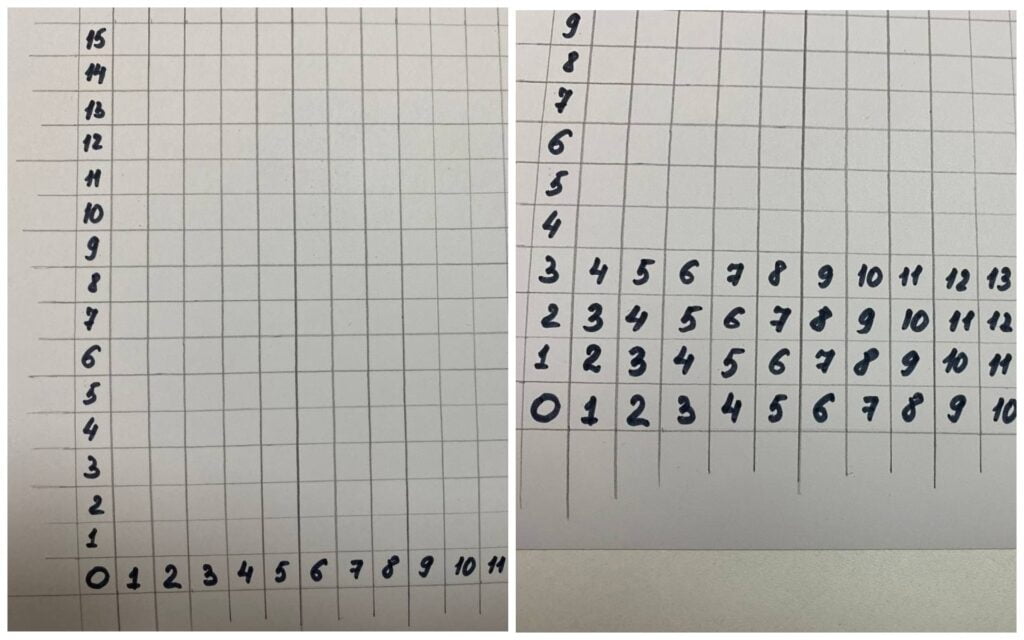
Step 4. If students find it difficult to fill in (and to save time), you can download a ready-made table at the link: таблица сложения
Only a printed sheet of paper should be glued to the cardboard.
Step 5. Next, take cardboard, draw lines 2 cm apart. Then cut out
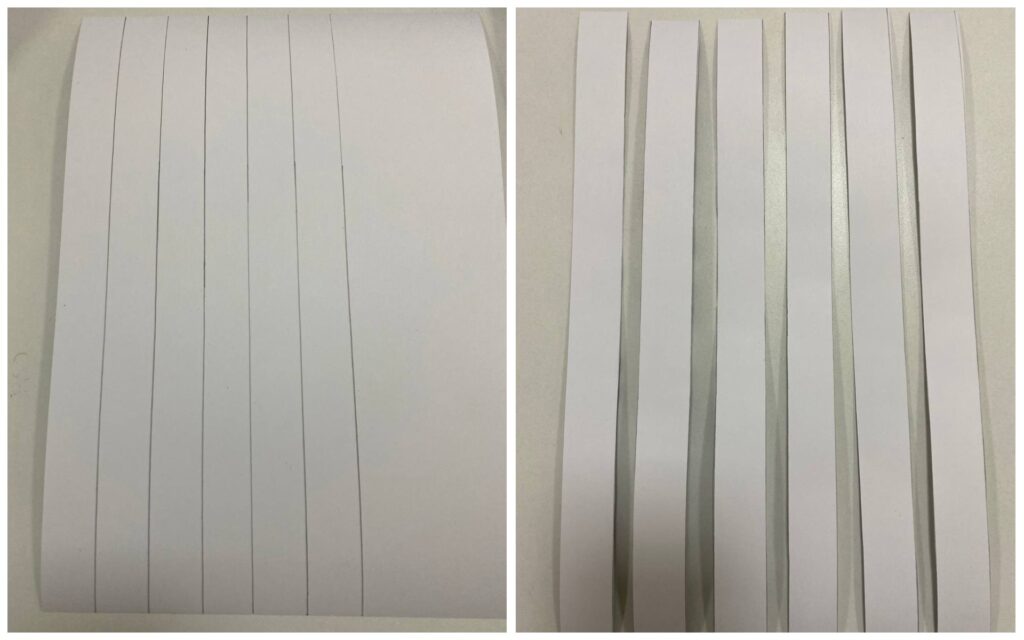
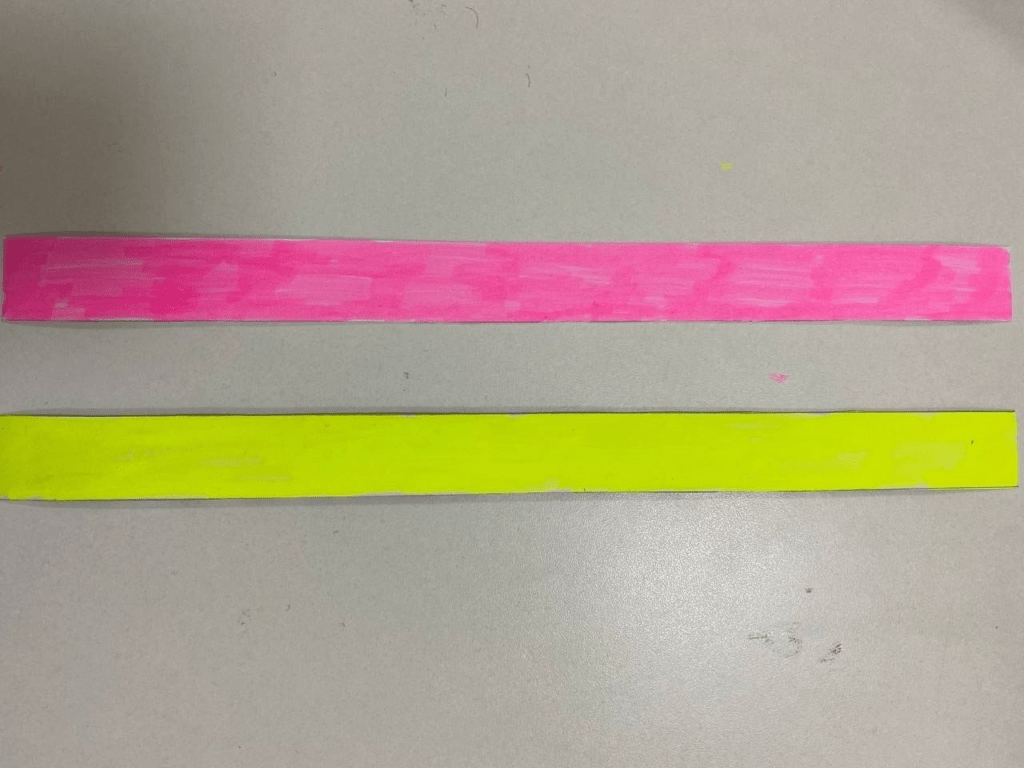
Step 6. Use a felt-tip pen to colour in 2 different colours
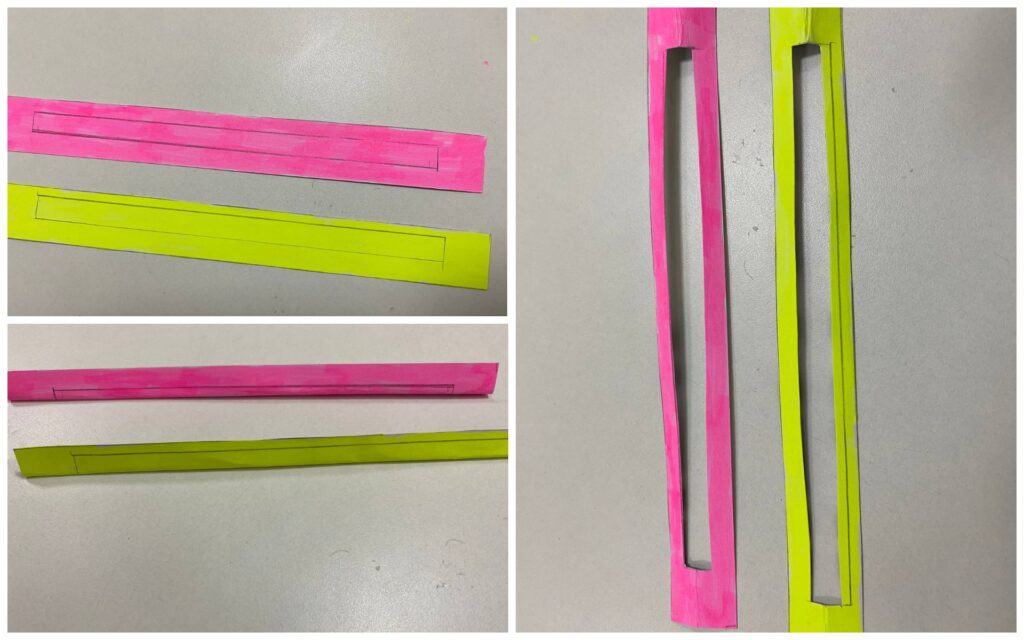
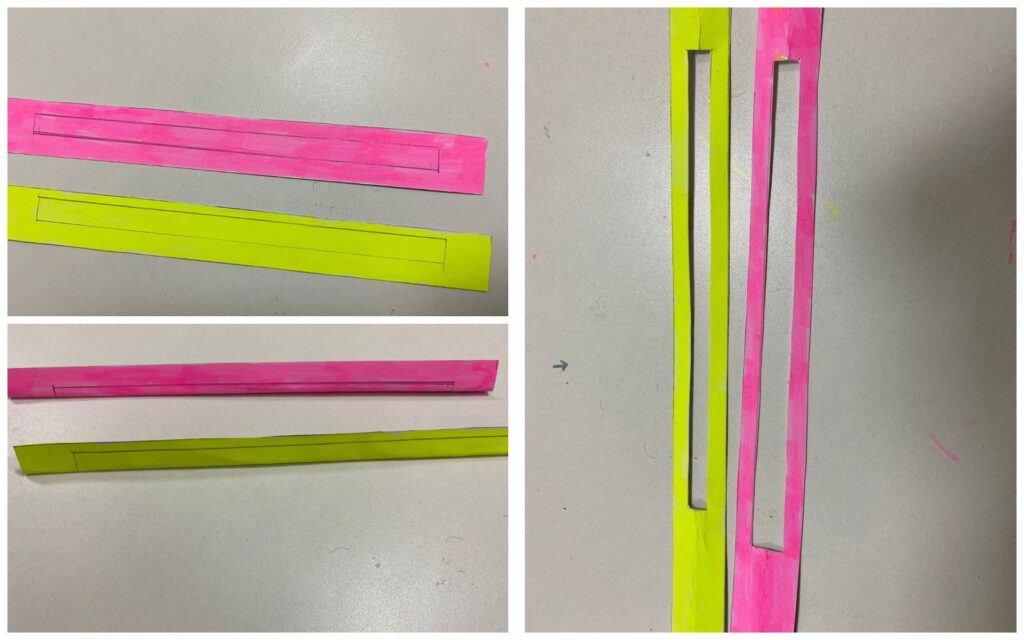
Step 7. Then draw a rectangle in the middle leaving 2cm to the right and 2cm to the left. And cut out by folding the cardboard in two
Step 8: Use paper glue to glue the cut out lines (along the edges only). Apply glue only where the arrow is pointing – along the edges of the paper.
Step 9. Use a felt-tip pen to colour the 2 lines again in different colours on the other lines. Then glue as in step 8.
Apply glue only at the point where the arrow is indicated – along the edges of the paper.
Step 10. Again use a felt-tip pen to draw 2 lines in different colours on the other lines. Then draw a rectangle in the middle leaving 2cm on the right and 5cm on the left. And cut out by folding the cardboard in two
Step 11. Mark on the right-hand side (where 5 cm is) and cut out the square
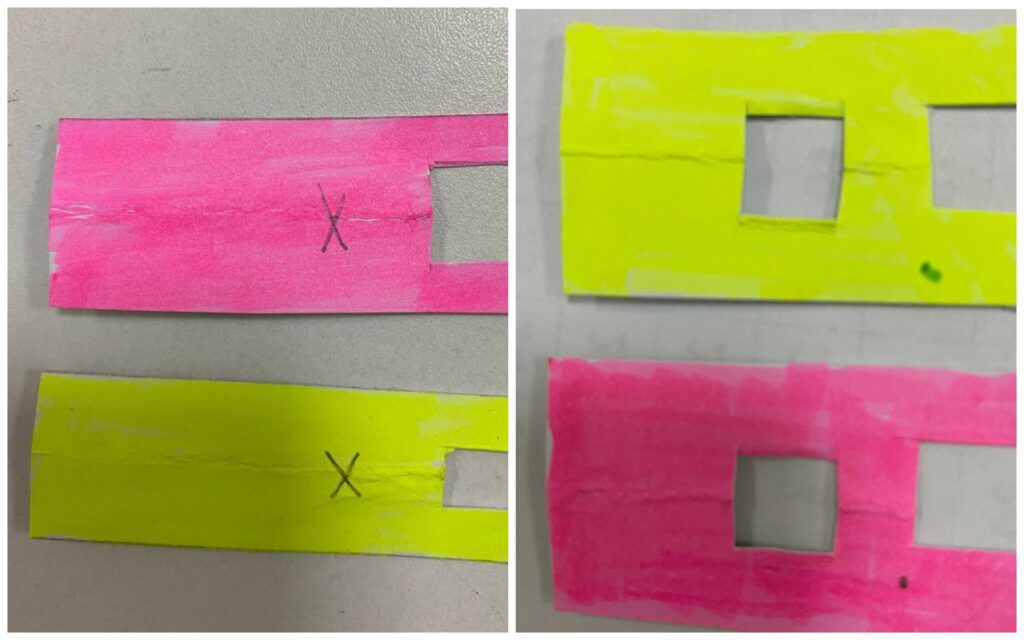
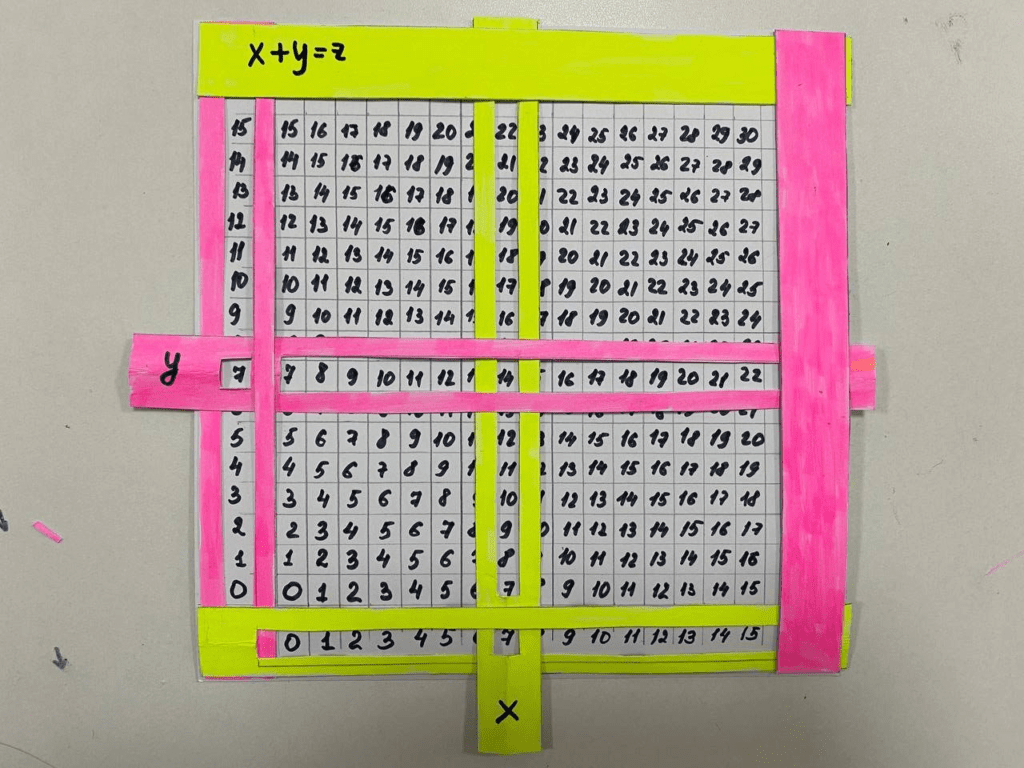
Step 12. Then connect these lines. The small squares indicate numbers – x and y (or a and b)
Where the lines intersect means: x+u=z
or
a+b=c
Work at home
1. Before the next lesson, think of tasks for your desk partner.