
Week 3
Connecting the model to Arduino
In this lesson students:
- assemble a sensor connection diagram
- connect sensors to the board
- write a program to display
You can start from the listener level and suggest connecting sensors to the board without a ready-made template
We connect the anemometer model to the Arduino board
- connect one contact directly to positive 5V
- the second contact, using a 10K resistor, is connected to the negative GND
- We also connect the second contact to the digital pin
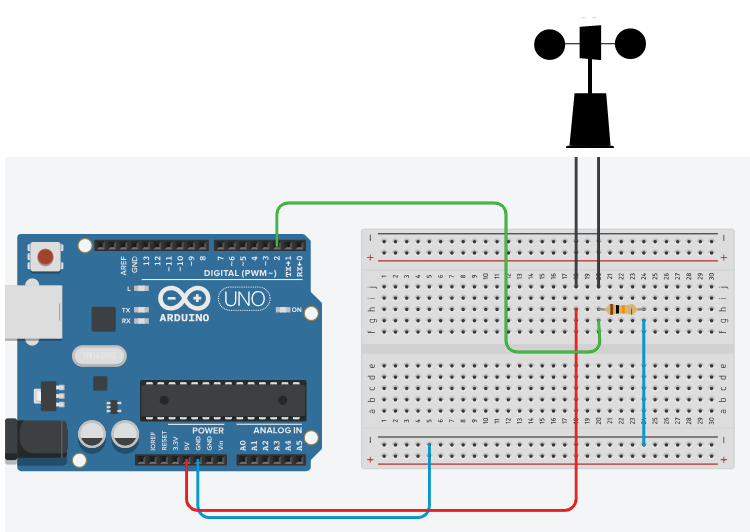
It is also necessary to write a program to display data from sensors
You must use a port monitor to output data
 float b=0;

  void setup() {
  pinMode(3, INPUT_PULLUP);
        Serial.begin(9600);
}
void loop() {
  static unsigned long startTime = millis();

 if (millis() - startTime >= 10000) {

    Serial.print("za 10 sek  ");
    Serial.print(b);
    Serial.println(" raz");

   float a= b/10;
  float ork = 75;
  float rsm = ork *a;
  float rsmchas = rsm*3600;
  float rkmchas = rsmchas / 100000;

   Serial.print("Skorost= ");
  Serial.println(rkmchas);
    while (true);
  }

  if (digitalRead(3) == LOW) {

    b++;
    delay(200);
  }


}