Week 4
5. Making of other parts
- Draw 8 circles with a diameter of 4.5 cm on cardboard
- Draw a 2.3 cm line through the middle
- Make holes for the skewer at the ends of the segment with a pen
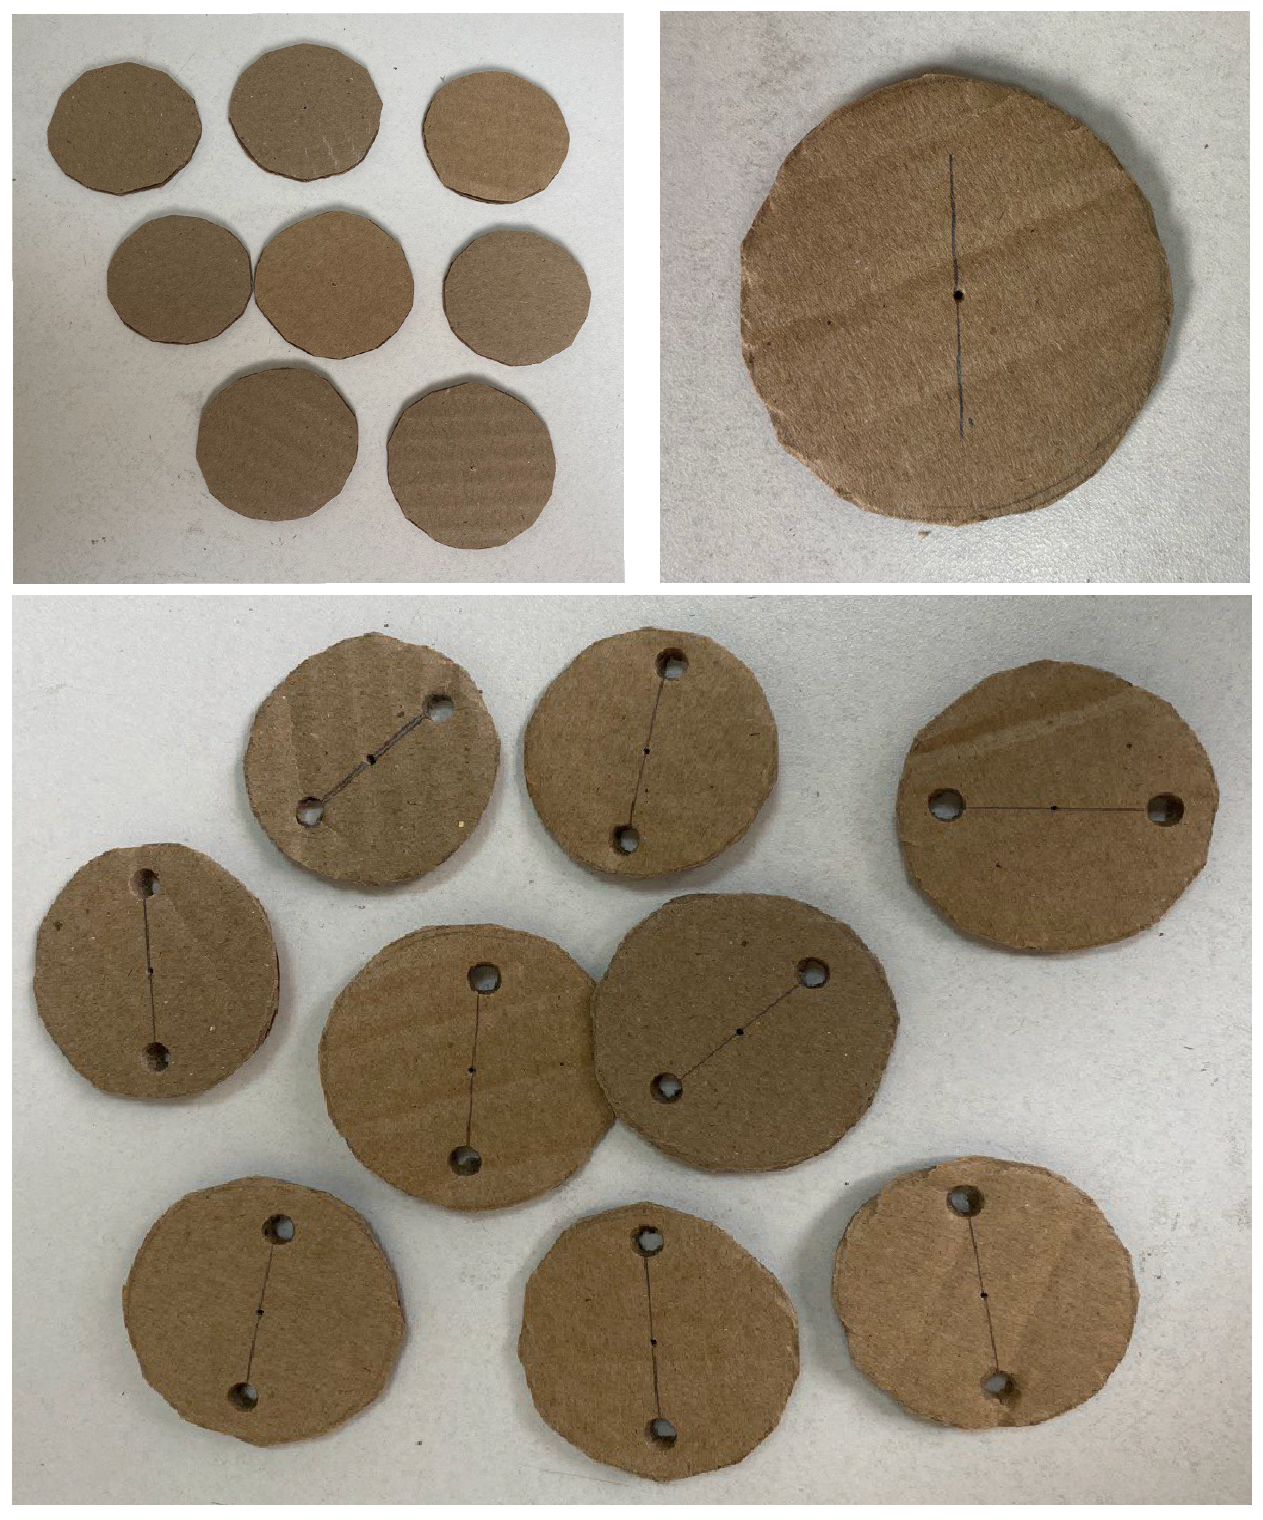
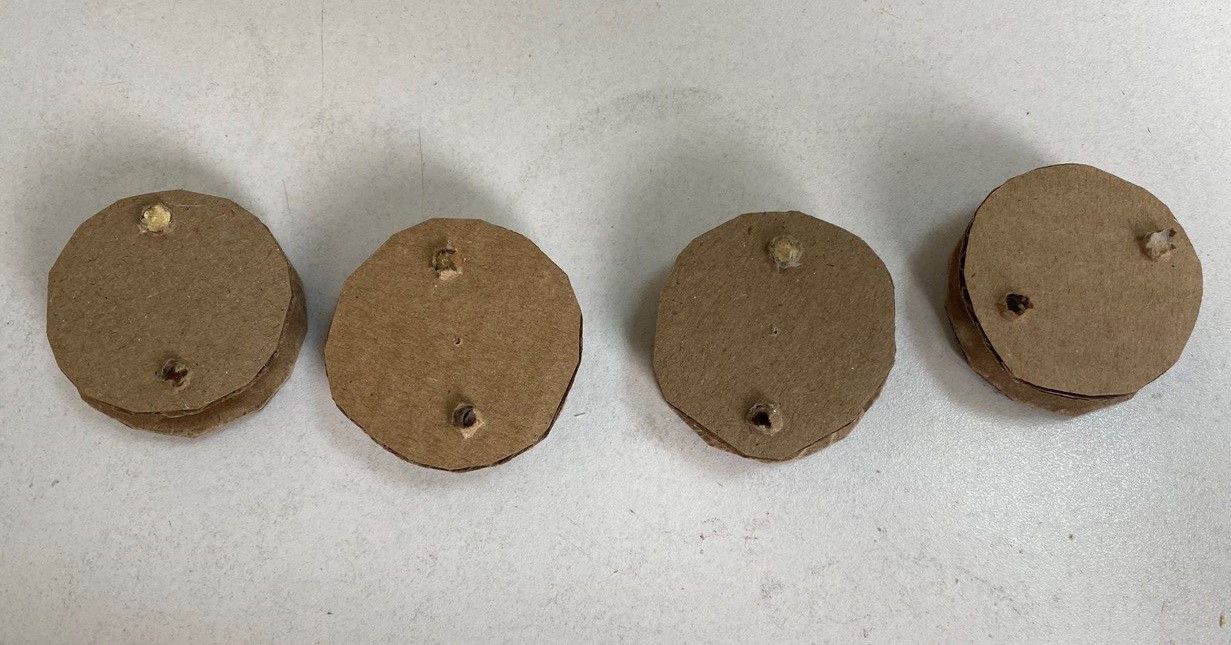
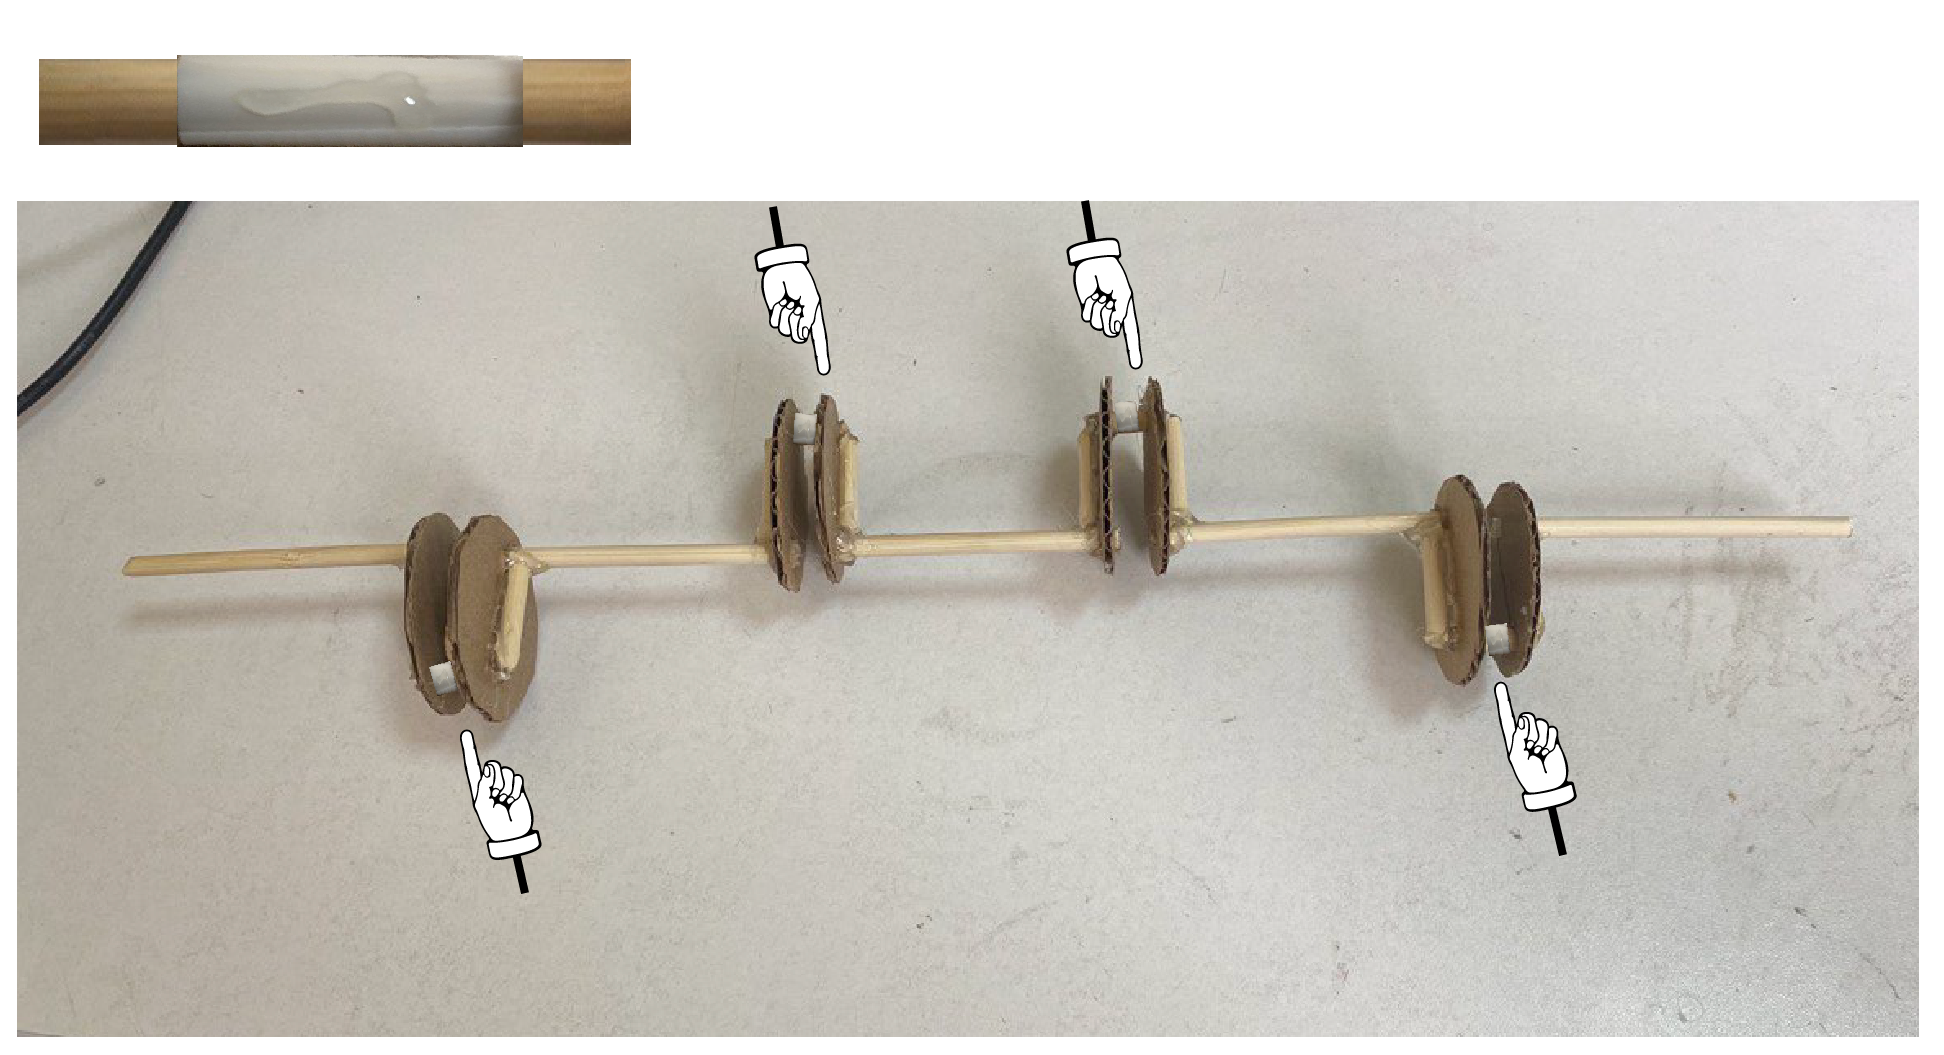
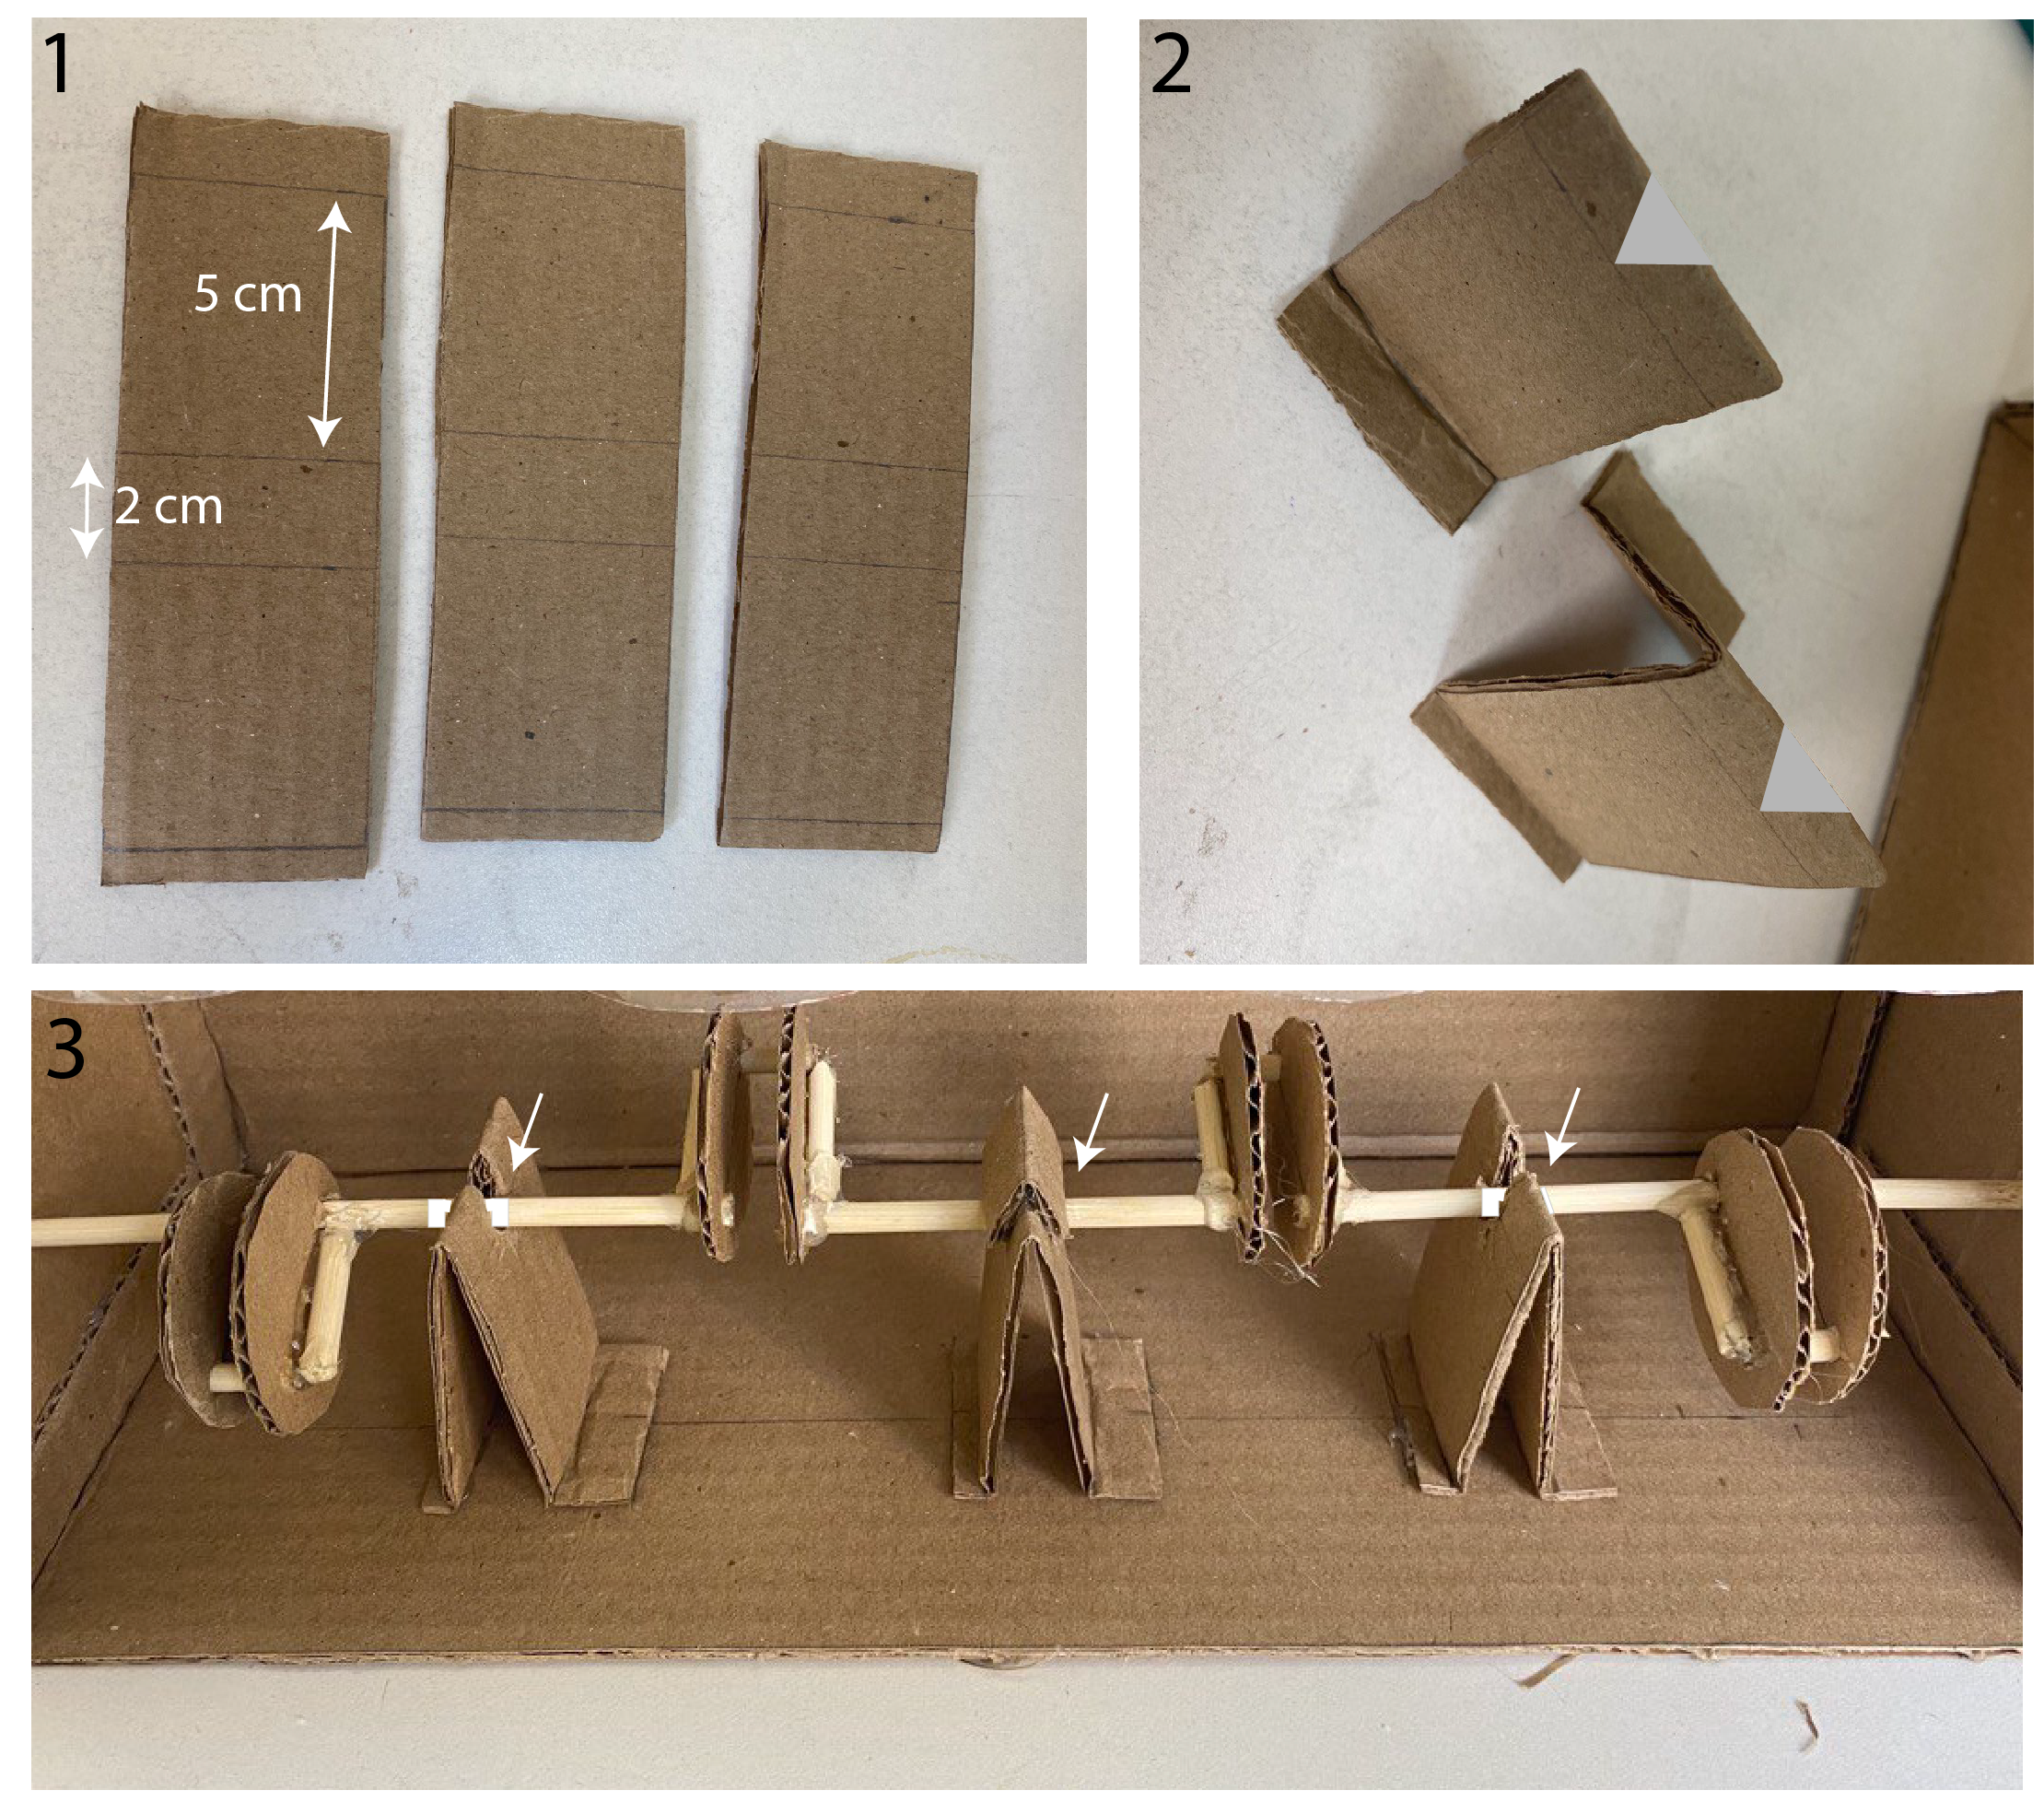
- Insert 4 cm skewers into the holes of 2 circles so that there is a 1 cm space between the circles.
- Apply glue to the outside of the part (the area shown by the green arrows). Check the right angle between the skewer and the circle with a ruler.

Attach the skewer to the rest of the circles in the same way.
Connect the circles with pieces of skewers (sizes and attachment points are shown in the picture below). Use thermoplastic glue.
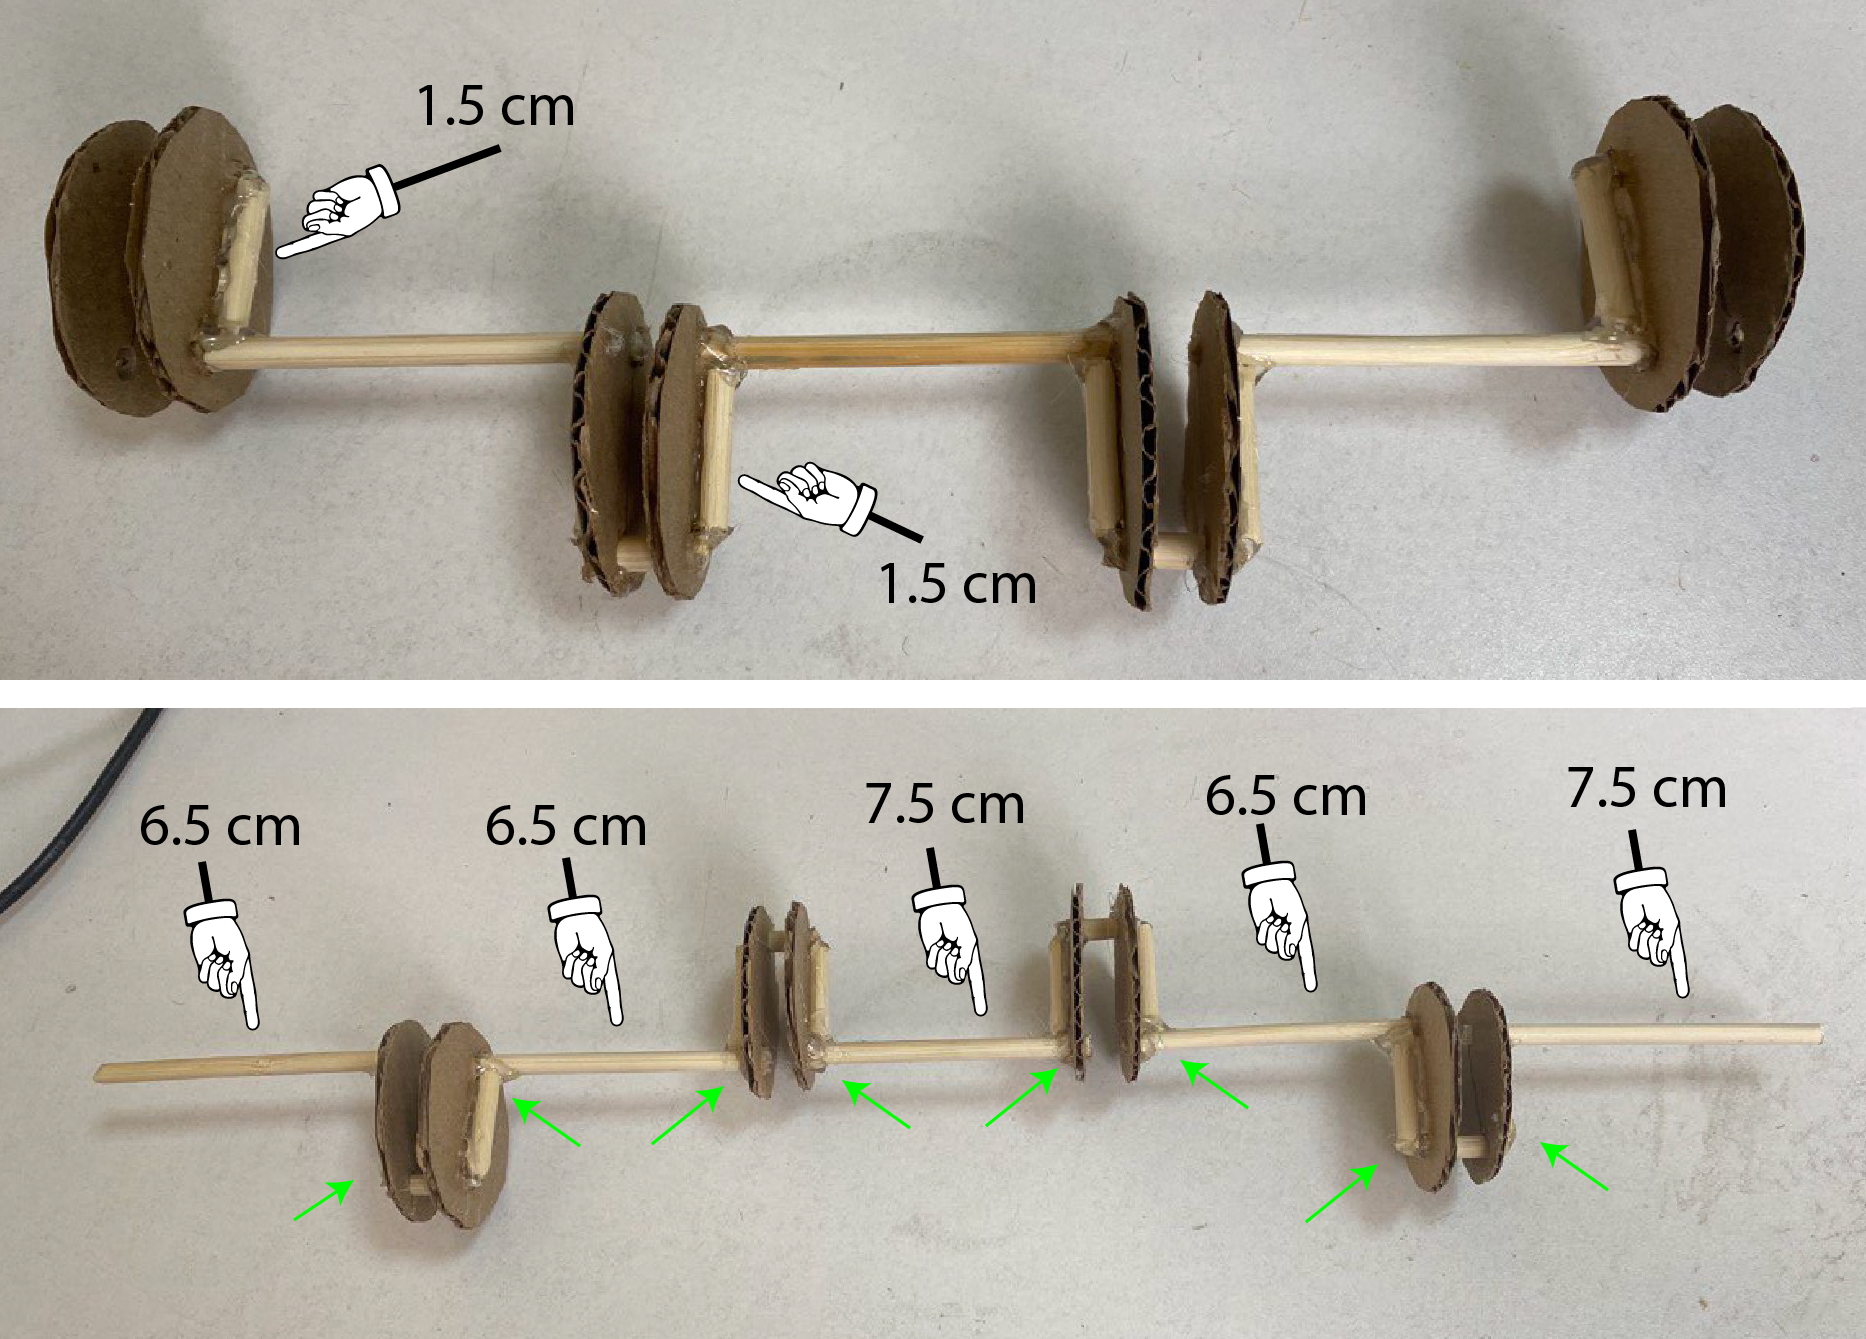
Wrap the skewers with a piece of juice straw in the manner shown earlier (the areas are indicated in the picture below).
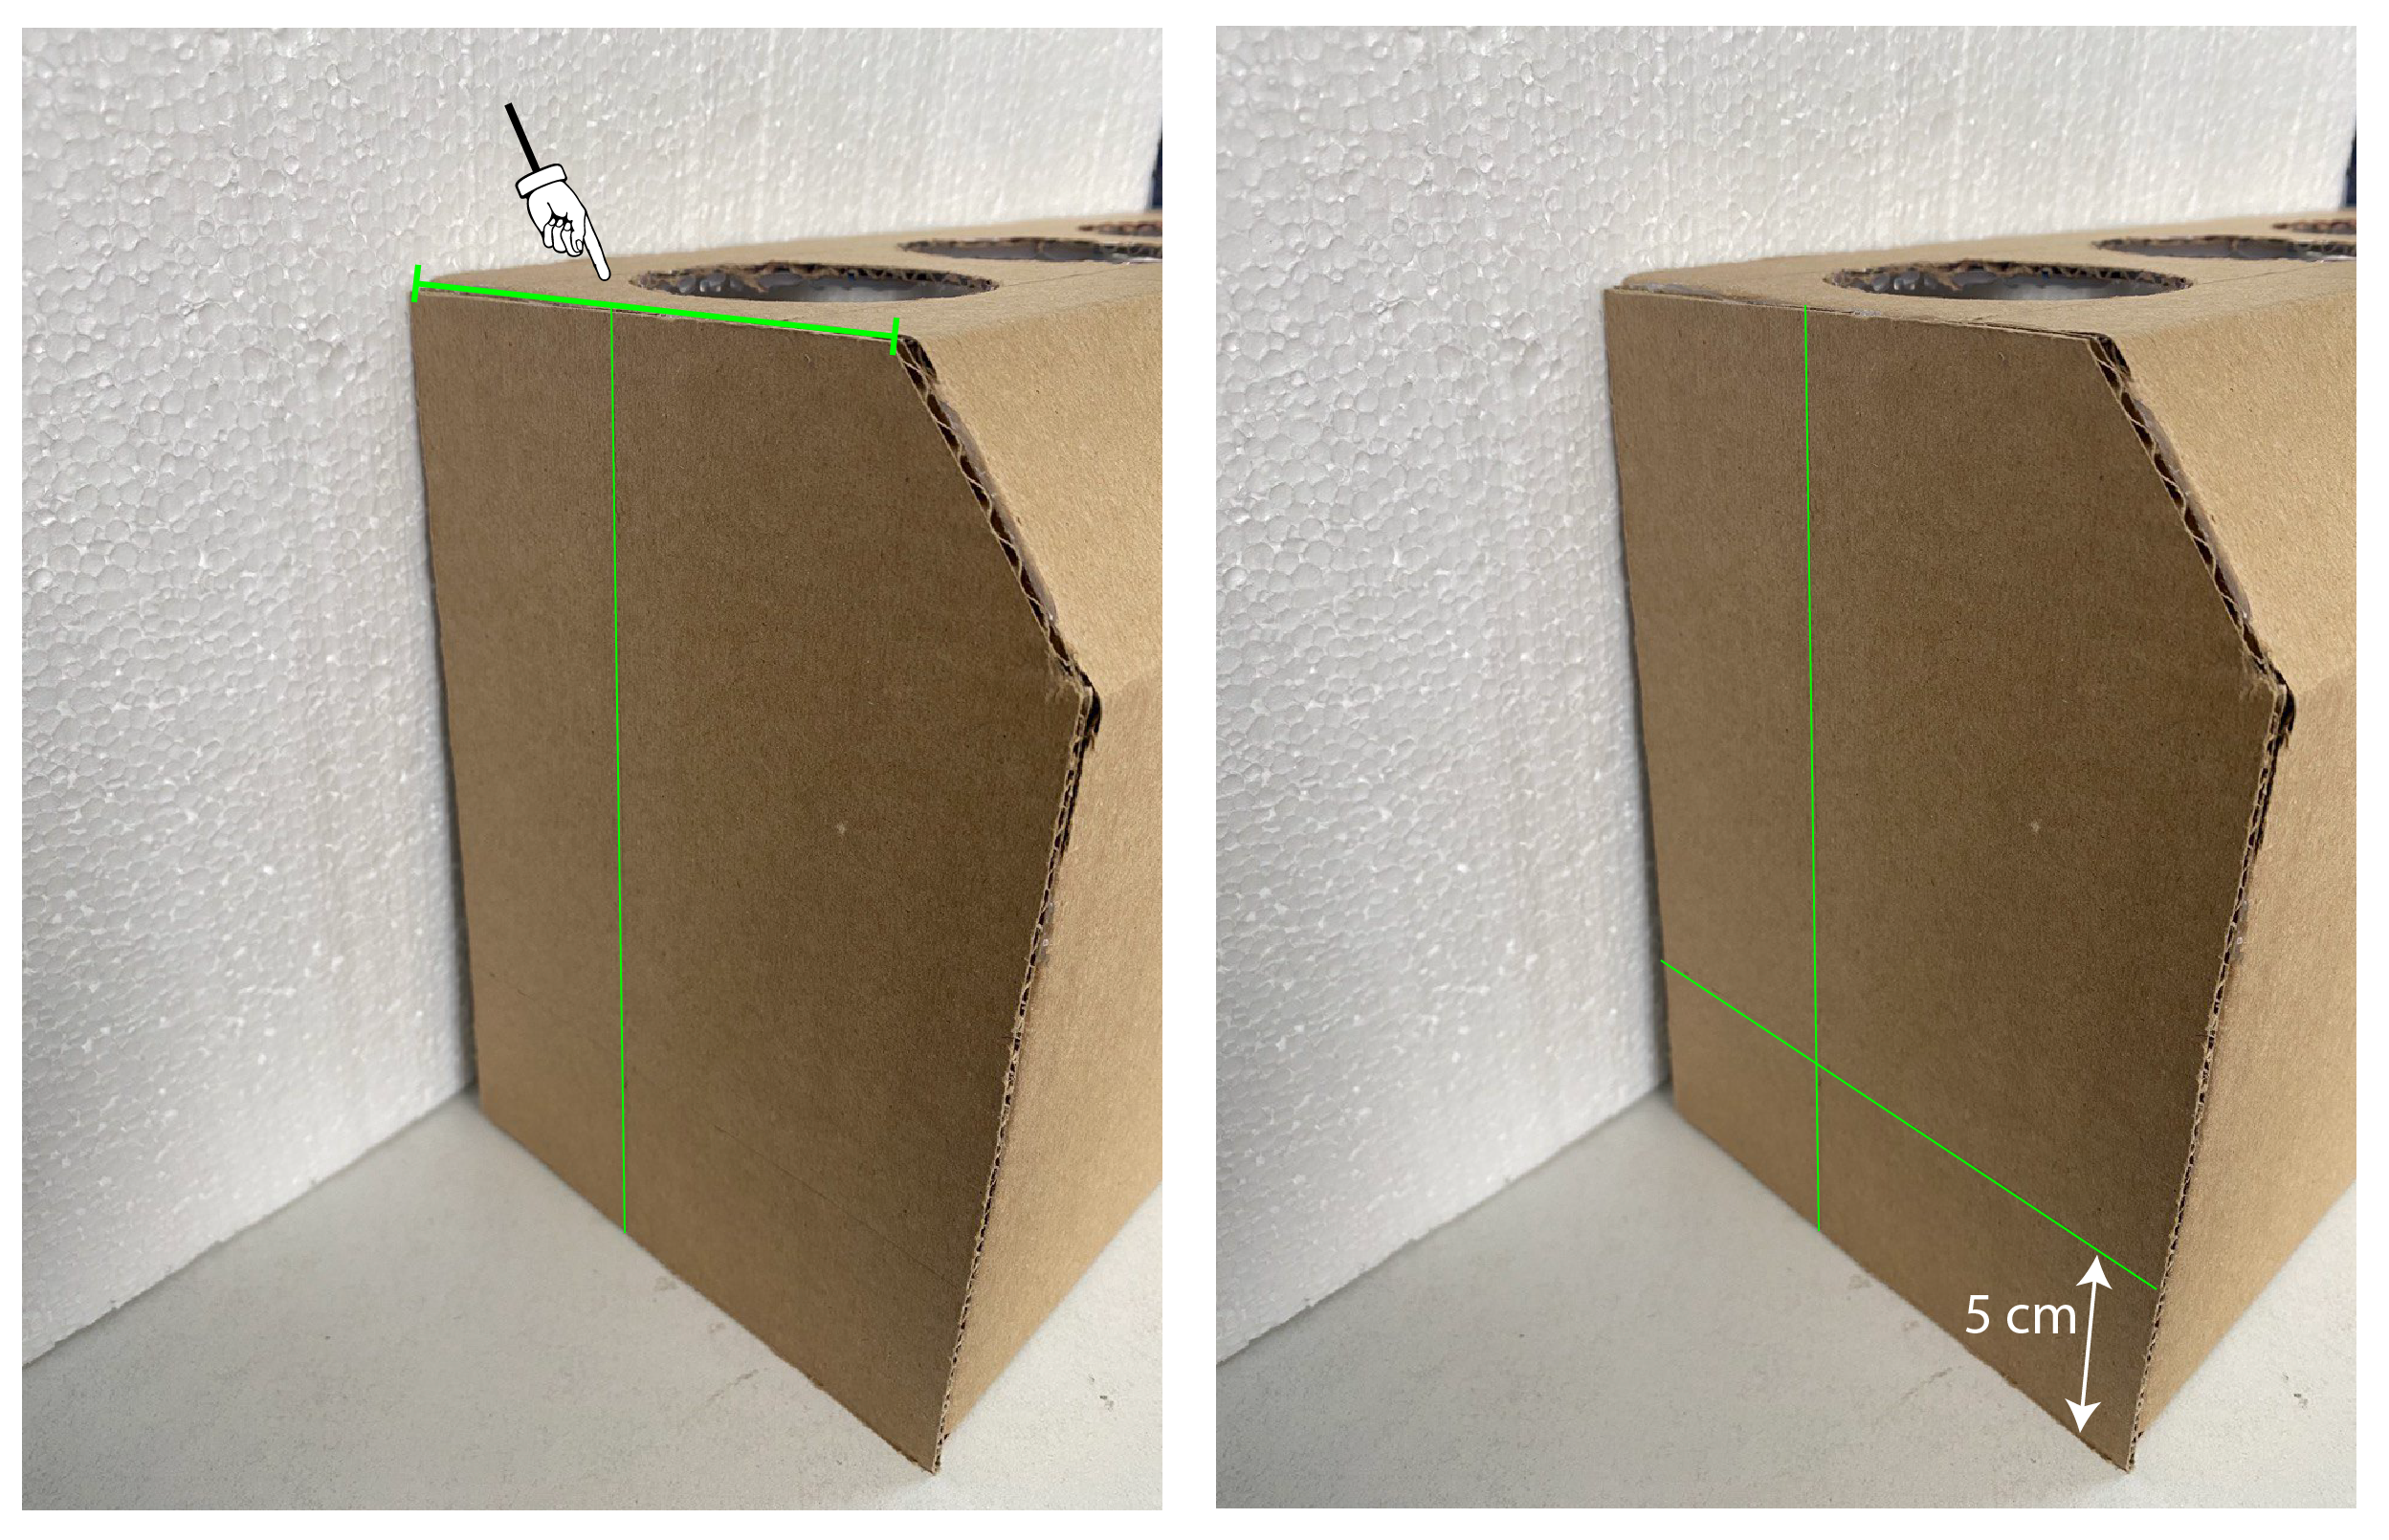
- Divide the top of the ICE layout in half and draw a perpendicular through the middle.
- Step back from the bottom of the layout 5 cm and draw a perpendicular to the previous line.
- Draw lines on the other side of the layout in the same way.
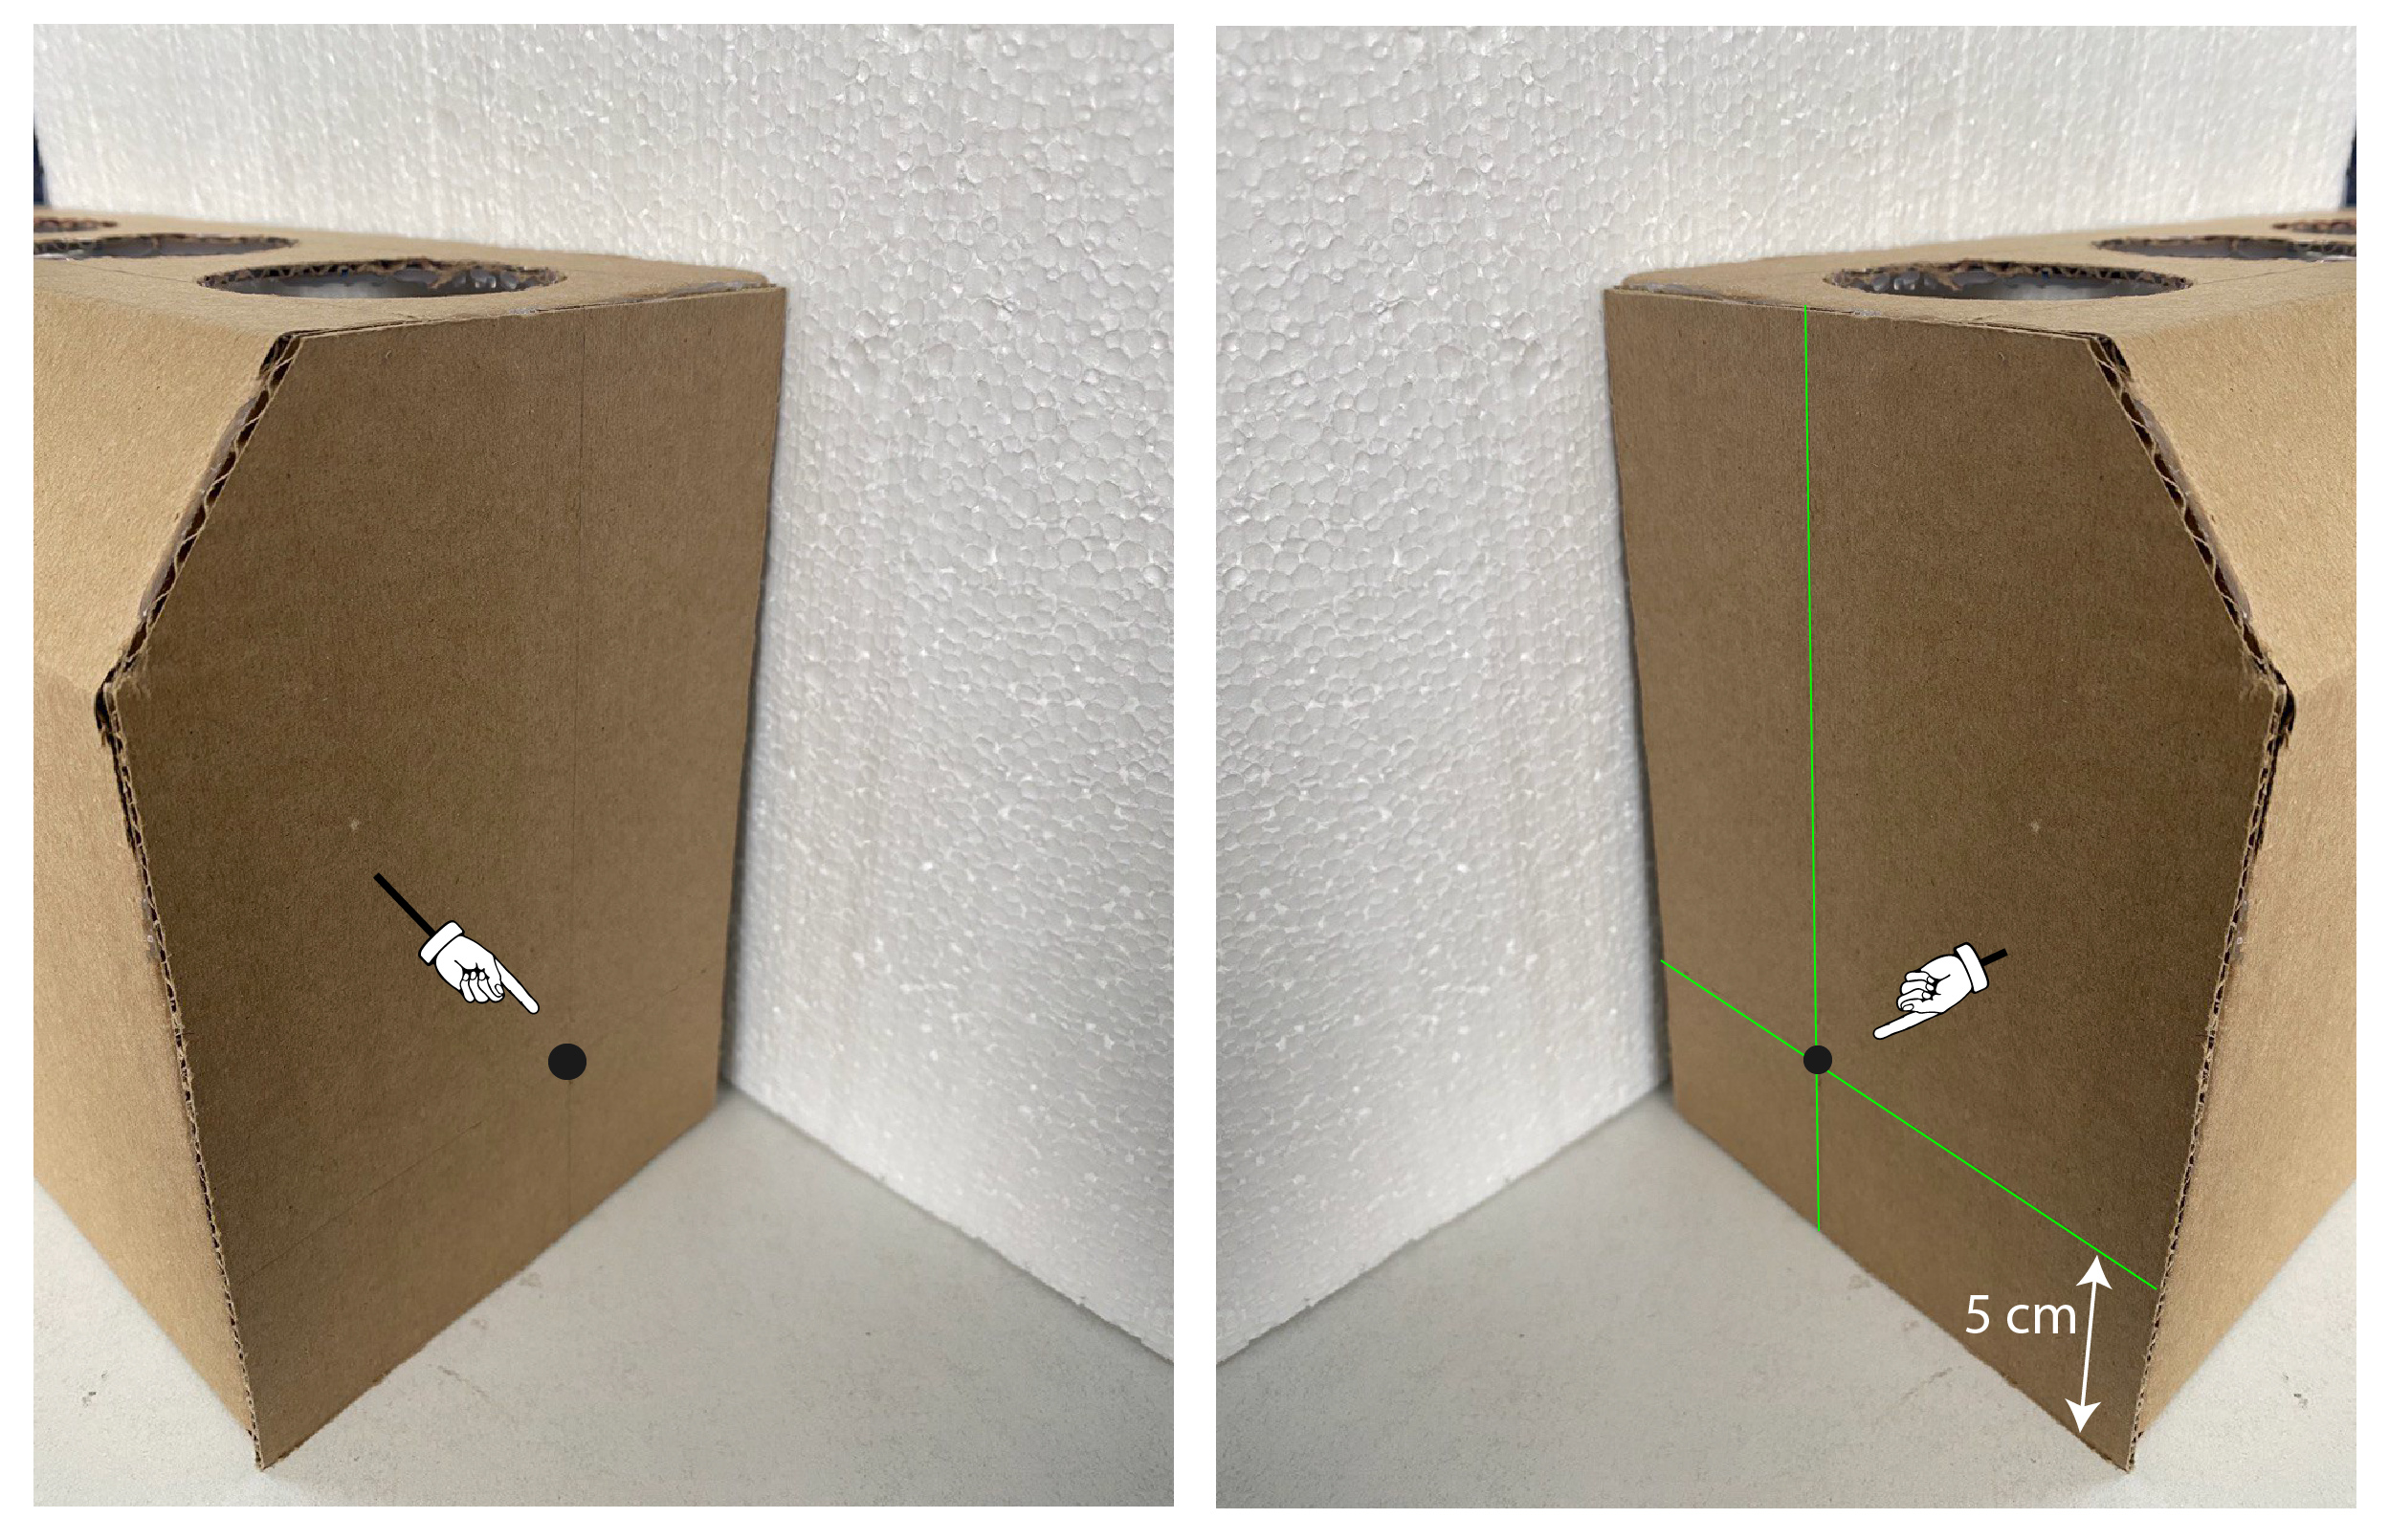
Make holes for the skewers at the intersections of the line (the points are indicated in the picture below).
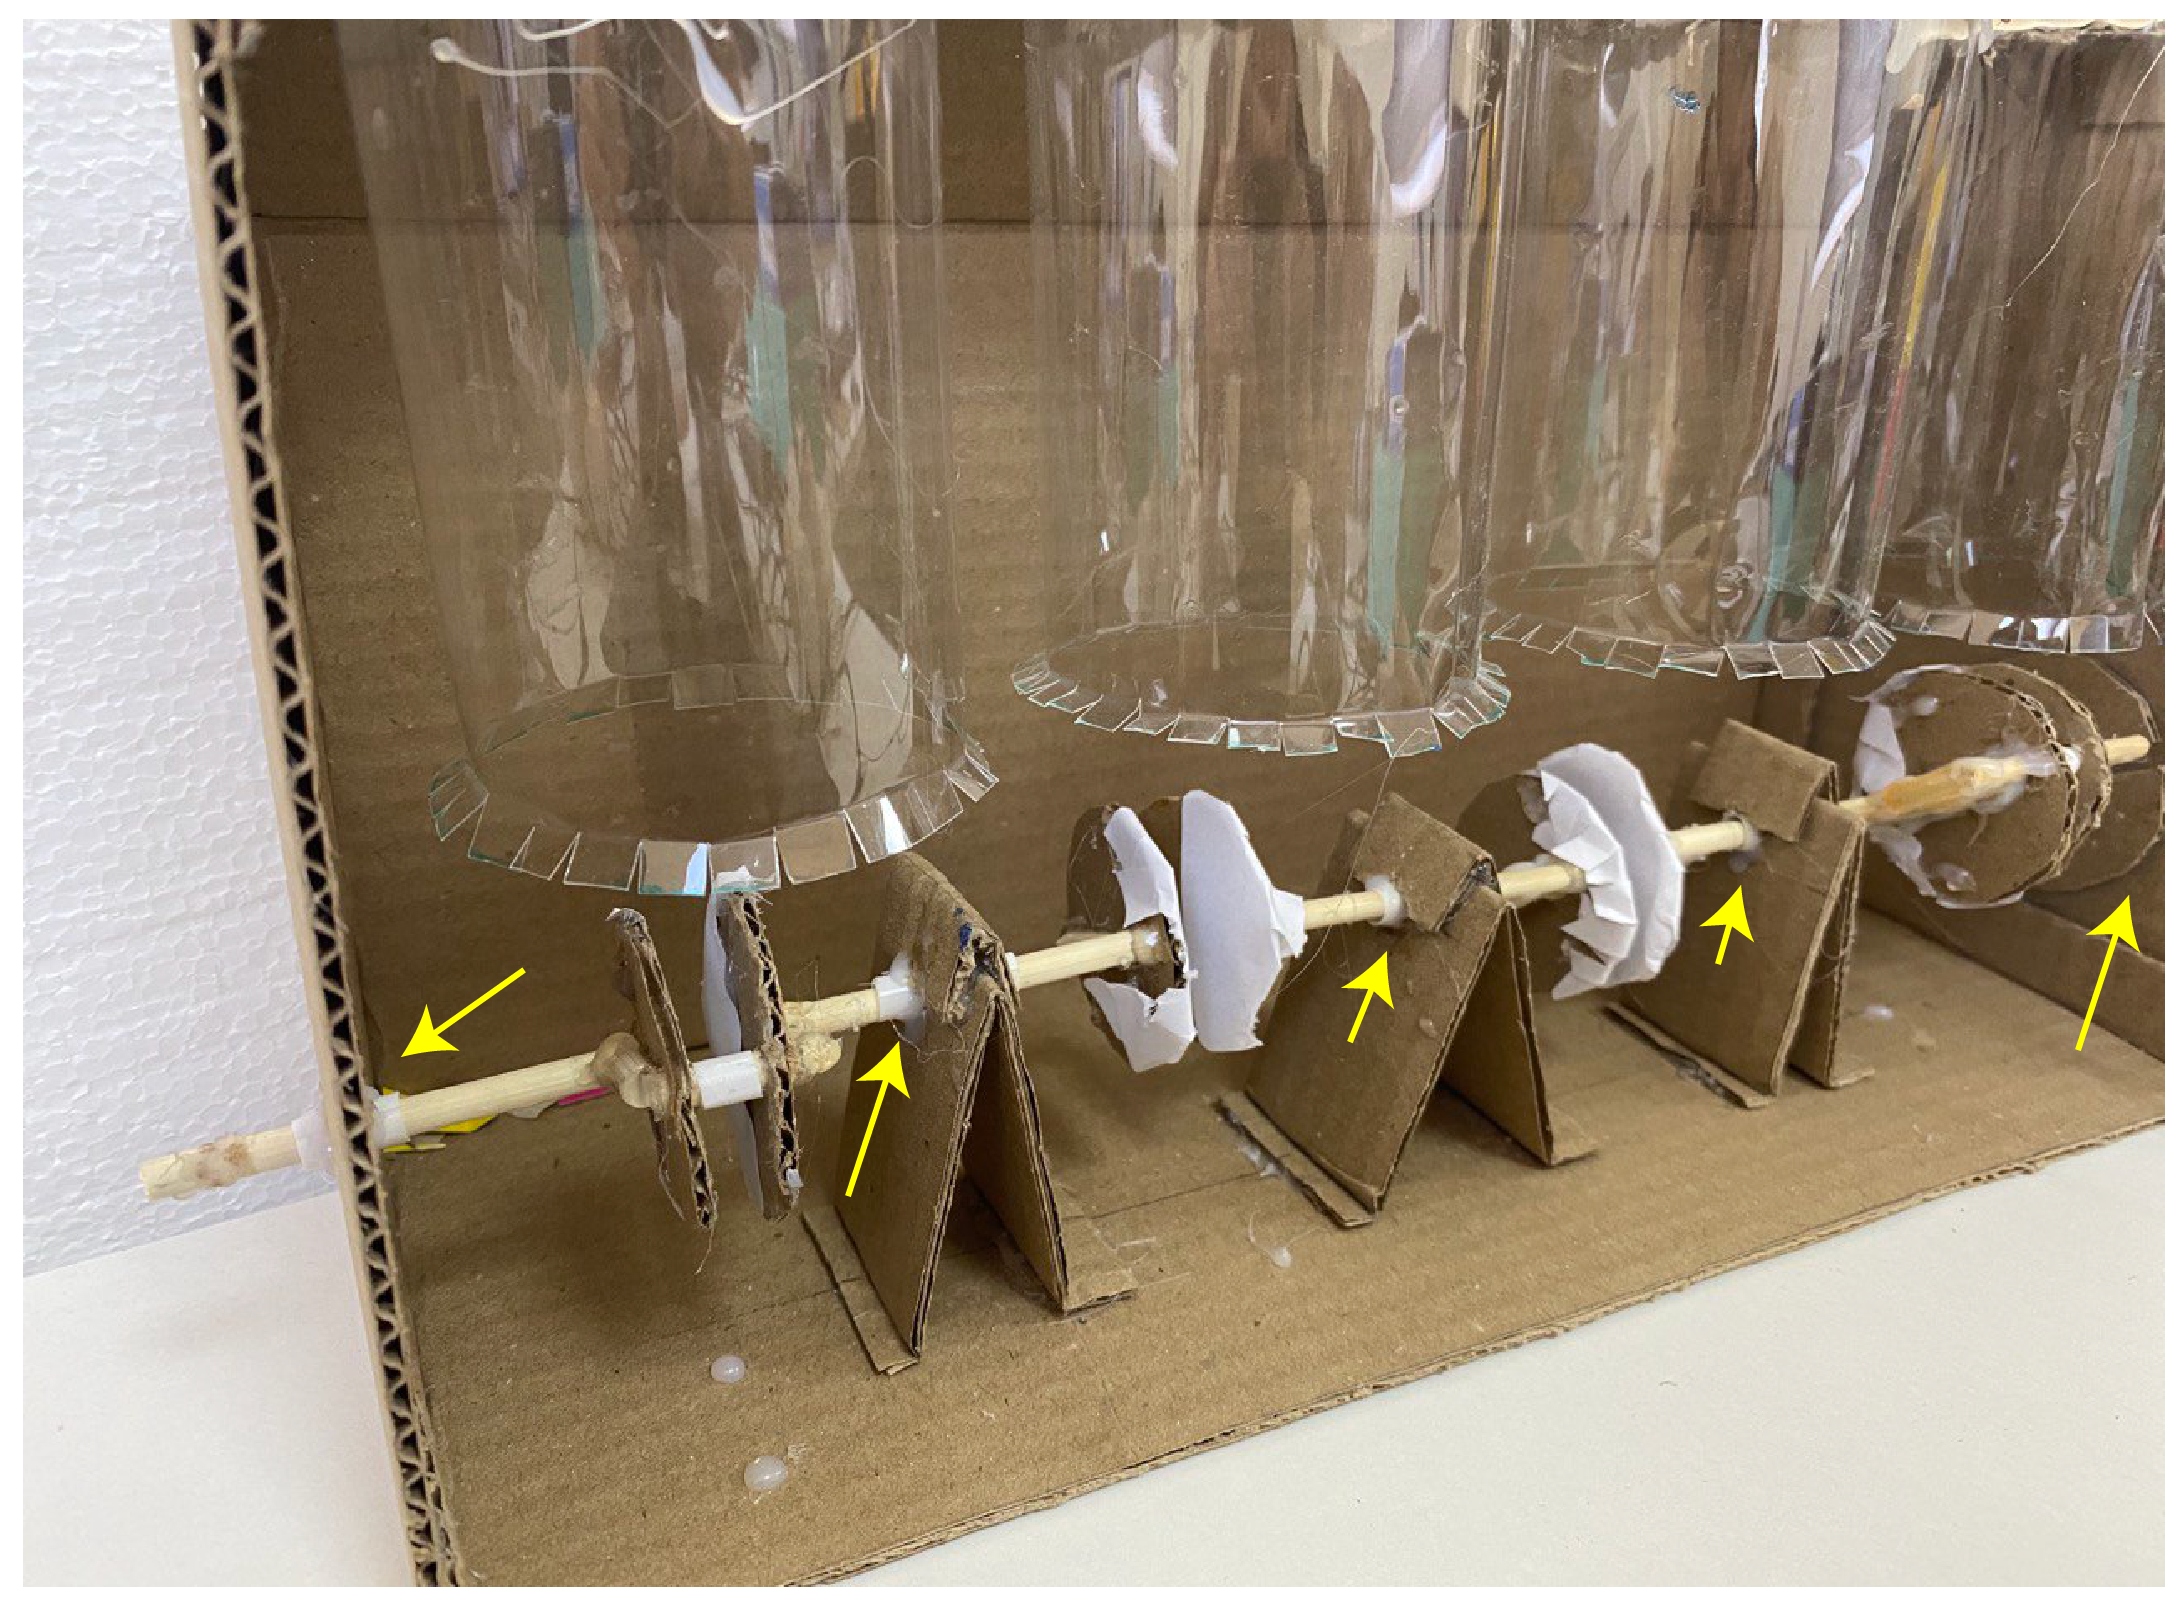
- Install the part with circles in the holes made as shown in the picture. Try to fit the circles in the middle under the plastic connectors for the cylinders.
- Before installing the part with circles, wrap the places where the skewers pass through the holes with a piece of a juice straw (this measure is necessary to ensure smooth movement of the internal combustion engine parts; the areas are indicated by yellow arrows).
- The dimensions of the parts for additional support of the skewers are shown in the picture below.
- It is necessary to put skewers in the triangular holes of the parts for support. After installing the skewers, the upper part must be closed with a piece of cardboard and glue. (The skewer should not be too tight in the hole. Try to set the skewer so that it can rotate freely in the hole).
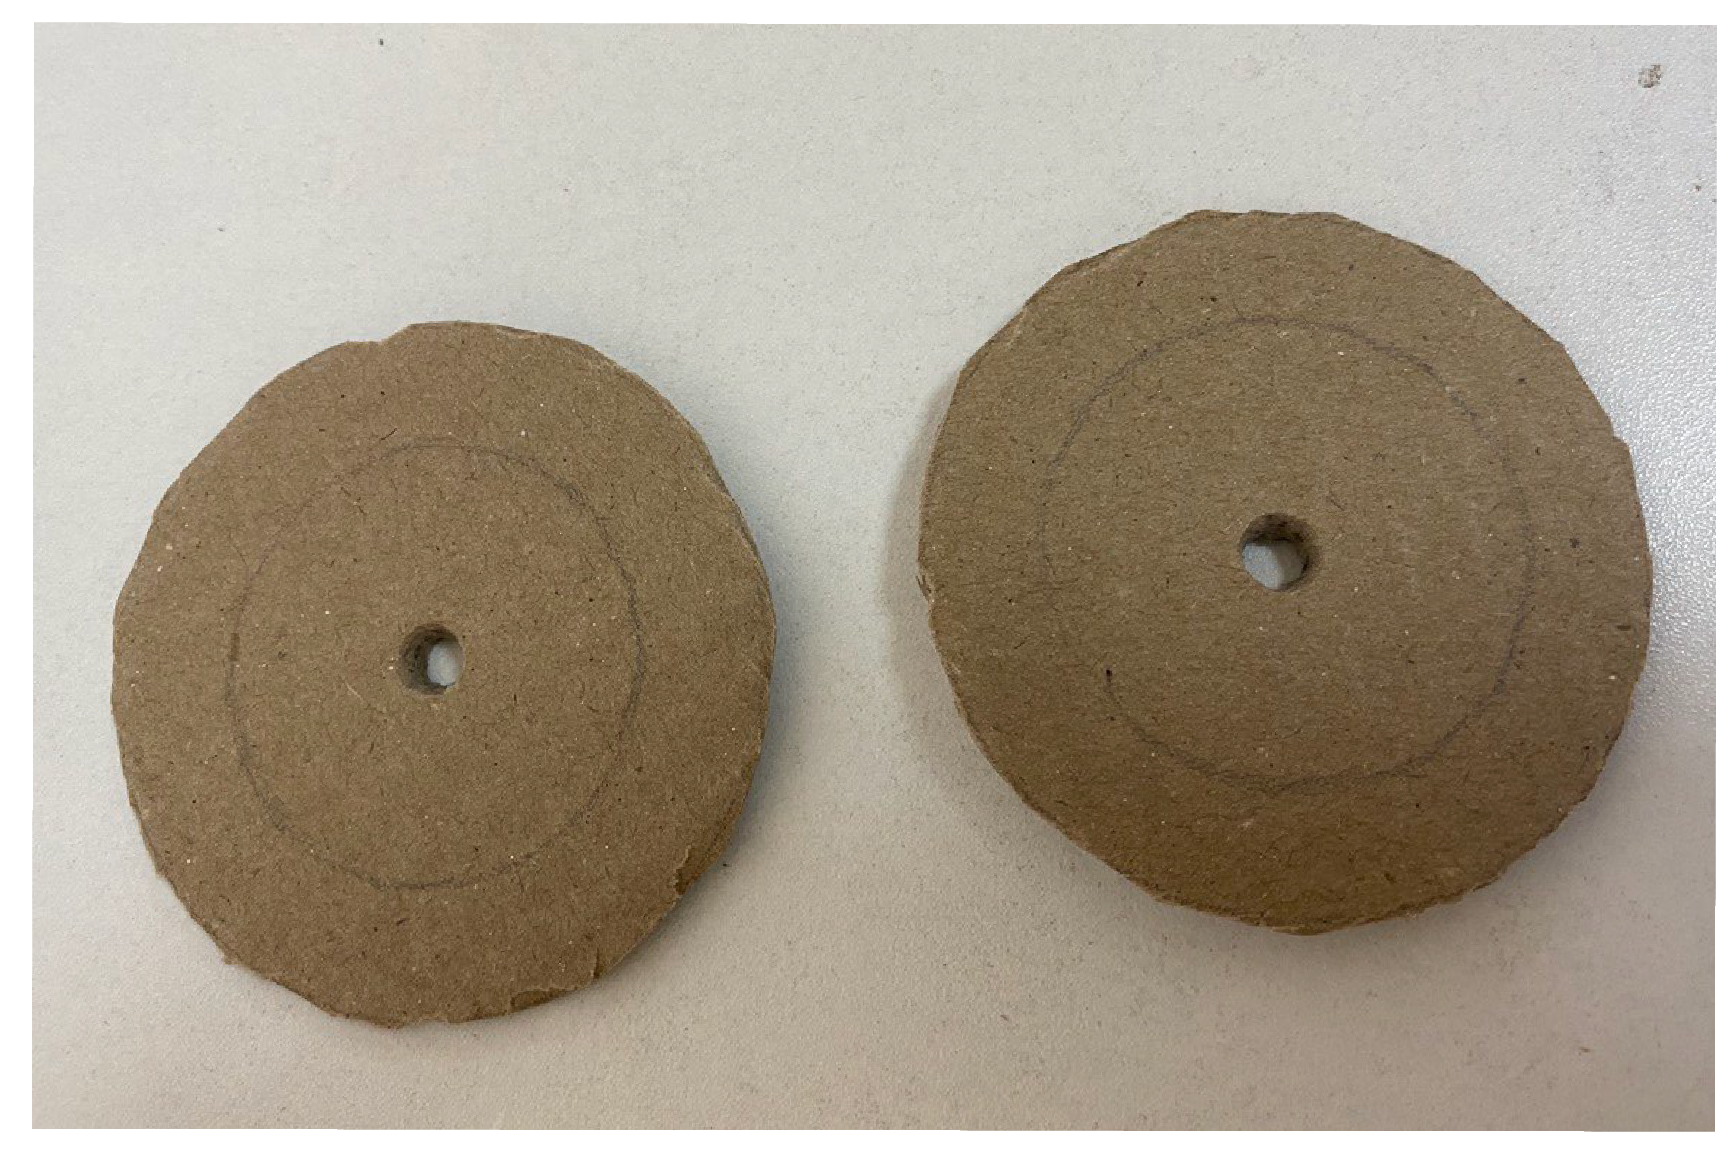
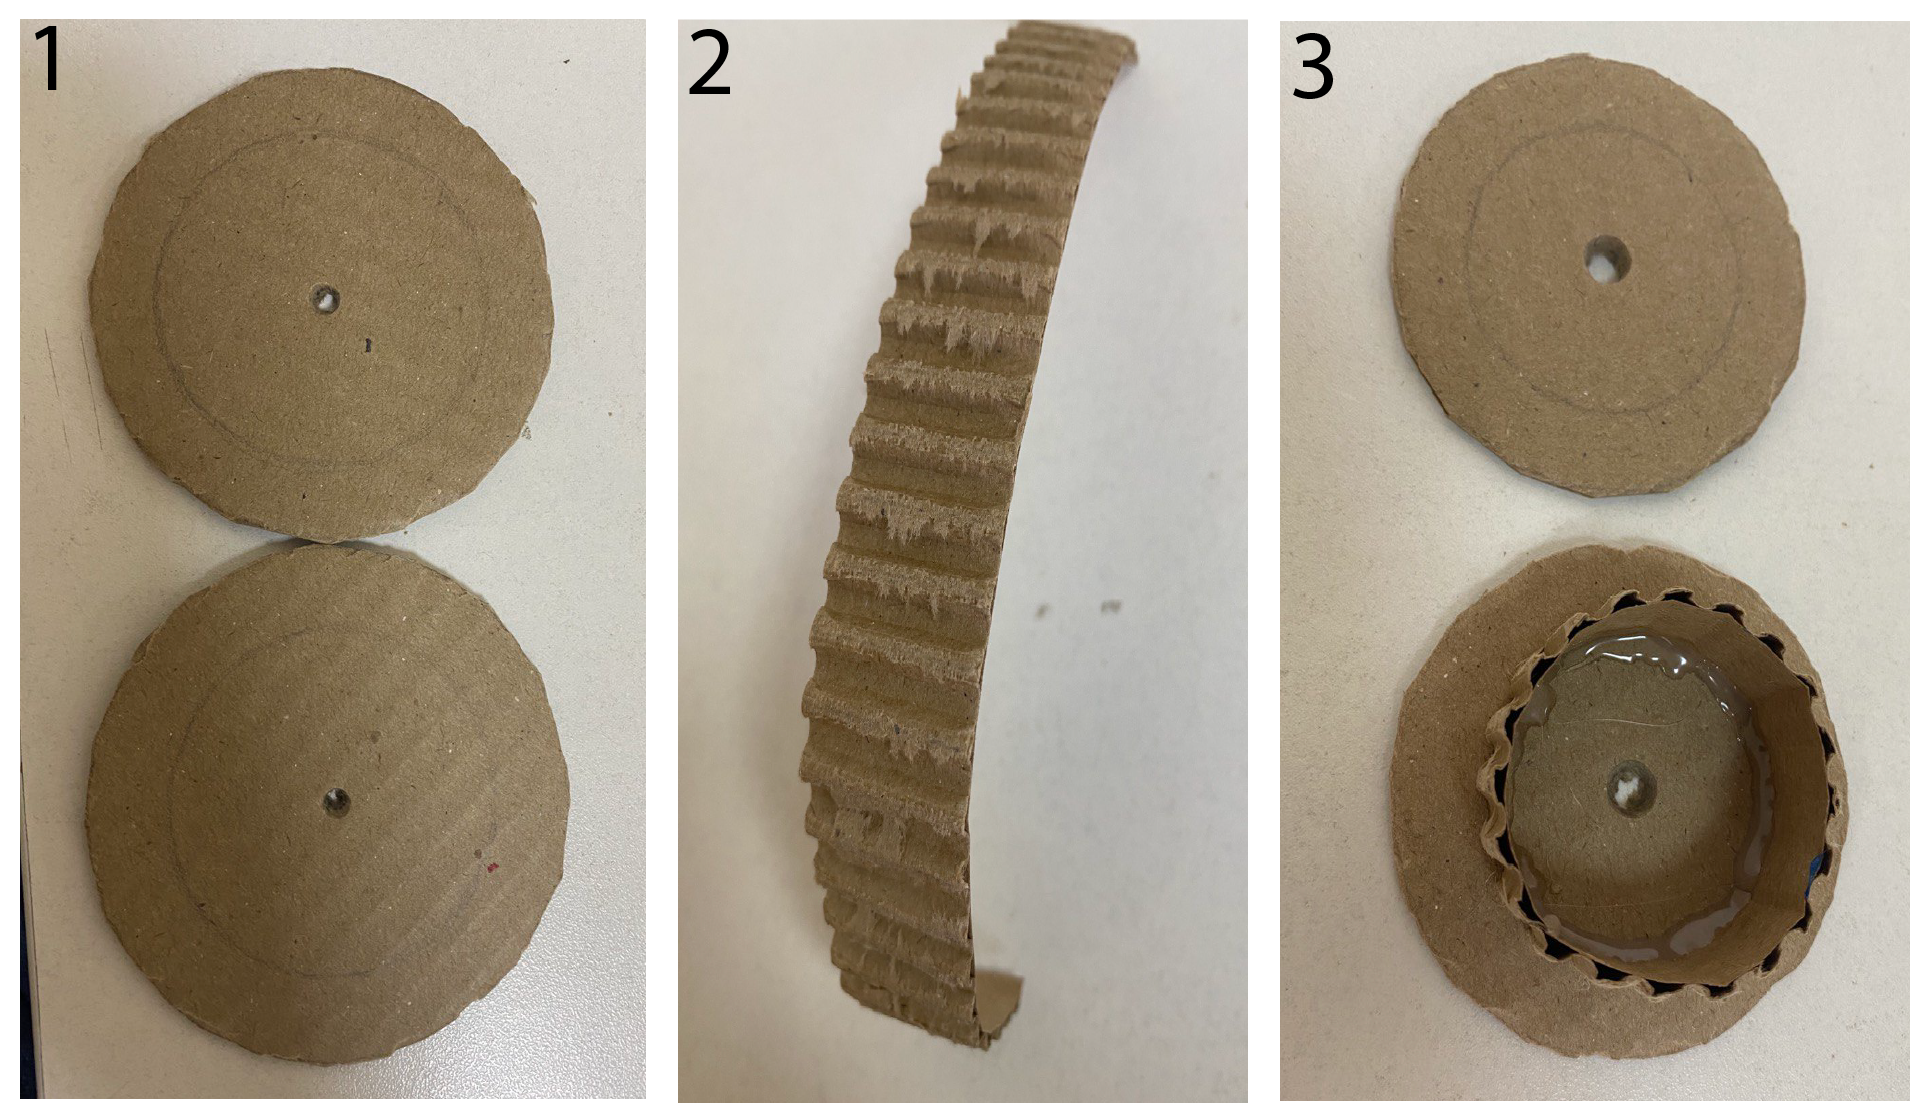
- Cut out 2 circles with a radius of 3 cm from cardboard.
- Draw a circle with a radius of 2 cm on the circles.
- Make holes for the skewers in the center of the circles.
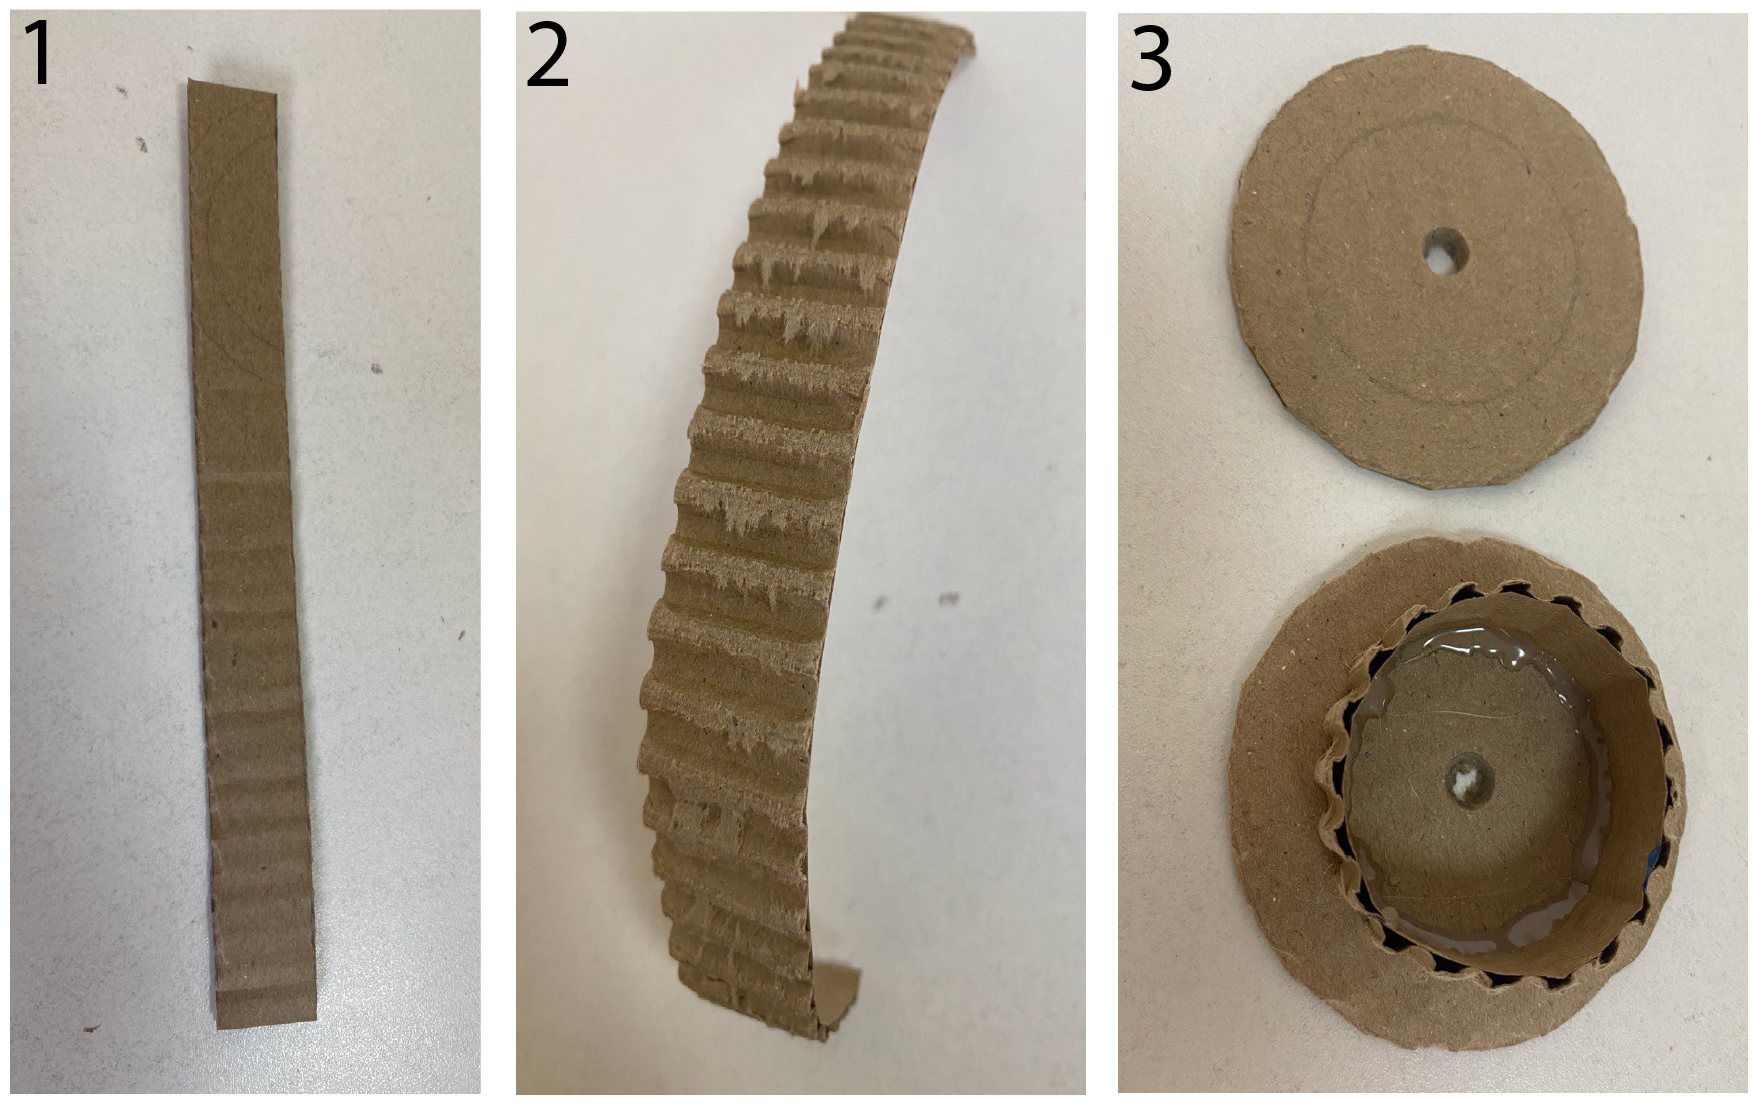
1. Calculate the length of the inner circle using the formula from geometry. Cut a piece of cardboard 2 cm wide and equal to the length of the inner circumference (take the length of the cardboard 1 cm longer than the circumference, you can cut off the unnecessary part after attaching the parts).
2. Remove one surface of the cardboard with a skewer.
3. Glue a piece of cardboard to the inner circle. Apply glue to the inside.
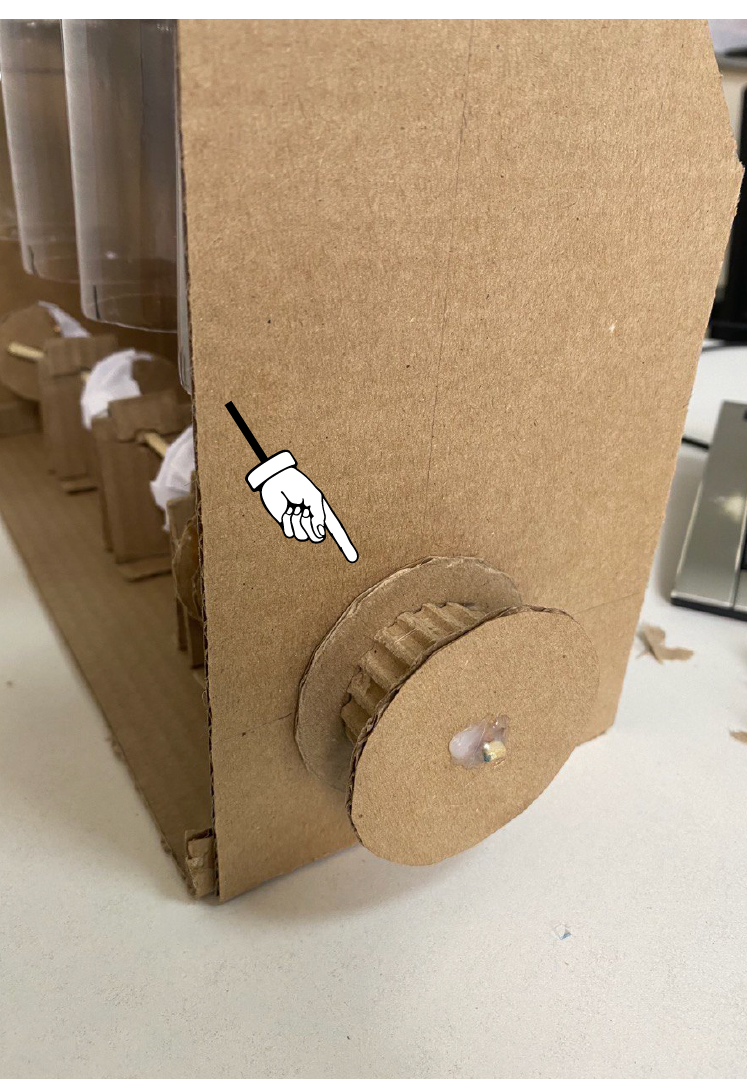
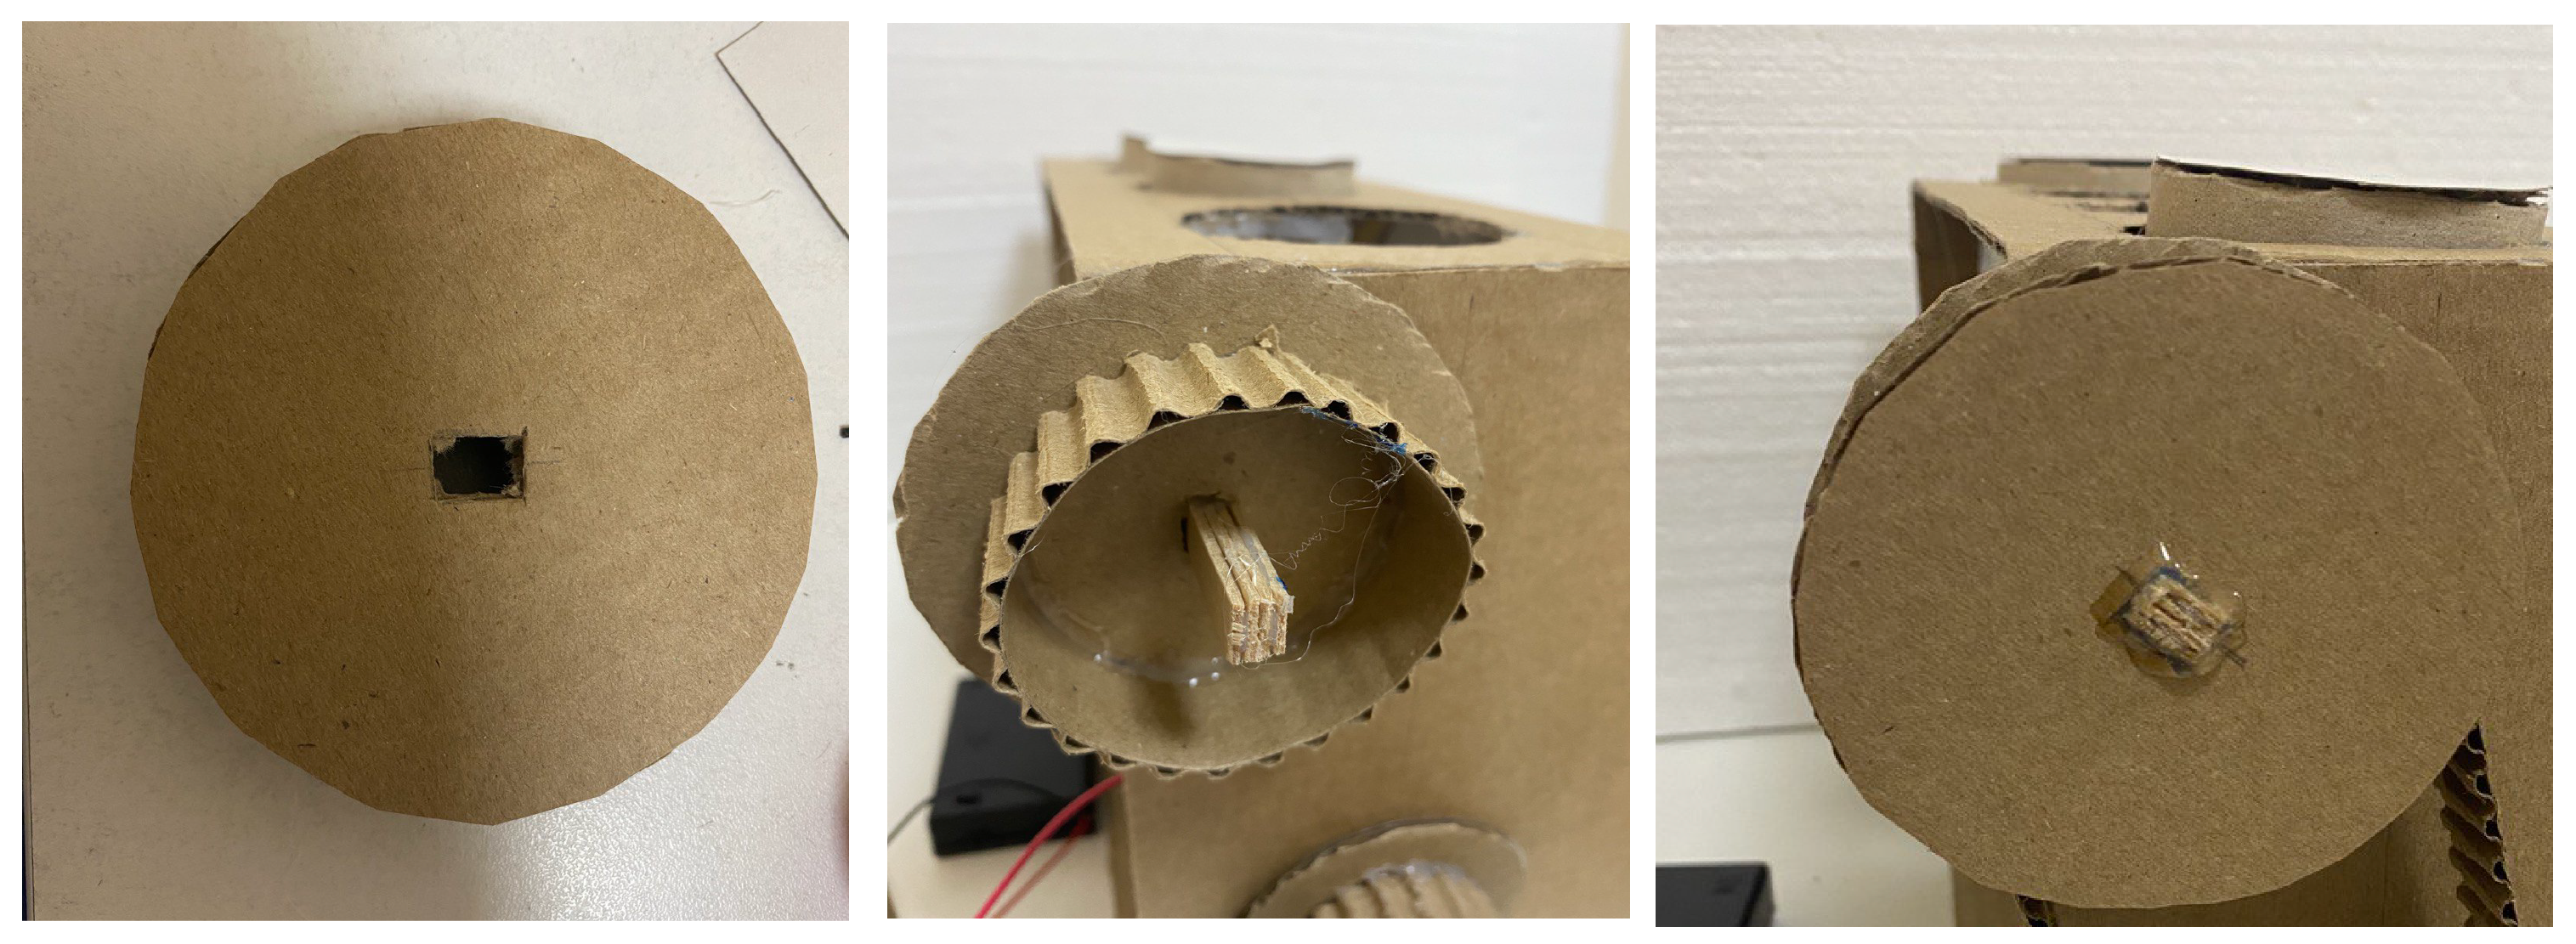
- Install the resulting part on the left side of the engine layout (when viewed from the front).
- First set the first part of the circle with the cardboard attached to the skewer. Leave a space of 2mm between the layout and the circle. Secure the parts by applying glue to the middle. After the glue has dried, apply glue to the inner circumference of the second circle and put the second piece on the skewer. Apply glue to the middle of the second circle to secure the pieces.
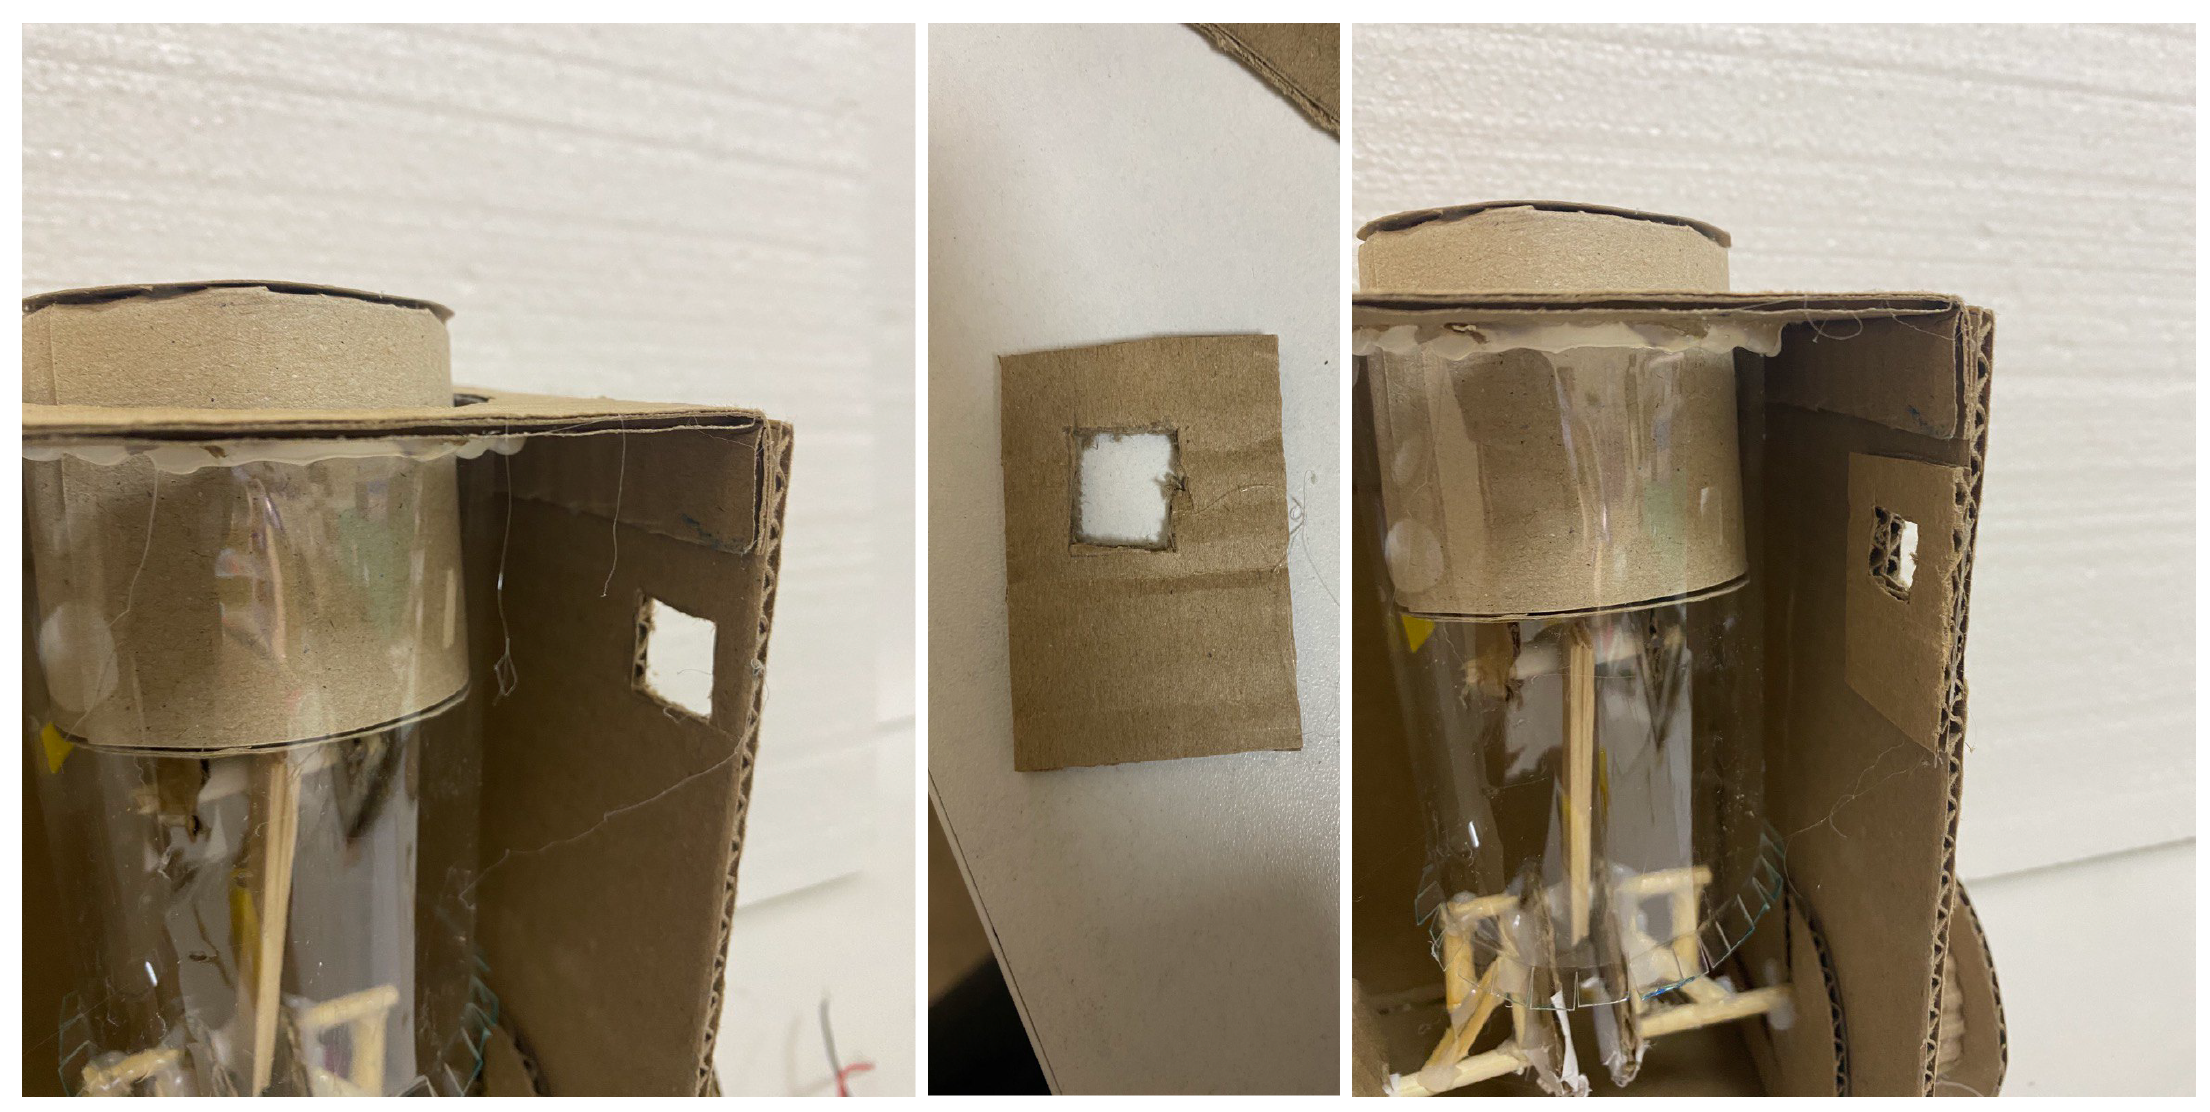
- Step back from the top 2 cm and 1 cm from the right side. Draw a 1 cm x 1 cm square and cut it out (the area is shown in the picture).
- Glue on top of the square area a piece of rectangular cardboard with a square connector as shown in the picture below (the size of the piece of cardboard should approximately match the size of the motor with the gearbox).
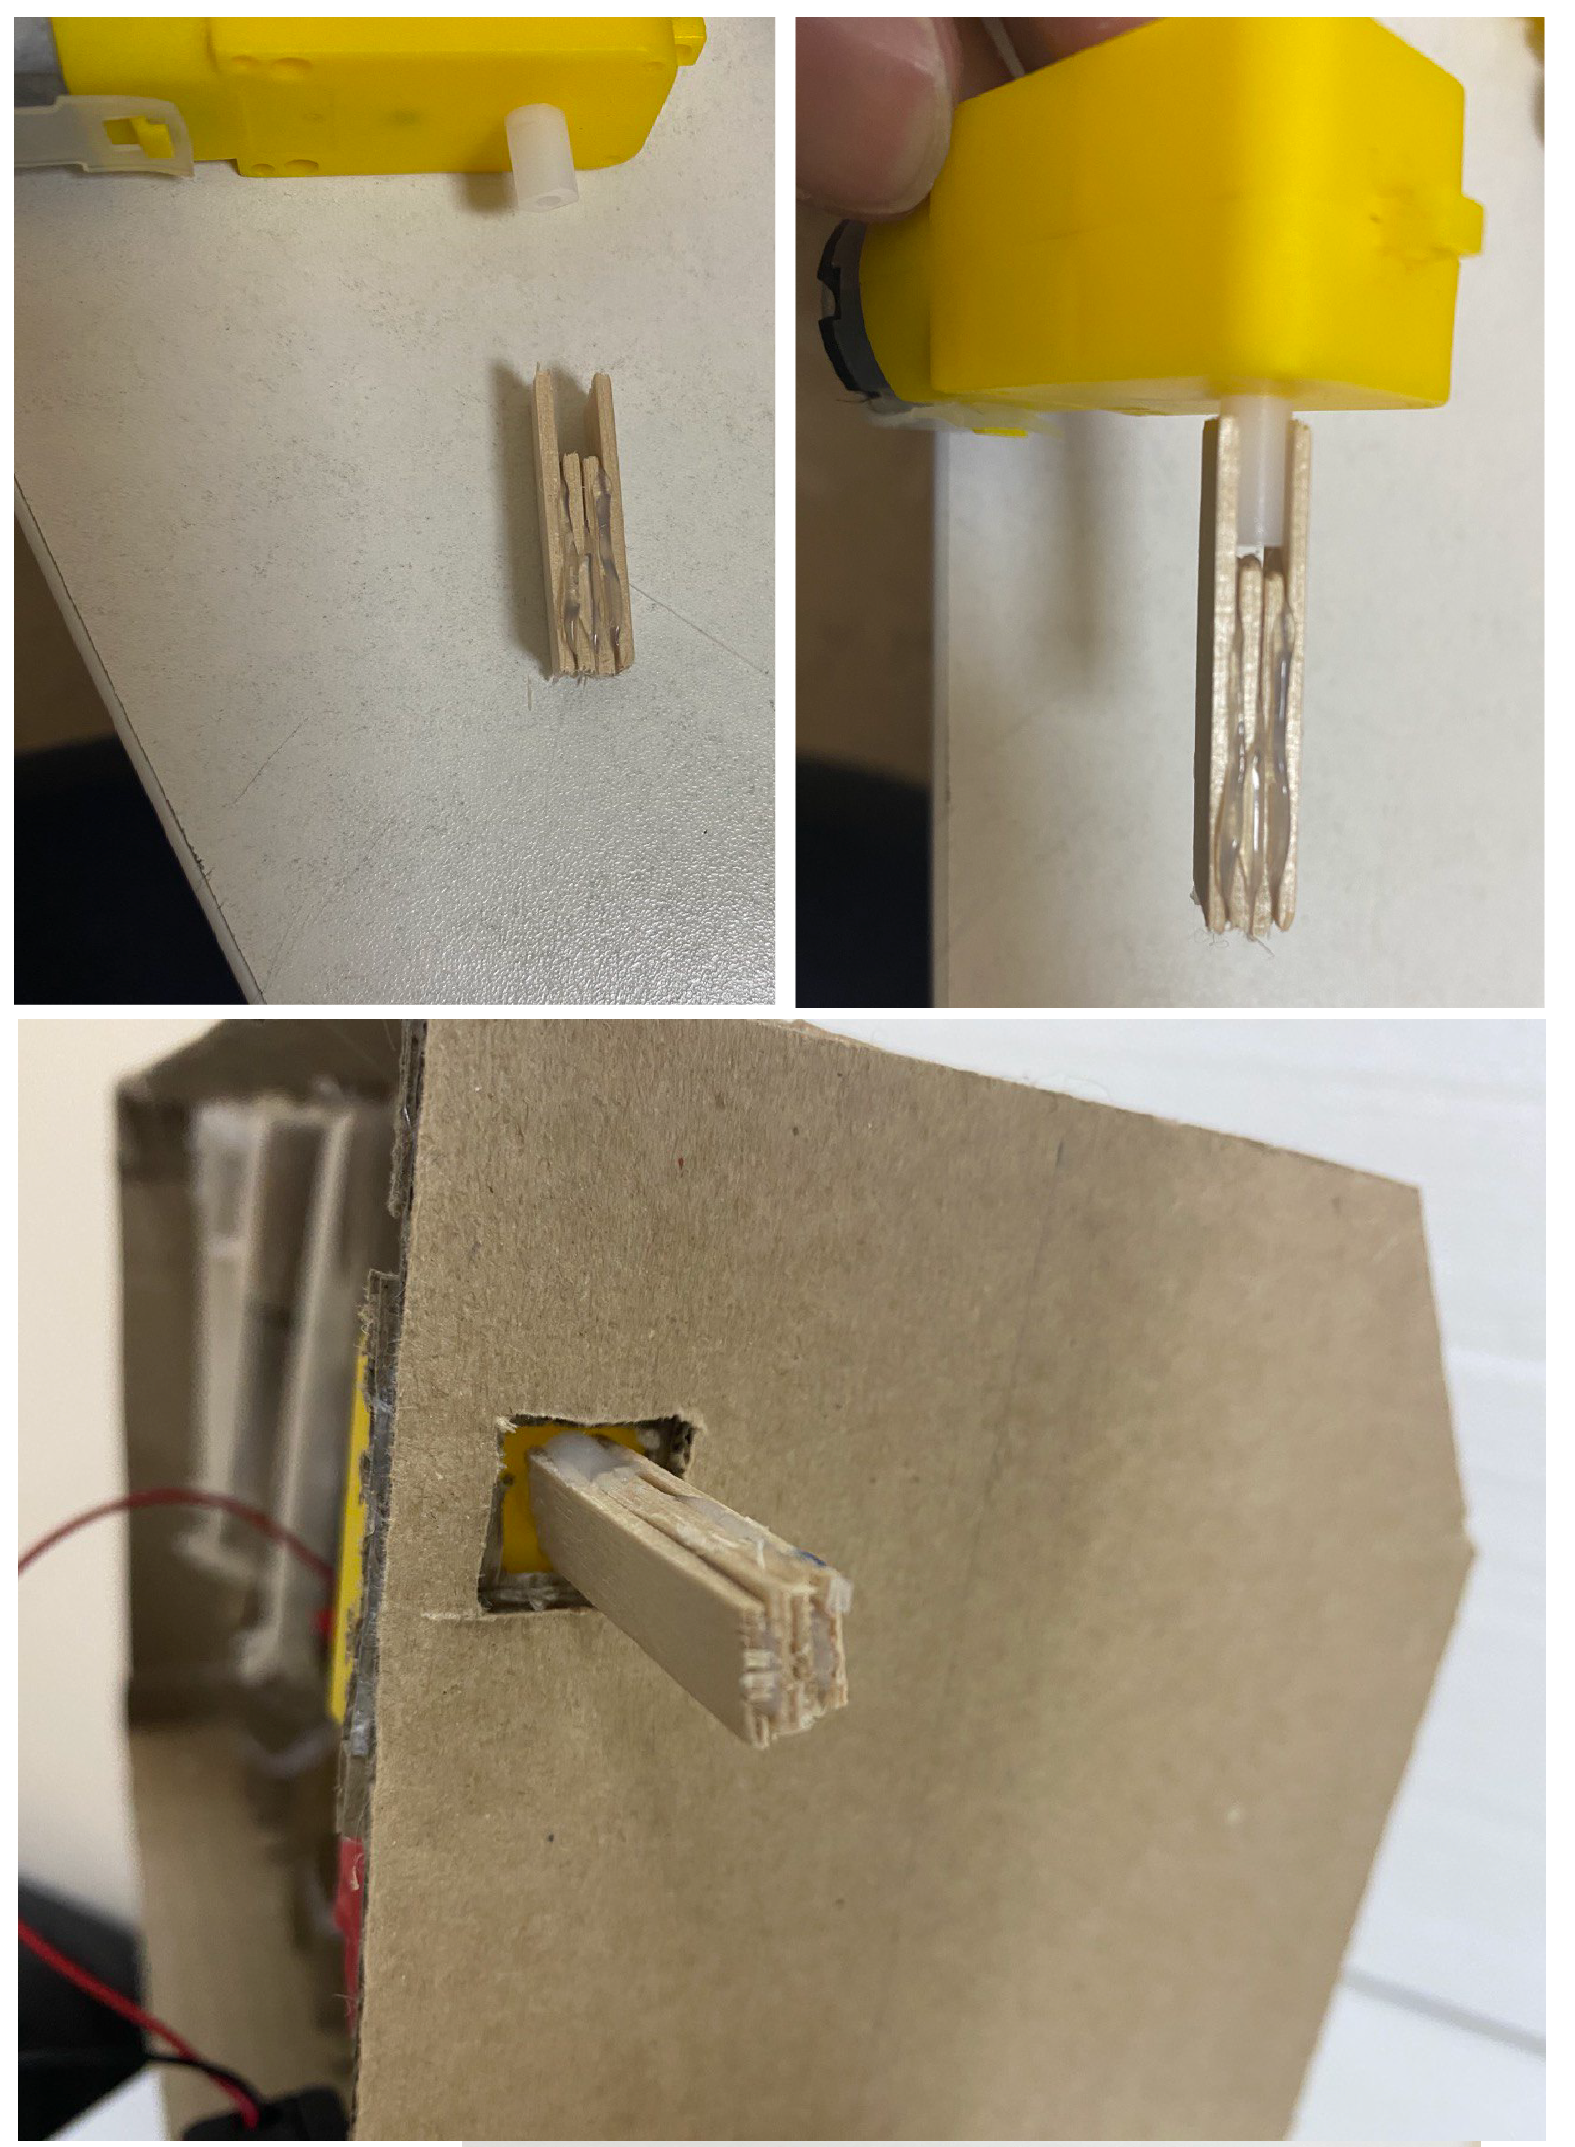
- Combine the pieces of ice cream sticks into the shape shown in the picture using thermoplastic glue to connect them.
- Glue the resulting part with thermoplastic adhesive to the geared motor
- Glue the motor with the gearbox to the cardboard by placing a piece of wood in the square hole.
1.
- Cut out 2 circles with a radius of 4 cm from cardboard.
- Draw a circle with a radius of 3 cm on the circles.
- Make holes for the skewers in the center of the circles.
Calculate the length of the inner circle using the formula from geometry. Cut a piece of cardboard 2 cm wide and equal to the length of the inner circumference (take the length of the cardboard 1 cm longer than the circumference, you can cut off the unnecessary part after attaching the parts).
2. Remove one surface of the cardboard with a skewer.
3. Glue a piece of cardboard to the inner circle. Apply glue to the inside.
First, install the first part of the circle with the cardboard attached to the wood piece. Leave a space of 2mm between the layout and the circle. Secure the parts by applying glue to the middle. After the glue has dried, apply glue to the inner circumference of the second circle and slide the second circle onto the piece of wood. Apply glue to the middle of the second circle to secure the pieces.
1 .
- Wrap the rope around the two resulting circles and measure the length.
- Take a piece of cardboard 1.8 cm wide and 1 cm longer than the length of the rope.
2. Remove one surface of the cardboard with a skewer to get convex shapes like in the picture below.
3. Wrap two circles with the resulting piece of cardboard. Secure the end of the piece of cardboard with thermoplastic glue.
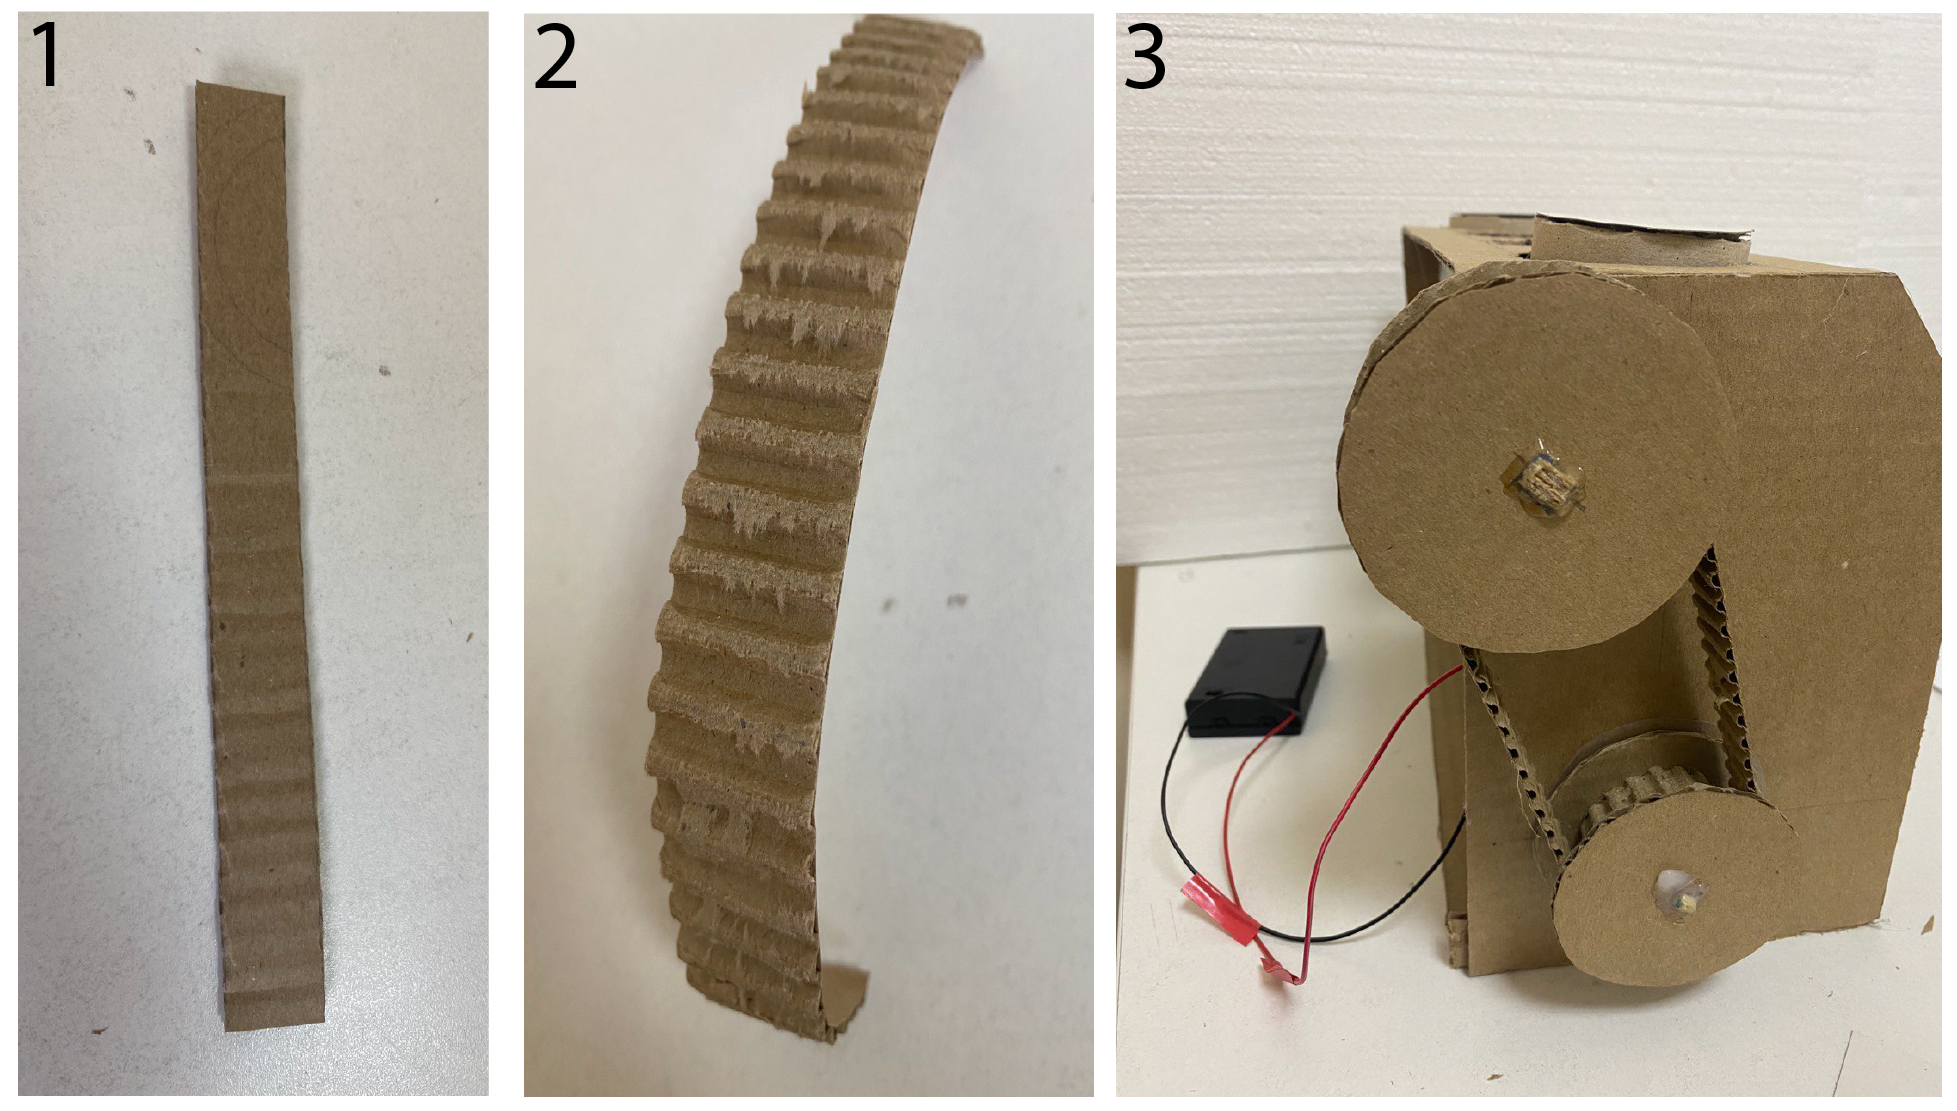
Connect the geared motor to the battery compartment,
A video demonstration is shown in the video below.

Conclusion
The students developed their engineering skills through building a model of an internal combustion engine. It is recommended to think about improving the design of the ICE layout and add your own ideas.
Assessment
PBL based assessment criteria:
Problem-based learning is a teaching method in which students acquire knowledge and skills, working on one project for 4 weeks, to research and find an answer to a genuine, interesting and complex question, problem, or challenge. (follow the link)
For project grading, in the first week, provide this material (PBLrubrics) to students in order to:
– the students previously understood by what criteria they need to prepare,
– pupils were able to independently assess their colleagues.