
Lesson 2
The feasibility of installing a wind generator
Small wind farms are widely used today as alternative sources of electricity, which make it possible to achieve real savings. Such devices are usually installed in suburban areas, in areas remote from the main power grids. But this is not the only reason why people increasingly prefer structures of this type.

Land owners successfully use wind generators to achieve complete autonomy and significant energy savings
However, not every zone is suitable for installing a wind turbine. In order for the mini-power plant to function fully during the period of operation declared by the manufacturer, the climatic conditions of the area must meet the requirements of special equipment. The average wind speed should not be less than 4.5-5 m/s. Only in this case, the installation of a structure with a windmill will be economically justified. To find out approximate data on the average annual wind speed by region, you need to view a special wind map. More accurate information can be obtained using an anemometer and a signal reader. The measuring system should be installed at a high altitude so that closely located buildings and trees do not distort the results.
If you decide to install a mini wind farm for your home, you should also think about the availability of free space. At the same time, it should be taken into account that the wind should absolutely freely “walk” along the blades, well, without obstacles on its way to reach them from different sides. That is why the ideal place to install a wind turbine is considered to be the tops of hills, where air masses are compacted with a corresponding increase in pressure and wind speed. Marine regions and the steppe zone are also considered suitable.
The practical part of the work
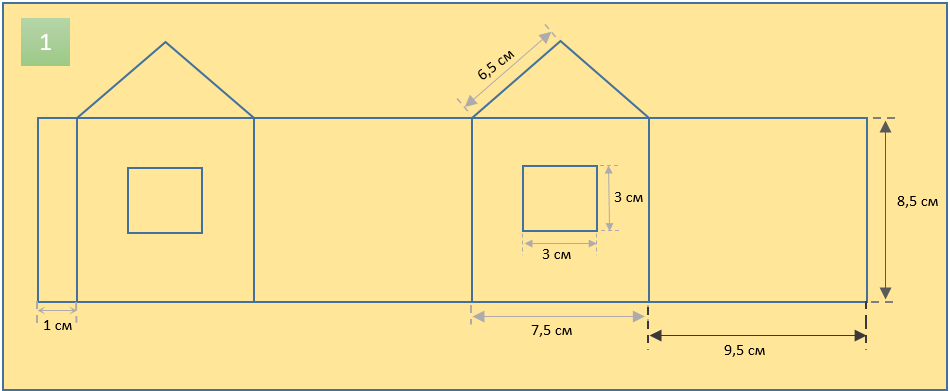
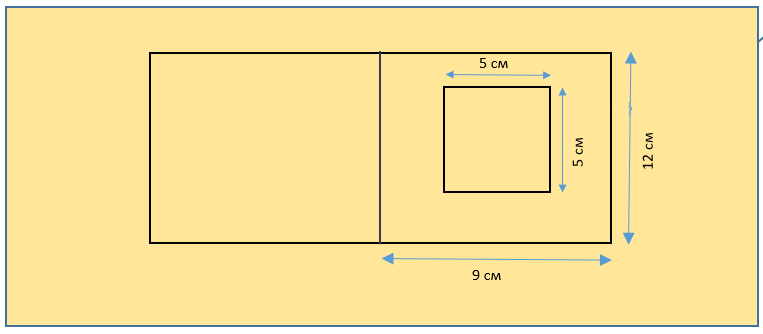
Step 1. Draw the layout of the house on a piece of cardboard. The dimension of the house layout is shown in the following figure
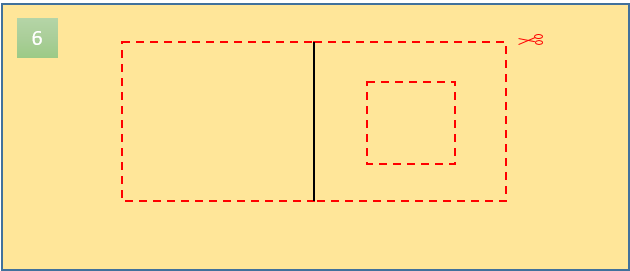
Step 2. Cut out the layout of the house following the red lines shown in the picture
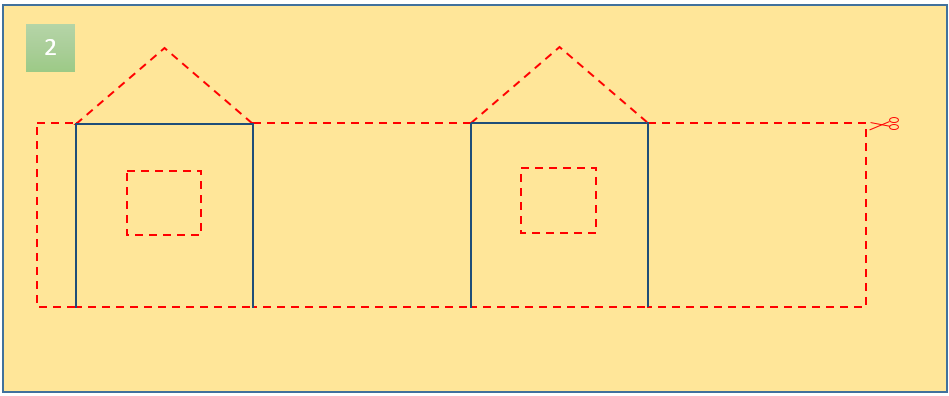
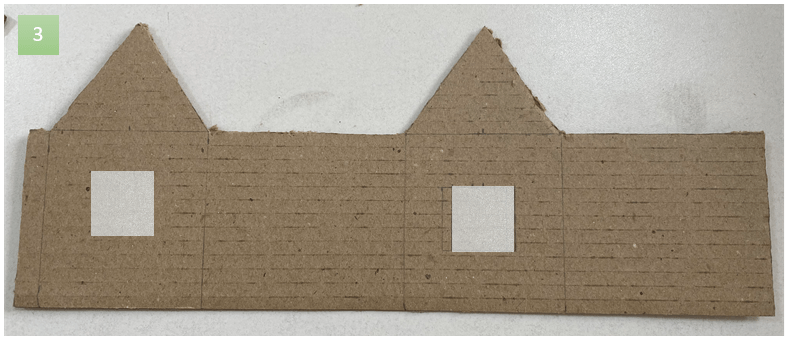
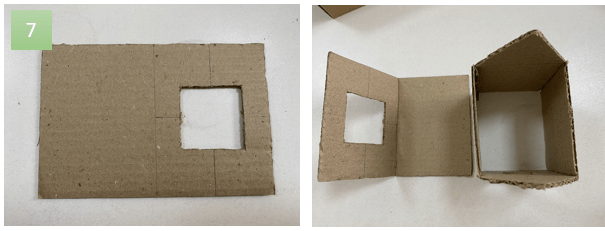
The following detail should be obtained
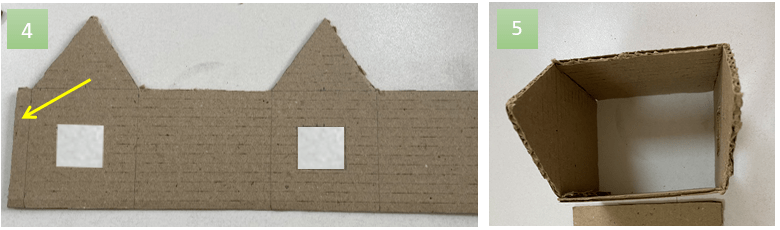
Step 3. Assemble the housing of the house by gluing the edge of the house (indicated by the arrow) to the inside of the wall of the house
Step 4. Draw a model of the roof of the house on a piece of cardboard. The dimension of the roof layout is shown in the following figure
Step 5. Cut out the roof layout following the red lines shown in the picture
The following detail should be obtained
Step 6. Glue the roof to the body of the house
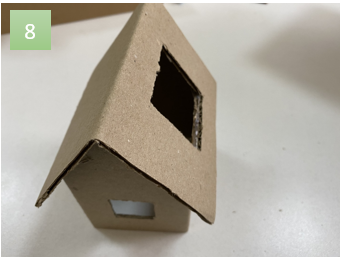
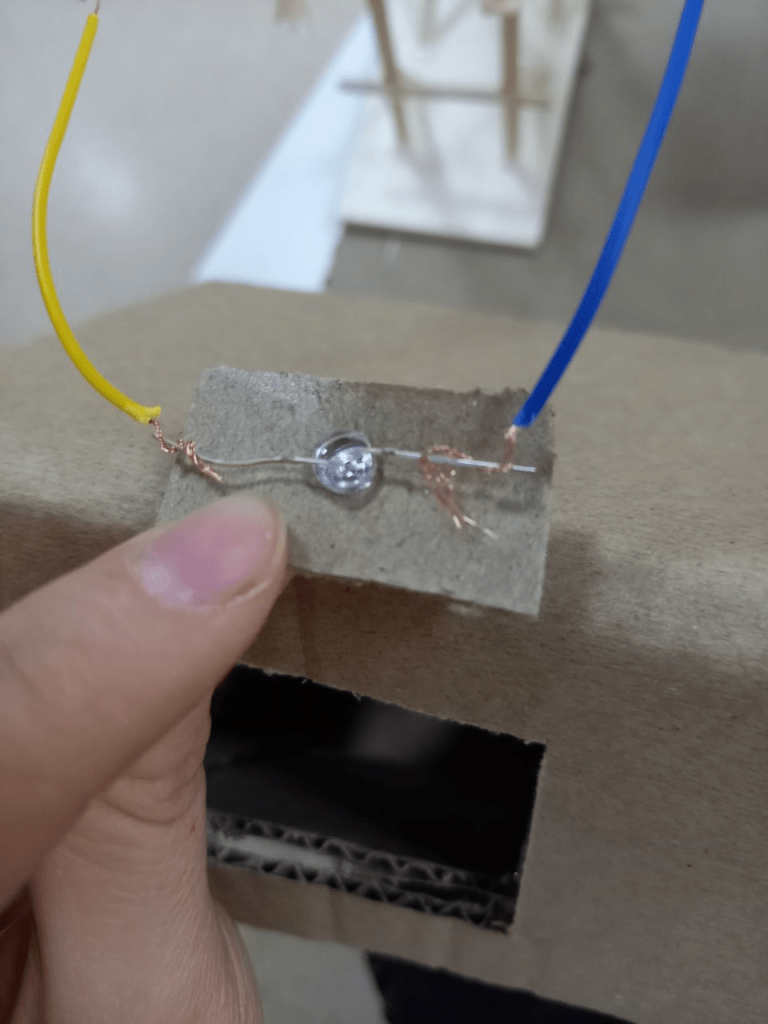
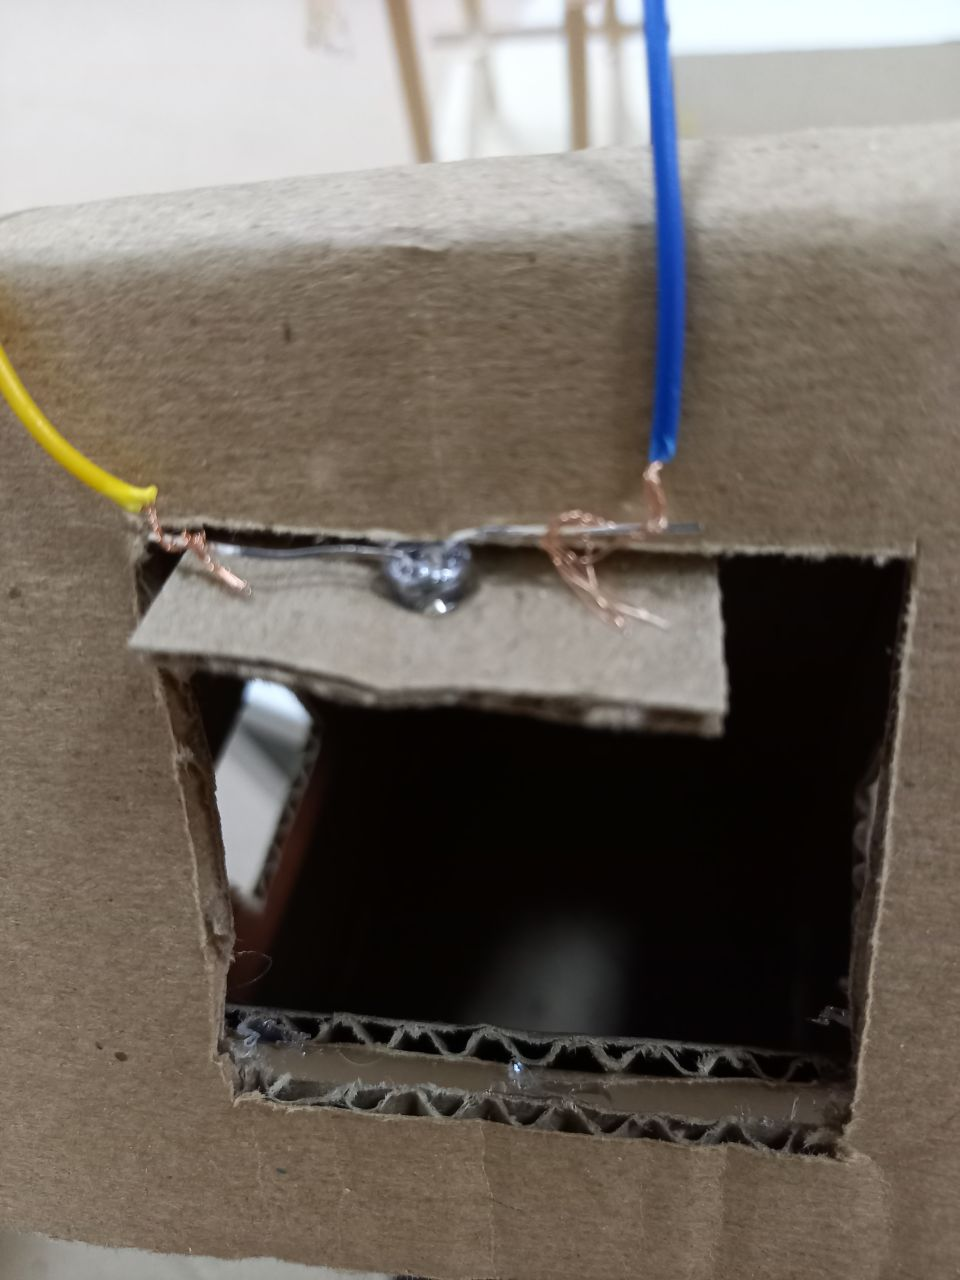
Step 7. Take the rest of the cardboard and make a hole on it to install the LED through it
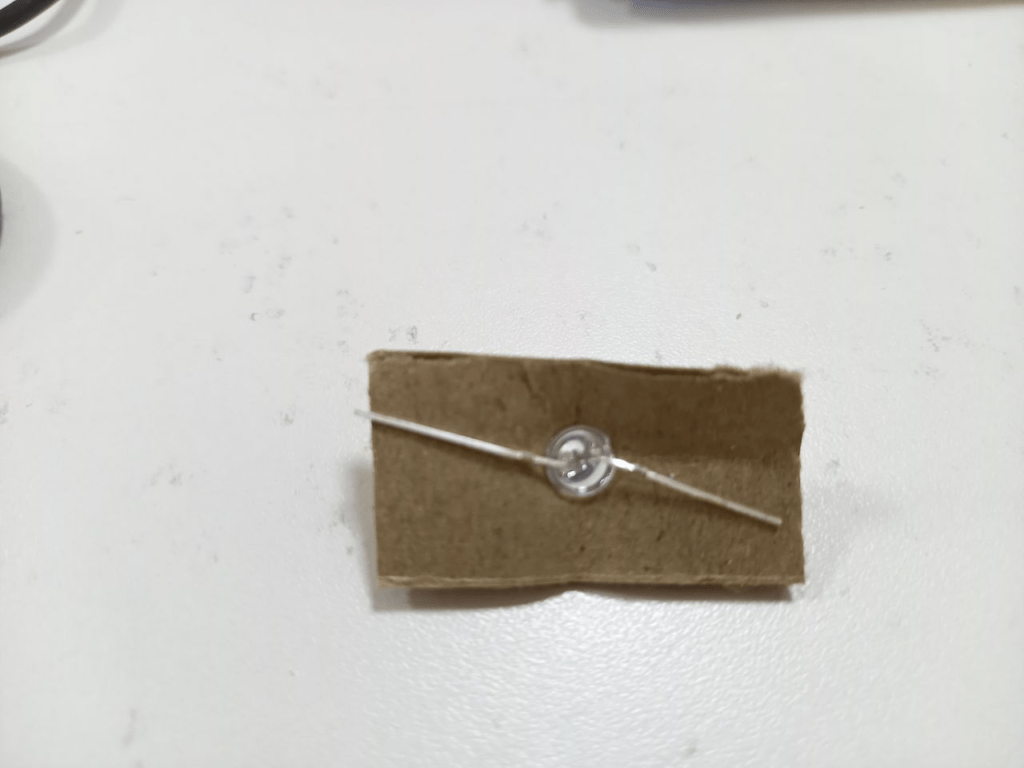
Step 8. Connect the wires to the LED, and attach the cardboard with the LED to the roof of the house with hot glue
It’s important to know!
Each charge has a “+” and “- ” . A new LED, as a rule, has two outputs (legs), one of which is slightly longer than the other. The long lead is the anode (+). The short output is the cathode (–). Touching the anode to the plus, and the cathode to the minus, a serviceable emitting diode will glow. At the battery compartment (+) is the red wire, and (-) is the black wire. Therefore, the long leg of the LED must be connected to the red wire of the battery compartment, and the short leg to the black wire of the battery compartment.