
Lesson 1
Introduction
Shakespeare calls people “masterpieces of creation”, while others call the human body the most beautiful machine. But, like any car, sometimes body parts require repair or service improvement. For example, if a person is nearby or what does he use to help him see if it is difficult for him to see from afar? (Points) if a person
what is used for hearing if the ear deteriorates? (Hearing aid) if a person cannot walk what is used to help you walk if you are suffering? (Stick or crutch) glasses, hearing aid, stick or crutch-what do these things have in common? All of them are prosthetic assistive devices, all of these devices are designed to make human life easier. The creation of such products and processes that improve the quality of human health and life for STEAM (science, technology, engineering, art and mathematics) the knowledge of medicine of specialists who use in their field is called biomedical engineers.
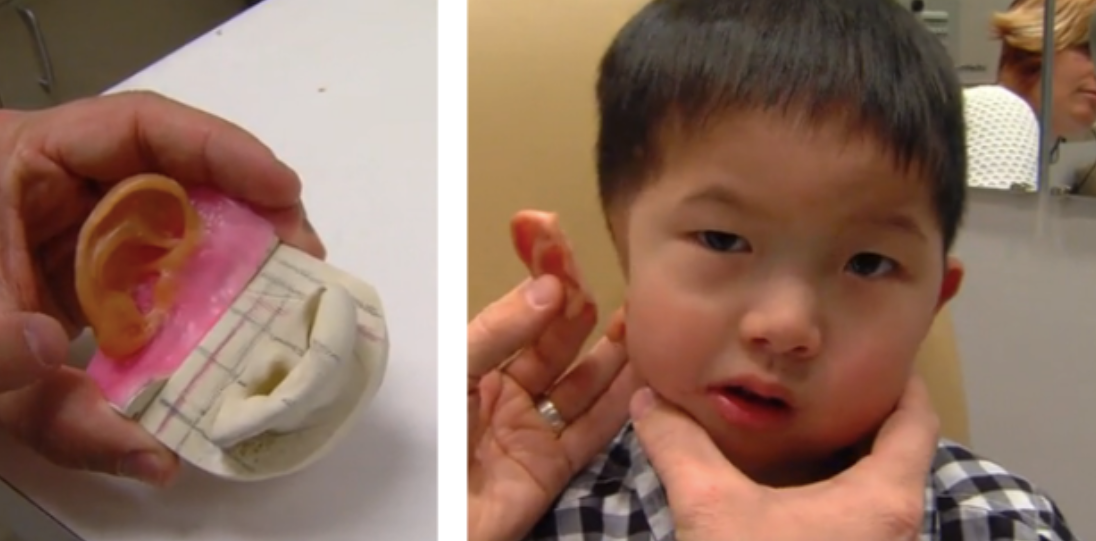
1-Fig. Biomedical engineers have printed silicone ears for a 4-year-old Chinese child named Kai, who was born with one ear using a 3D printer. In addition, biomedical engineers can use a 3D printer to print out from the patient’s own tissue both the heart, the frame valves of the heart, organs such as the nose, and jaw bones and skin.
In this project, you act as biomedical engineers, develop and test an auxiliary manual device that helps a person with cerebral palsy to hold various objects by weight. The advantage of the bionic hand in this project is that you print it on a 3D printer and program it with the Arduino platform to feel and bend things.

Figure 2. A biomedical engineer is testing powerful prosthetic devices to help a patient with disabilities
Basic terms and concepts
Prosthetic aids
STEAM
Biomedical Engineer
Arduino Electronic Platform
Step 1. First we print out the details of the hand on a 3D printer. To do this, first open Snapmaker Luban or a similar slicer program on your computer. To click and download the desired model, click the “Add” button in the left corner of the window, as shown in Figure 3. * The file to be printed is indicated by a special link.
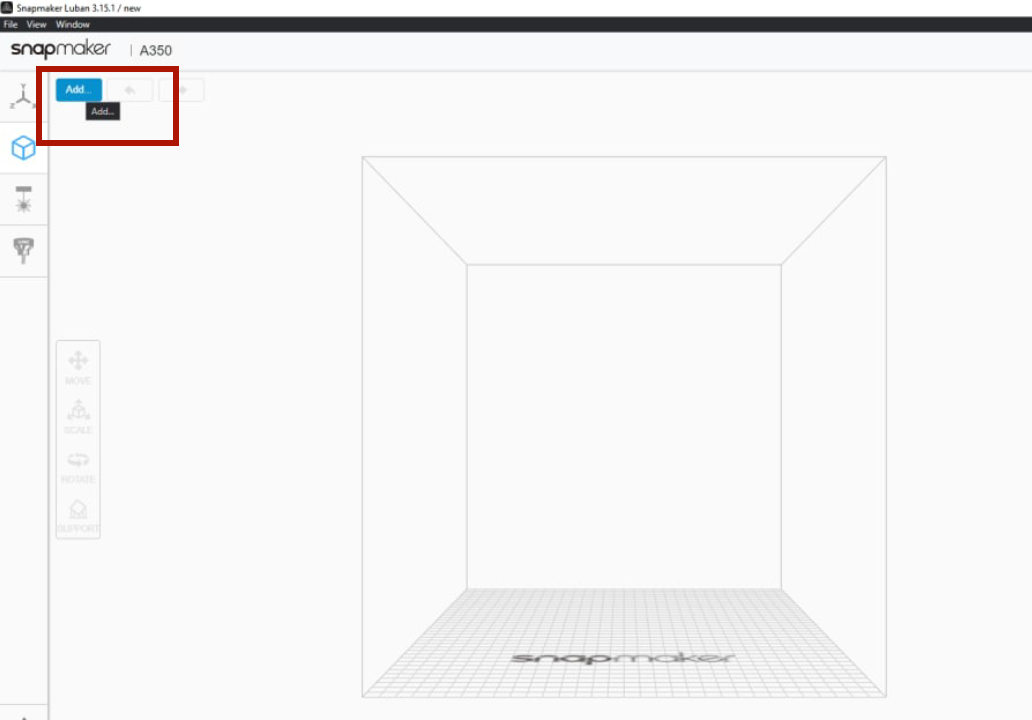
Fig. 3. The start page of the Snapmaker Luban program
Step 2. When you click the “Add” button, a new window opens in which you select the file you need and click the “Open” button.
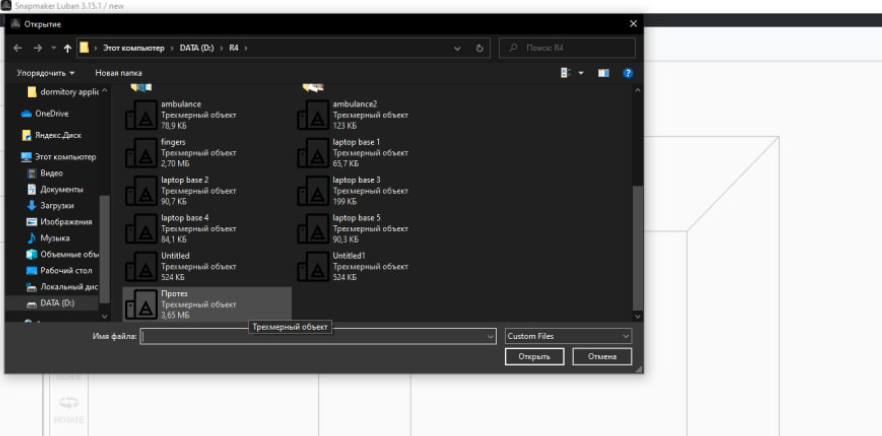
Fig. 4. Select and open the desired file
Step 3. When you click the “Open” button, your file will be downloaded and opened in the program, as shown in Figure 5.
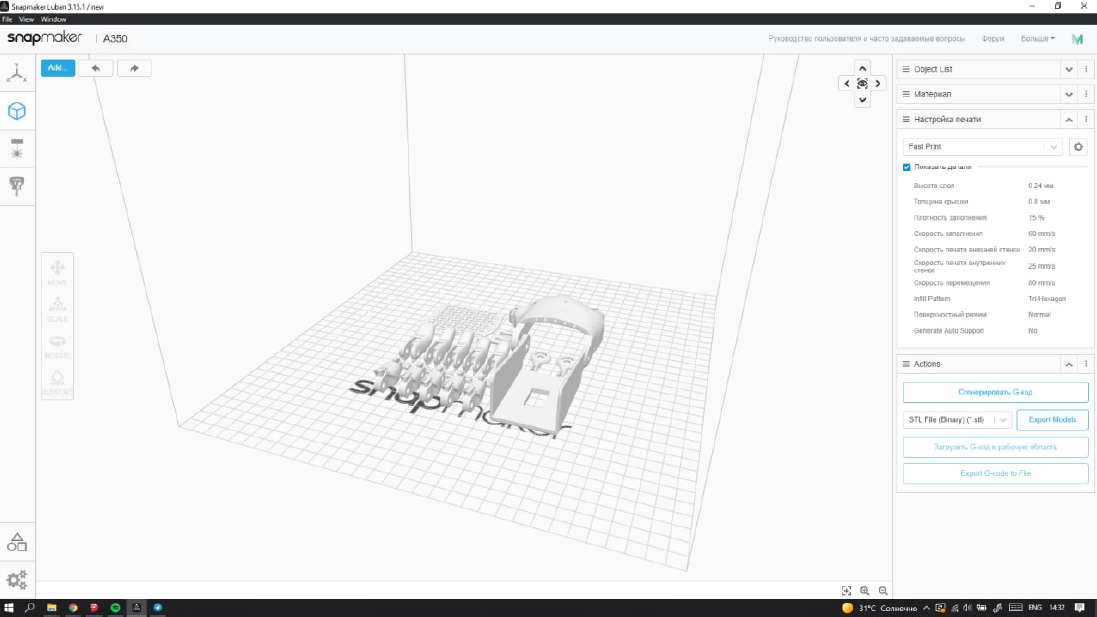
Fig. 5. Uploaded video of manual model details in Snapmaker Luban
Step 4. When the manual model file is loaded, click the Settings button next to the “Fast print” button in the right corner of the window.
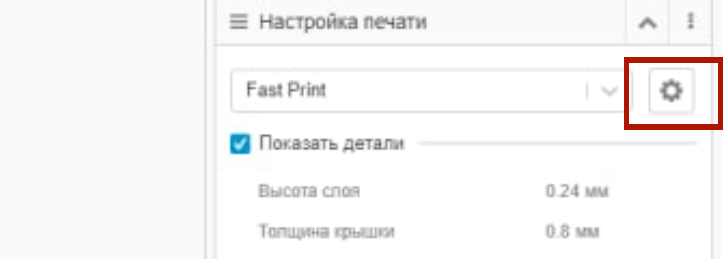
Fig. 6. Settings Button
Step 5. When you click on the Settings button, a new window will open for you. In the lower left corner of the left window that opens, click the “Copy” button.
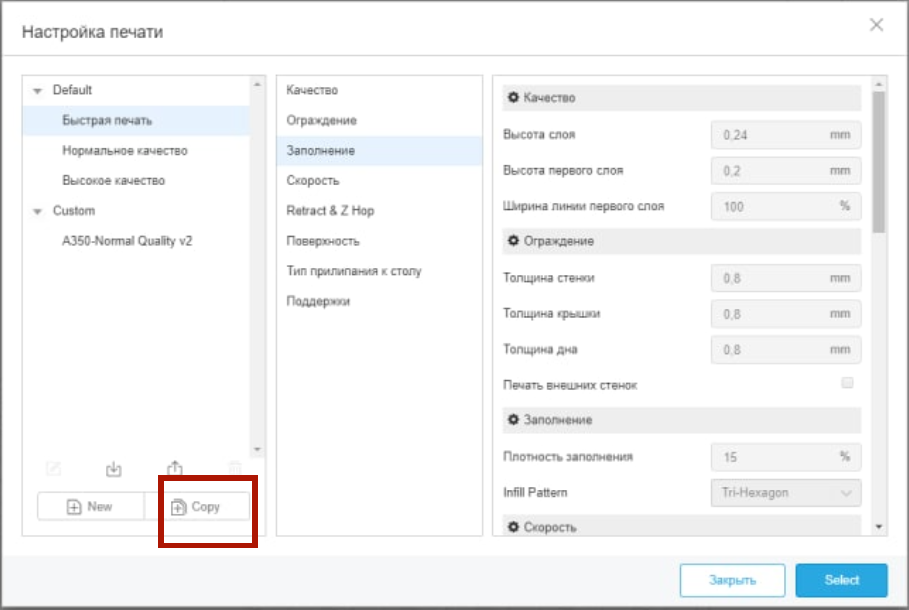
Fig. 7. The “Copy” button in the head output settings window
Step 6. When you click on the “Copy” button, a new small window opens and asks you to write down the file name. Write the name of the copy in this place and select the “Ok” button.
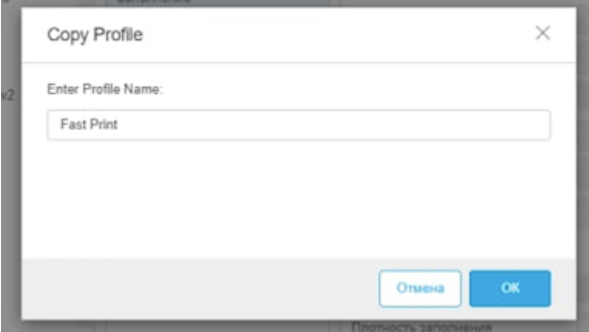
Fig.8. Copying a file to the program
Step 7. Now a copy of your file will appear at the bottom of column 1 in the “Print Settings” window. Click on the name of this copy, then select the “support” button in the second column and select the cell next to “Generate Auto Support” in the third column. Finally, click the “Select” button located in the lower right corner of the window.
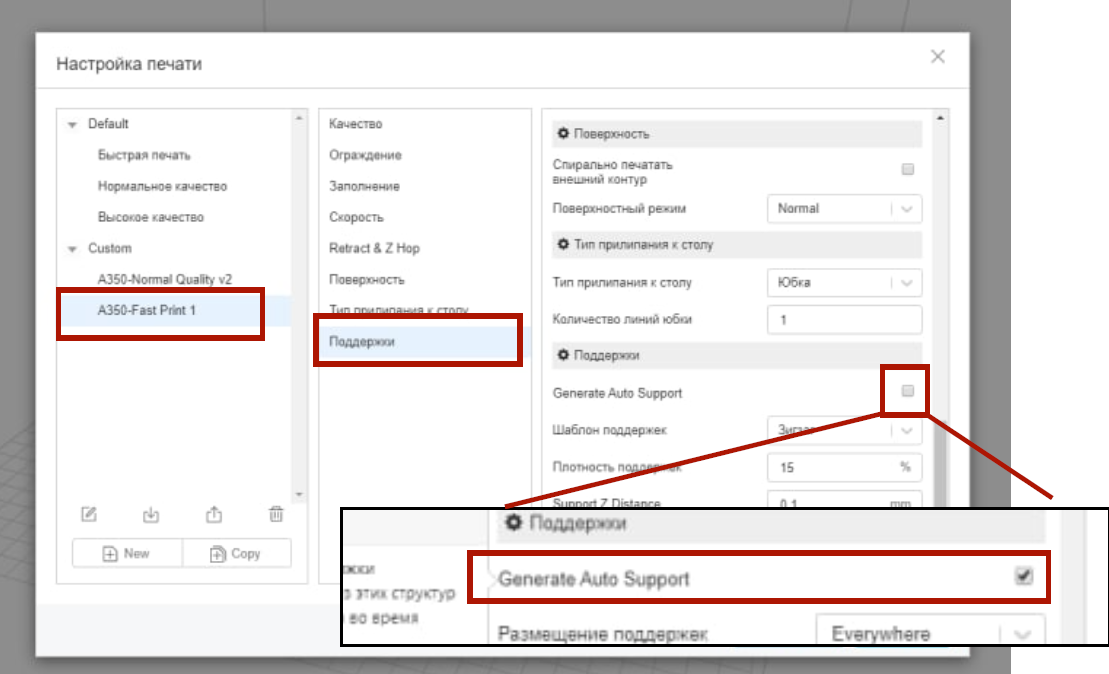
Fig. 9. If you select the “Generate Auto Support” cell, then prevents falling out and erroneous pressing of your parts, i.e. relies on parts without moving them in place
Step 8.When you return to the home page where the “Print Settings” window is closed, click the “Generate G-code” button in the lower right corner of the window.
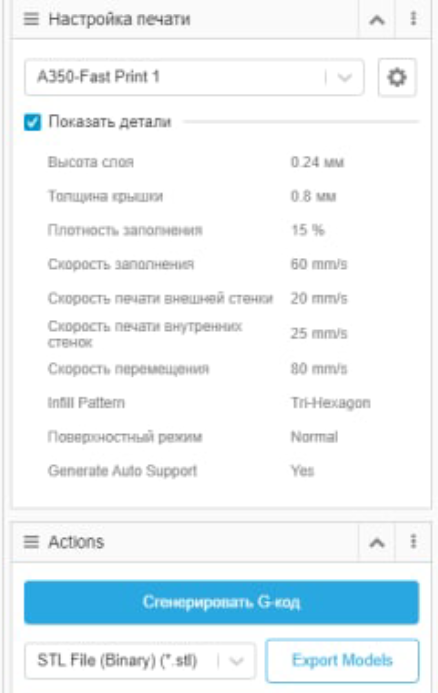
Figure 10. G-code is the language in which people explain to the machine how to do something. The G-code of a 3D printer consists of commands to move parts in it. The saved file becomes a G-code that the printer understands and uses for 3D printing.
Step 9. In the lower left corner of the main page, use the “Export G-code to File” button to select the “Save” button in the window that opens to save commands written in the programming language used by 3D printers to the flash memory of your choice.
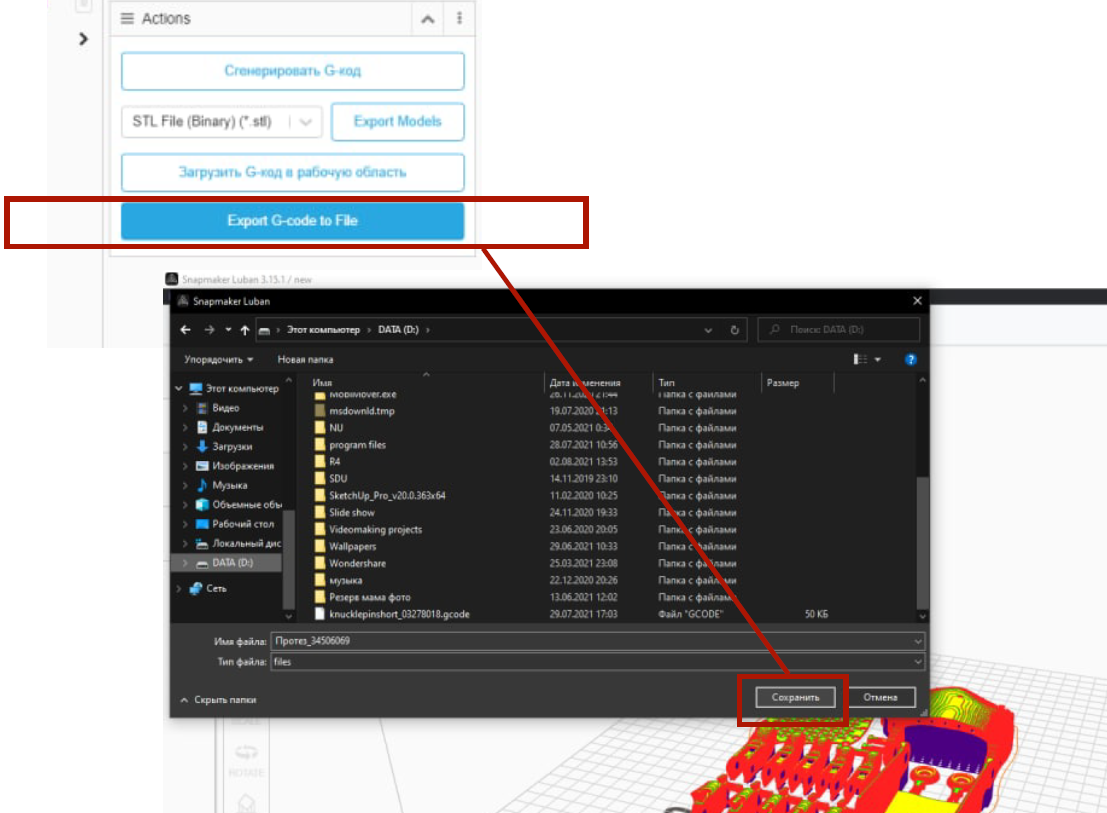
Fig. 11. Video of saving the G-code to flash memory
Step 10. Now we go to the 3D printer with the G-code recorded on the USB stick and connect the power supply (power supply) to the first power source.

Fig.12. Turn on the power supply and wait for the 3D printer to turn on
Step 11. The connection and download processes are displayed on a special screen.
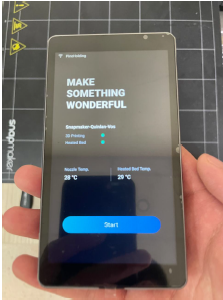
Fig.13. The touch screen is considered the printer’s control panel
Step 12. Now connect the flash memory to the 3D printer.
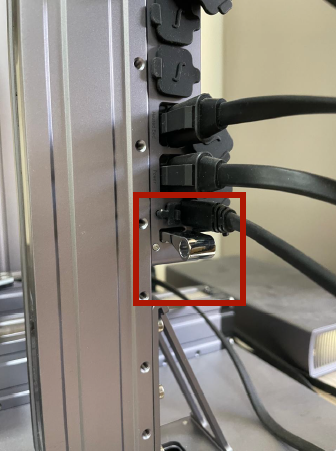
Fig.14. Connecting a flash memory with a G-code to a 3D printer
Step 13. On the touch screen, select the desired file from the list of files available on the flash memory select and click the “Select” button.
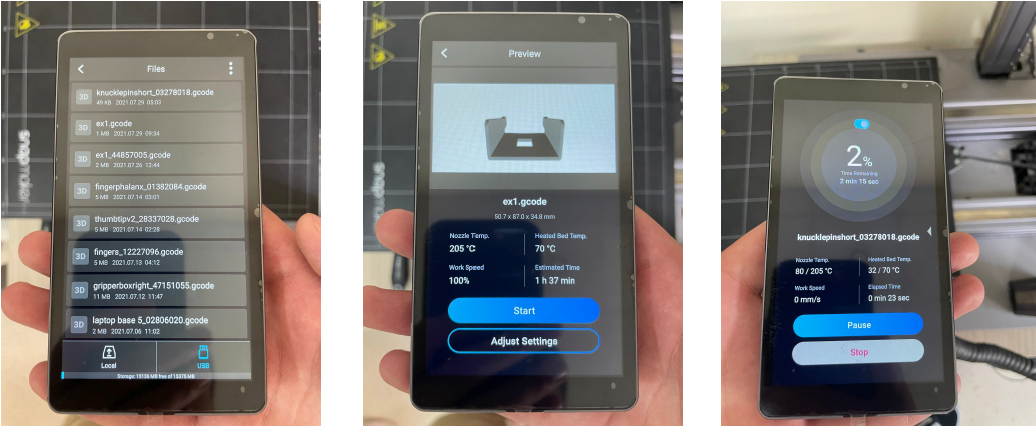
Fig. 15. Touch screen select the desired file, send by pressing and will show how long it will end
Step 14. After the printing process is complete, when the models have cooled down, carefully remove them from the printing surface using a special spatula.
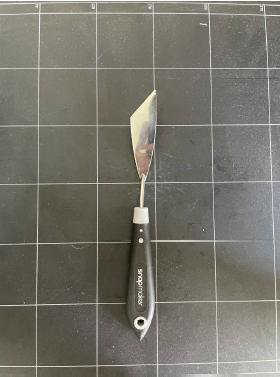
Fig. 16. Special spatula for objects released by the head for use and removal from the surface of the header
* You can download the hand parts to be printed on a 3D printer from the following link: https://drive.google.com/file/d/1ST69HNcg33E4AbF69iHy38J4y-c19Xnz/view?usp=drive_link