Lesson 1
Project objective
– To introduce the students to line, pie and bar graphs. To teach children to use the acquired knowledge and skills in practical activities and everyday life to orient themselves in their surroundings
– Make a diagram with their own hands.
Teacher’s guide
– Divide the pupils into groups. There should be 3-4 students in each group.
– Explain what a diagram is and the types of diagrams.
– The first week the pupils will begin making square tubes from coloured cardboard.
– In the second week they will continue to make a diagram. As they work, give brief instructions on how to use the hot glue (only the teacher uses it)
– Explain the PBL (project based learning) rubric to the students at the beginning of the lesson. Skills 4K (critical thinking, collaboration, creativity, presentation)
Safety in Steam lessons
Before we begin the lesson, teachers are advised to familiarise themselves with the safety procedures. If necessary (if using items specified in the PPE), brief the students. Go to Safety in Steam lessons
Theoretical part
– Who knows the meaning of the word DIAMOND?
– What is the topic of our lesson?
– What types of diagrams do you know?
– Suggest why you need to know this? What are some ways of gaining new knowledge?
A diagram (from the Greek diágramma ≈ picture, drawing, drawing) is a graphical representation which shows the relationship between different values in linear or geometric figures. When selecting the form of the diagram, you have to decide what you want to represent in the diagram. Different types and forms of diagrams emphasise different elements.
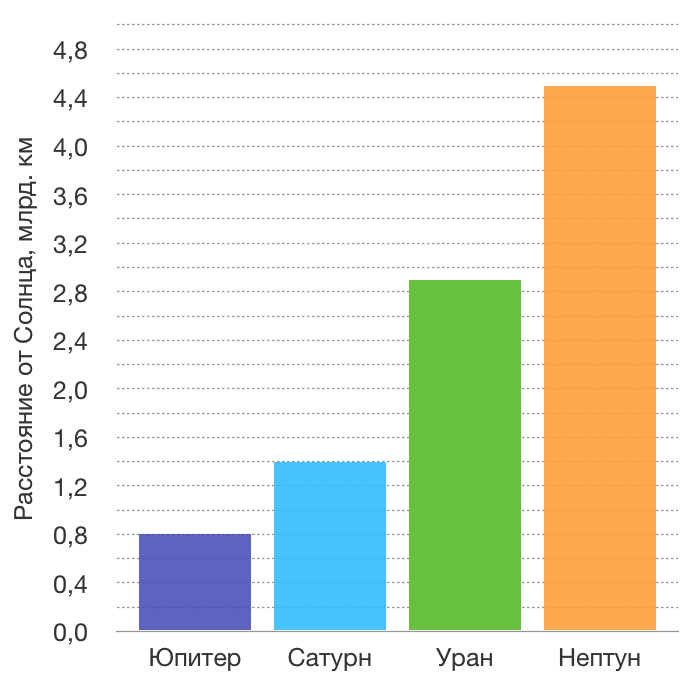
Bar charts are useful for showing trends over time and for constructing multiple data series.
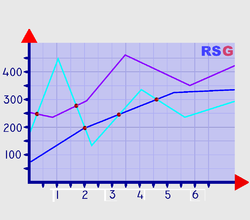
Line charts are useful for showing trends over time and comparing several data series
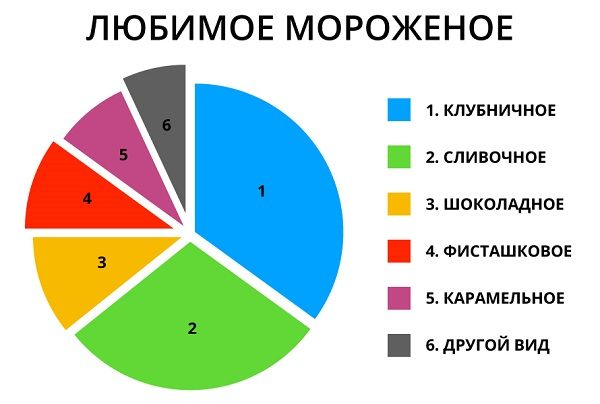
Pie charts are useful for highlighting proportions
Practical part of the work
Step 1
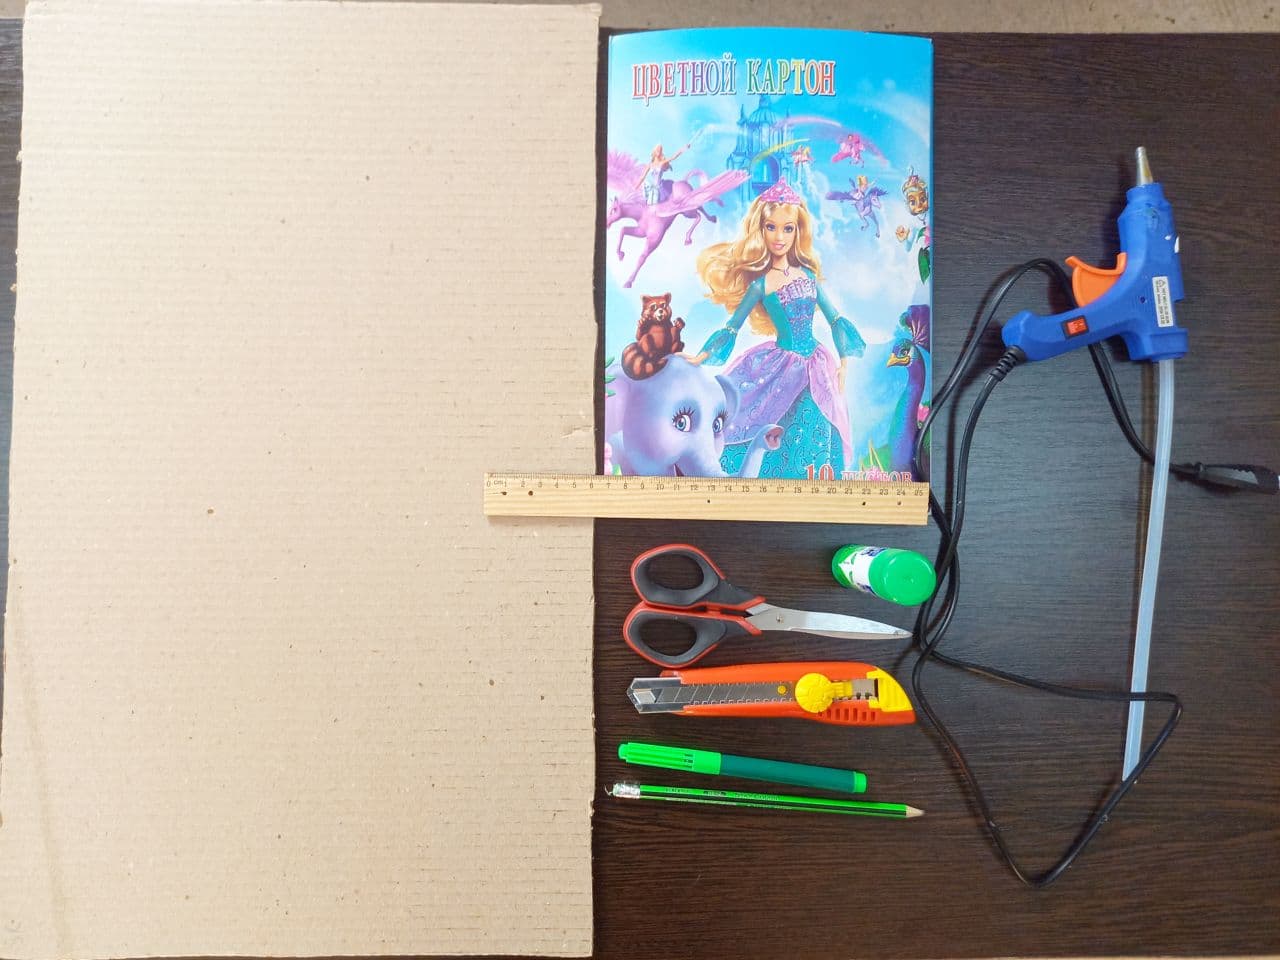
To make a bar chart . We need:
- Cardboard
- Coloured cardboard
- Paper glue
- Scissors
- Highlighter
- Ruler
- Thermal adhesive
- Pencil
- Stationery knife
Step 2.
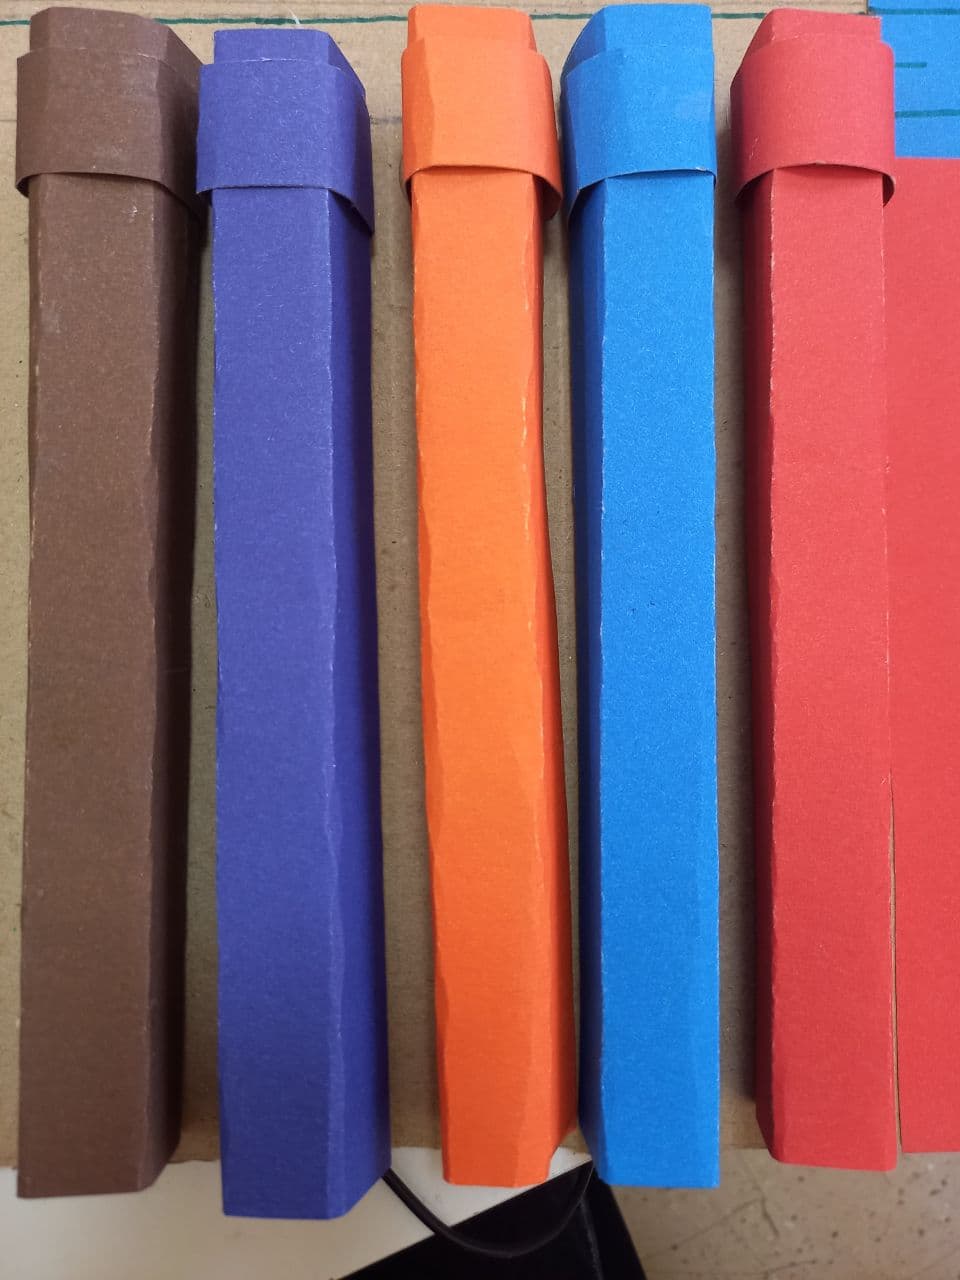
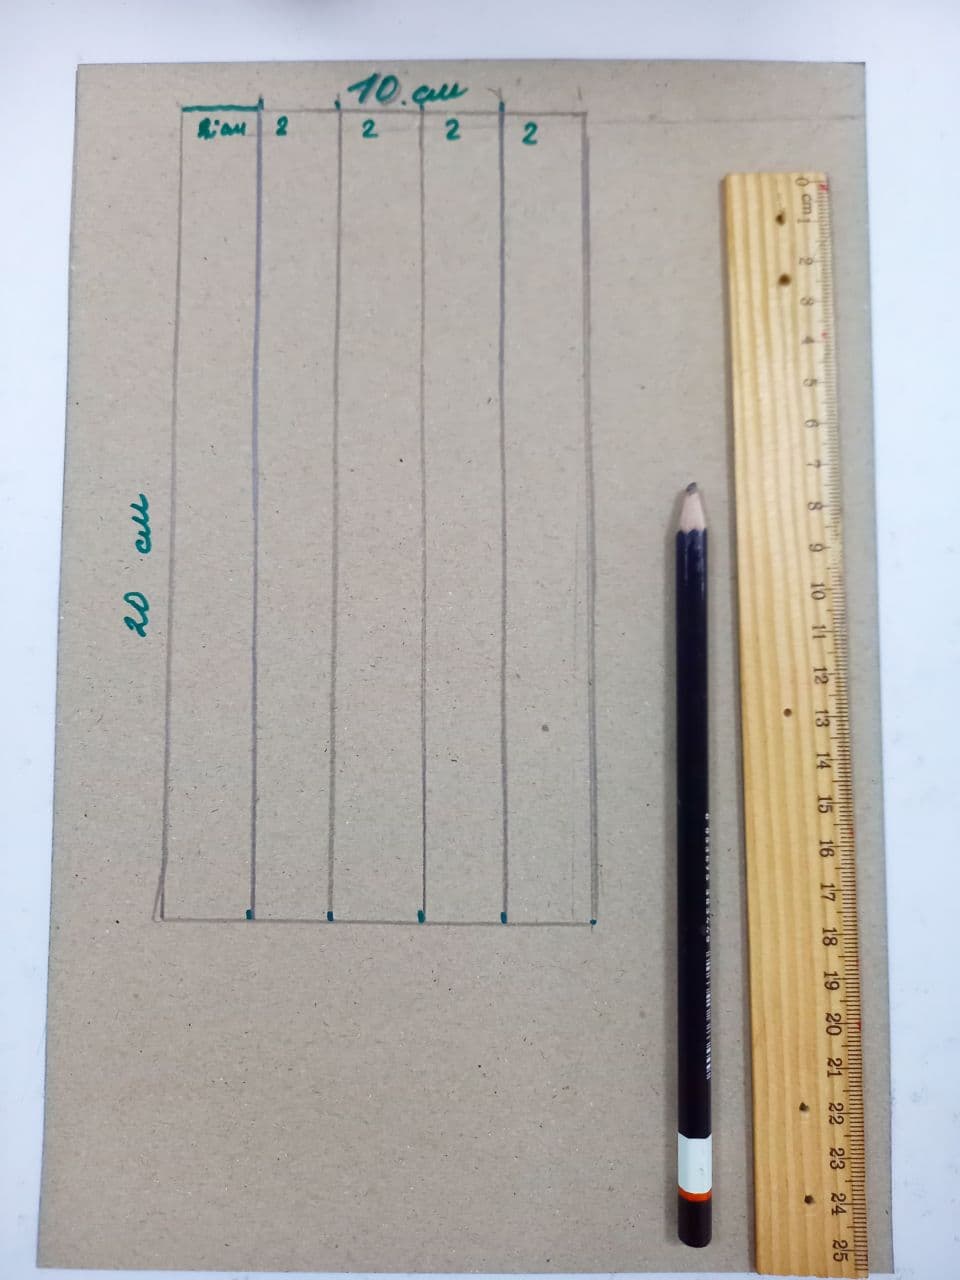
First we make a rectangular tube, for this we take 1 sheet of coloured cardboard, draw a size of 10×20 and divide the inside into 5cm lines
Step 3
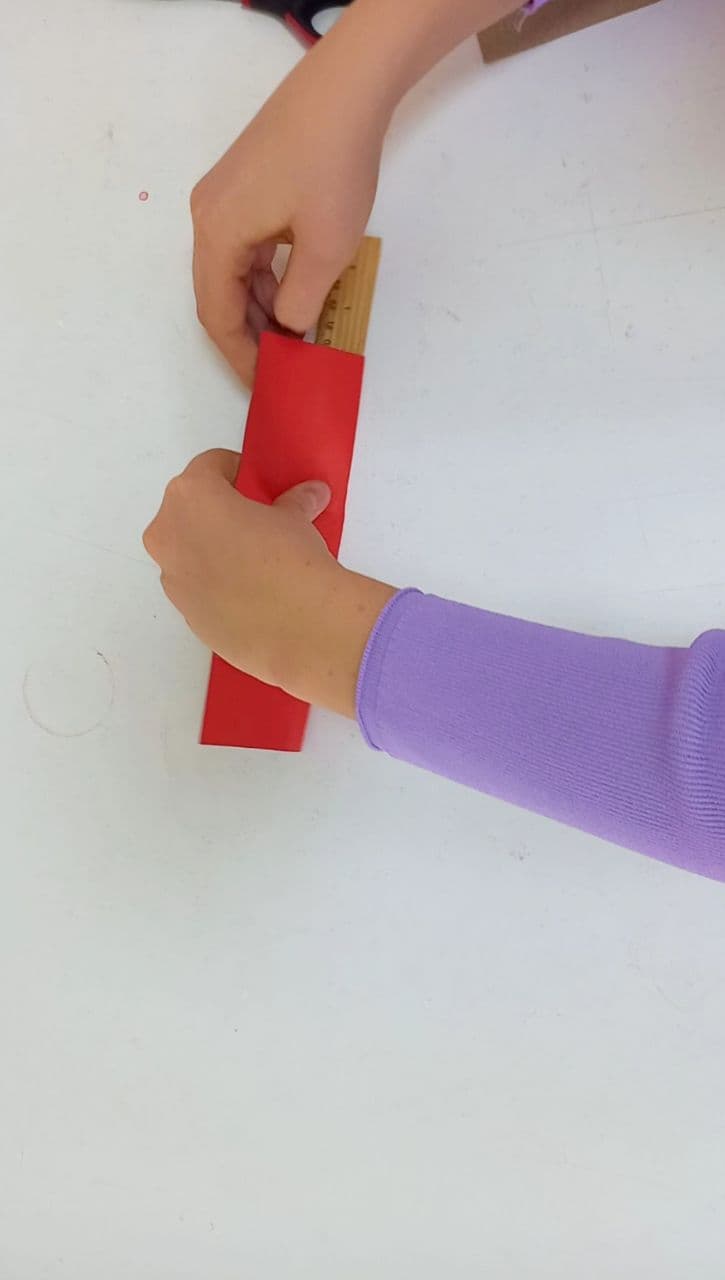
Cut our cardboard to size and twist along the lines to make a rectangular tube (you can use a ruler to twist it)
Step 4
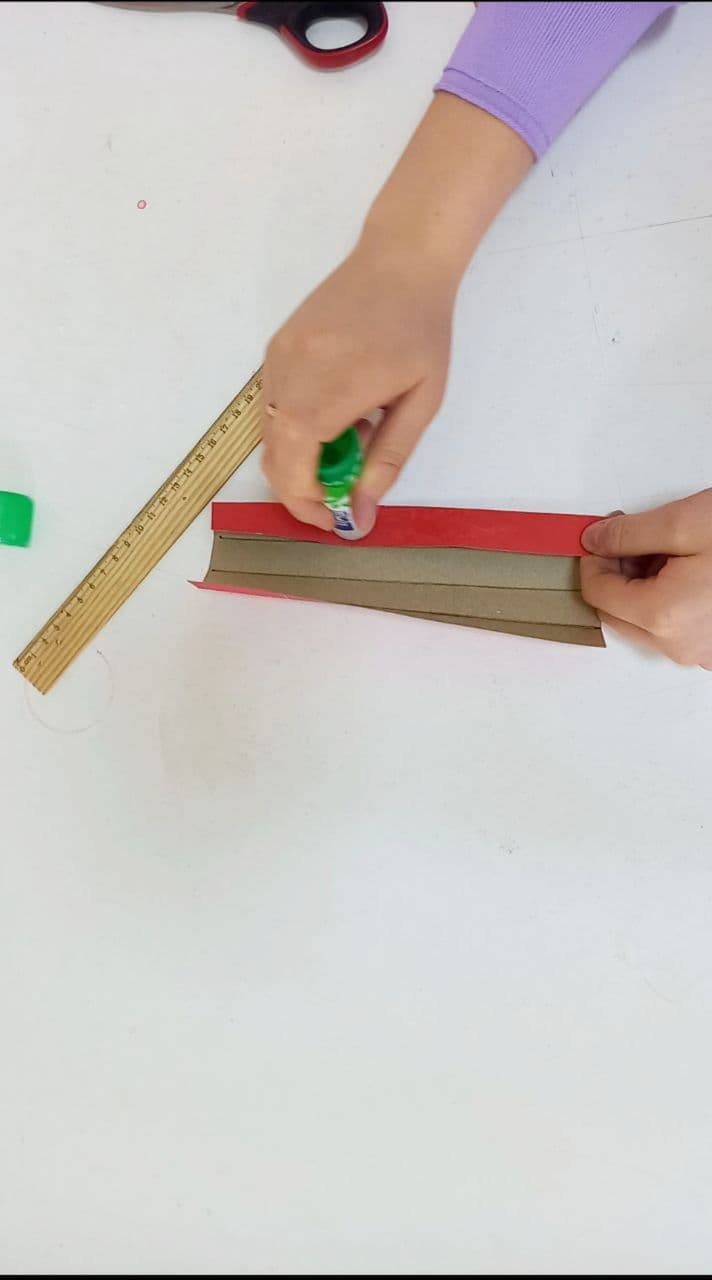
Glue one side of the pipe with paper glue and our pipe is ready
Step 5
Make a pipe holder from the rest of the paper so that the pipe can move around inside the holder
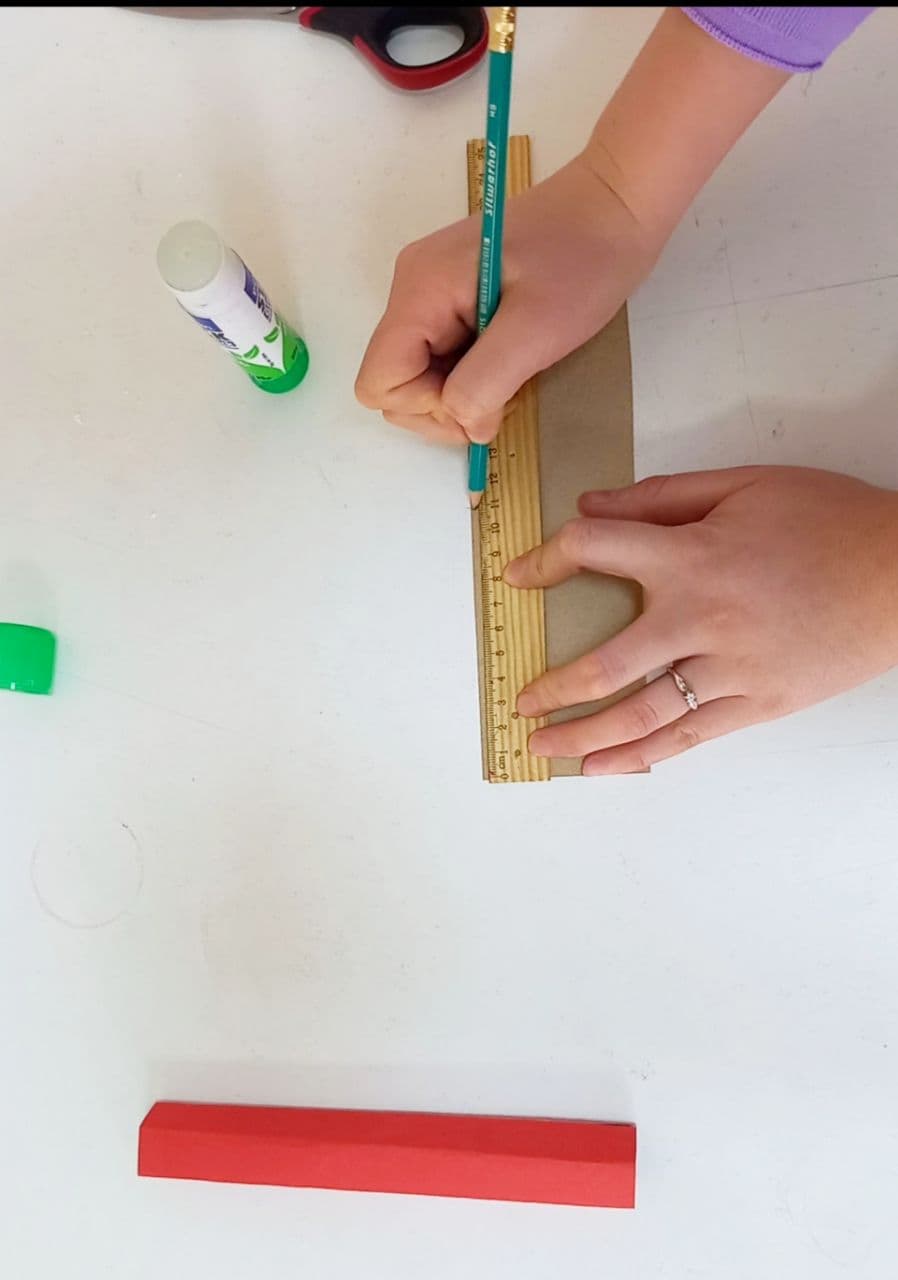
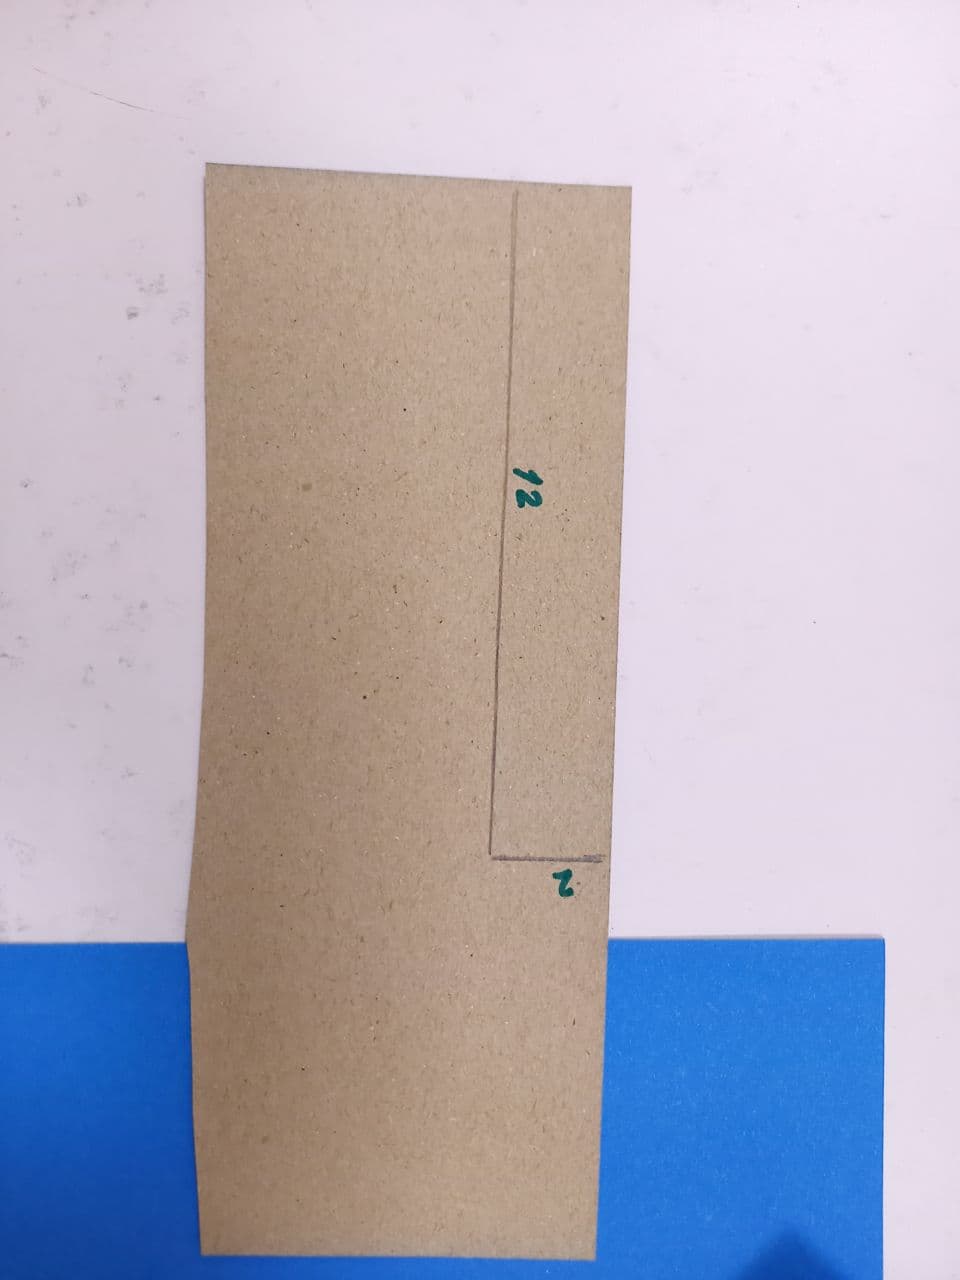
Step 6
Using a pencil ruler, cross out the size of the holder 12×2
Step 7
Cut off the holder, and glue one side (do not glue the whole part, because the rectangular tube will not move inside)

Step 8
Our rectangular tube with holder is ready, make exactly 5 of these for one diagram