
Lesson 1
GOAL
Build a lock that works with any RFID tag card or magnet and fingerprint.
Make a model of a door out of wood or cardboard.
Install a lock on the door
Expected results
After studying the project, students will be able to:
– acquire the skills of cooperation with the teacher and work in a group, in pairs; analyze and summarize the information received
– a responsible attitude to learning will be formed
– communicative competence will be formed in the process of educational activities
– learn how to work with the device (board) Arduino UNO
– to acquire basic skills of automation and skills of working with electronic devices
– acquire the ability to use ready-made applied computer programs
Interdisciplinary communication:
– Informatics (programming languages, working with PC, working with Arduino)
– Physics (work with electronics, automation)
– Technology (manufacturing, installation of the case, and use of equipment)
Teacher’s Guide
At the beginning of the lesson it is recommended:
– to familiarize students with the Arduino UNO device (description, principle of operation)
– Familiarize yourself with the Arduino IDE
– to familiarize students with the basic Safety Rules when working with electronic components
– provide ready-made code values and general drawings, and instructions on how to connect electronic components to the Arduino board
TASK
- Develop an electronic lock control module with access by RFID card
- Locking mechanism – servo and latch
- Pushbutton on the sash for automatic locking
- “Internal” button to open the door and write/delete cards
- Light and sound indication
- Writing and deleting ID cards to memory “on the fly” without flashing
- Storing ID in EEPROM memory
LIBRARIES
- Servo – standard library for working with servos
- MFRC522 (click to download) – RFID Reader
Install the library as shown in the video
https://youtube.com/watch?v=4fj8Lfk4hjA%3Flist%3DPLIlBnumqqiAXhk7nWJMtJQdaKzHYwFI_W%26index%3D2
Wiring diagram
- Servo: D10
- Buzzer: A0
- Red: D4
- Green: D5
- Open/Record Button: D8
- Door stop: D9
- RFID RC522
- 3.3V: 3V3
- RST: D6
- GND: GND
- MISO: D12
- MOSI: D11
- SCK: D13
- SDA: D7


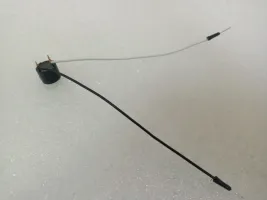
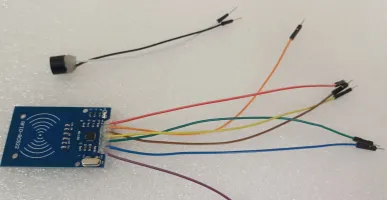
Use hot glue and carefully glue the wires

Code
After we have assembled the scheme, we will start writing a sketch
You can download the full sketch from this link. Download code