
Week 2
In today’s lesson you will start building a calculator.
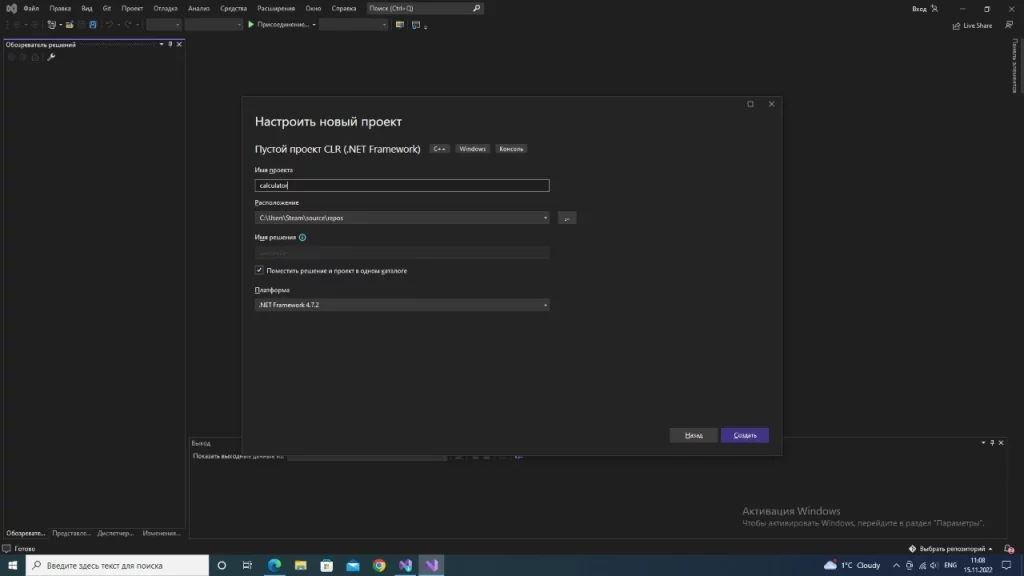
Step 1. Open Visual Studio. Choose without any code.

Step 2. Once the window opens, select File → Create → CLR Empty Project (.NET Framework) and name the project “calculator”.
Step 3. When the new window opens, click the Properties button in the Solution Viewer section. Under the “Linker” section, select “System”. Select Windows (/SUBSYSTEM:WINDOWS) from the subsystem.

Step 4. In the Linker section, enter the word “Main” under “Advanced” → “Entry point”, press “Apply” and “OK”.

Step 5. Navigate to the word calculator and right-click. From there select “New item” under Add.

Step 6. In the window that appears, select CLR → Windows form and click Add.
Step 7. Select MyForm.cpp. Write the following code in the window that opens.
using namespace System;

using namespace System::Windows::Forms;

[STAThreadAttribute]

void Main(array<String^>^ args) {

Application::EnableVisualStyles();

Application::SetCompatibleTextRenderingDefault(false);

calculator::MyForm form;

Application::Run(% form);}
Step 8. Save and close the application by pressing the Save button.
Step 9. Write calculator.sln in the search and reopen the application.
Step 10. A new window named MyForm will appear. This is the skeleton of the calculator. Enlarge it to the size you want.
Step 11. Open the panel item and select Textbox. Place it on top of the MyForm. Check Multiline.

Step 12. Open the Toolbox and select Button. Place it as a small square below the Textbox.
Step 13. Check both and change the font to Outline: bold, Size: 16 using the Font option under Properties.

Step 14. Create 20 instances by pressing Button Ctrl+C and Ctrl+V. Then check all Button buttons and specify Size 80;80 in the Properties section.

Step 15. Click Button8 and open the properties window. In text, deactivate Button8 and enter the number 7. Add the number 8 to the next Button7 and continue this process for other buttons in the same way.
Warning! Enter the numbers on Button8-Button6, Button12-Button10, Button16-Button14.

Step 16. Enter “+” for Button5, “-” for Button9, ” * ” for Button13, ” / ” for Button17, ” = ” for Button19,”, “0” for Button20, “C” for Button2, “CE” for Button3.
Step 17. Enter the symbol ⌫ in Button1, the symbol ± in Button4. To insert these symbols, first type it into a Word document ⌫, ± symbols. Then copy and paste them into Button.

With this, the skeleton of the calculator is ready. Save it.