Lesson 2
Smart gates
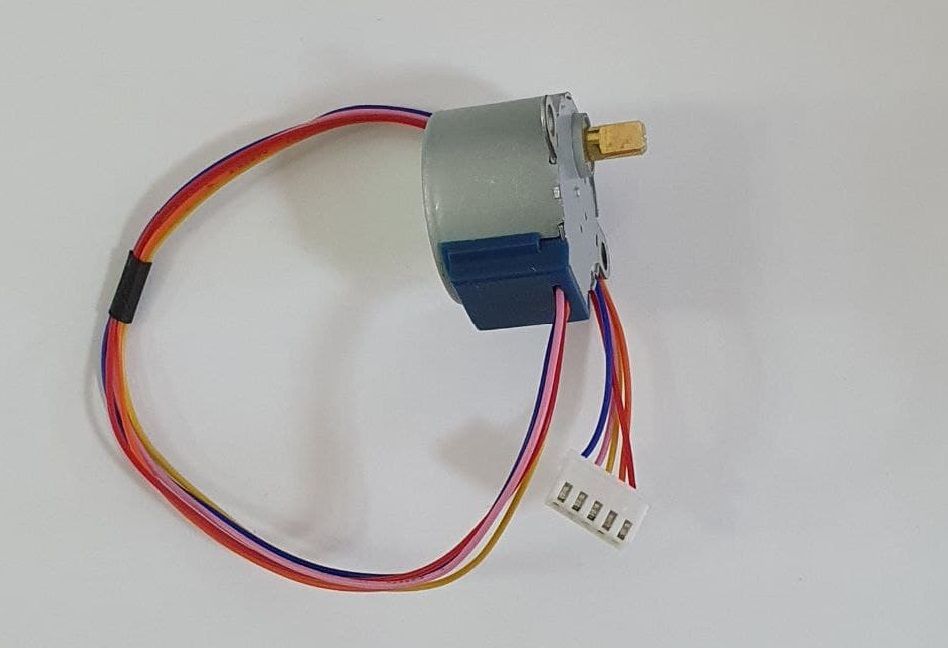
In this lesson, we will assemble smart garage doors. To do this, we need a stepper motor. The stepper motor is designed to accurately rotate an object by a given number of steps. With the help of the driver, the Arduino board will control the stepper motor. The number of steps is set in the Arduino IDE program.
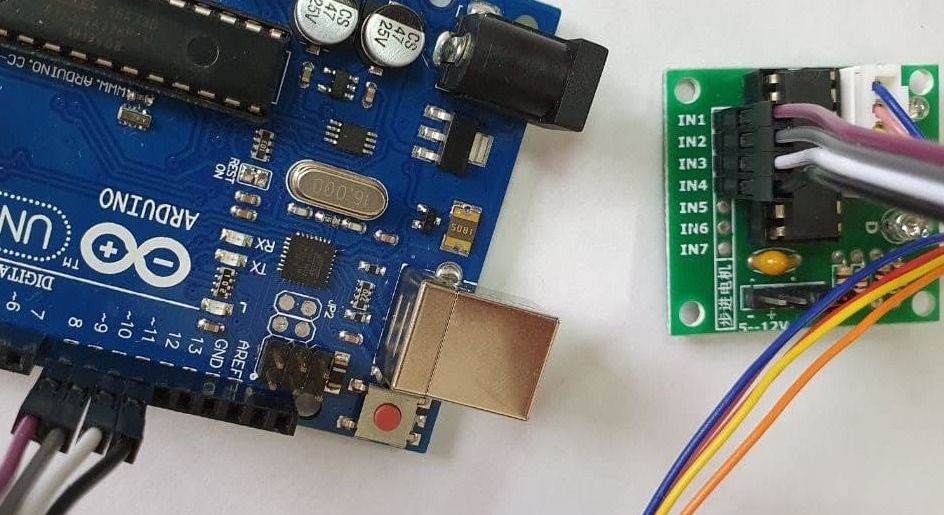
The diagram of connecting the stepper motor to the Arduino Uno via the driver is shown in the figure below.
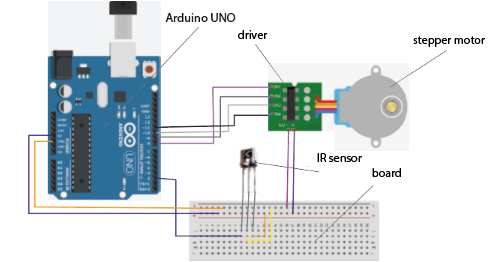
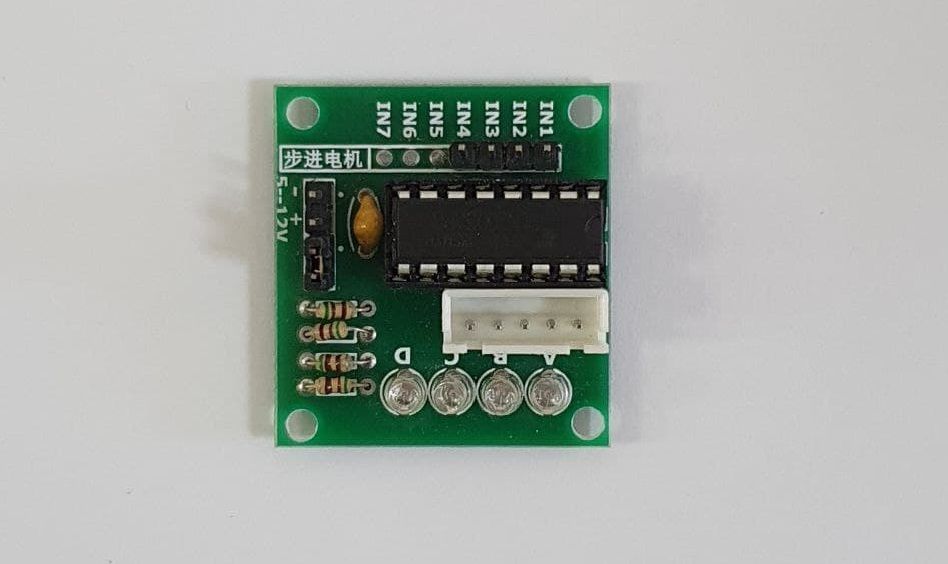
1. Connect the driver ports to the digital pins of the Arduino UNO board as shown in the figure.
N1 → 8; N2 → 9; N3 → 10; N4 → 11.
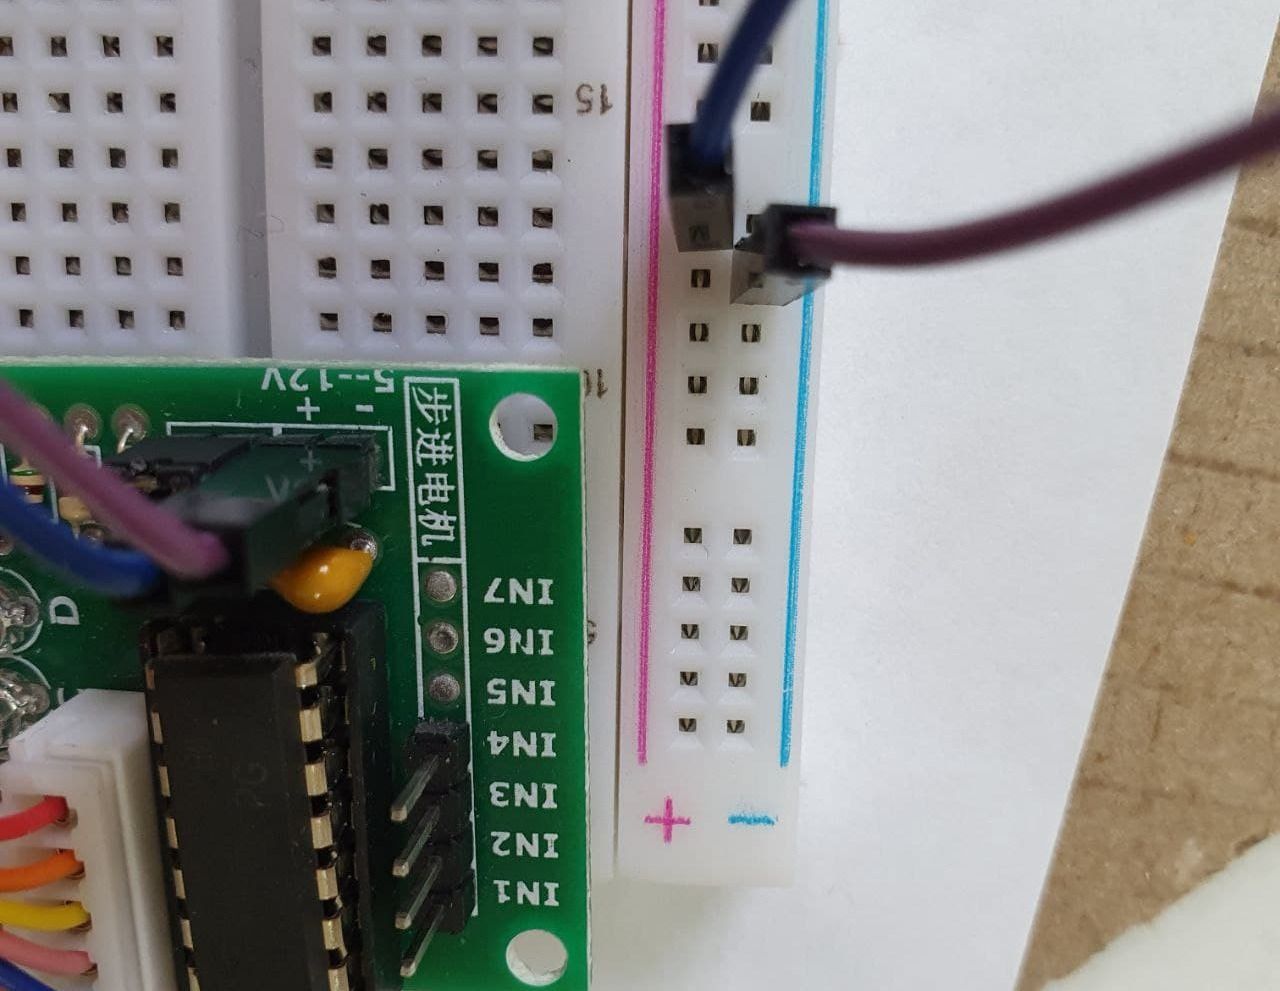
2. We will install the engine driver on the breadboard for this, “+” (plus) on the driver will lead to “+” on the breadboard. “-” (minus) on the driver, we will lead to “-” on the breadboard.
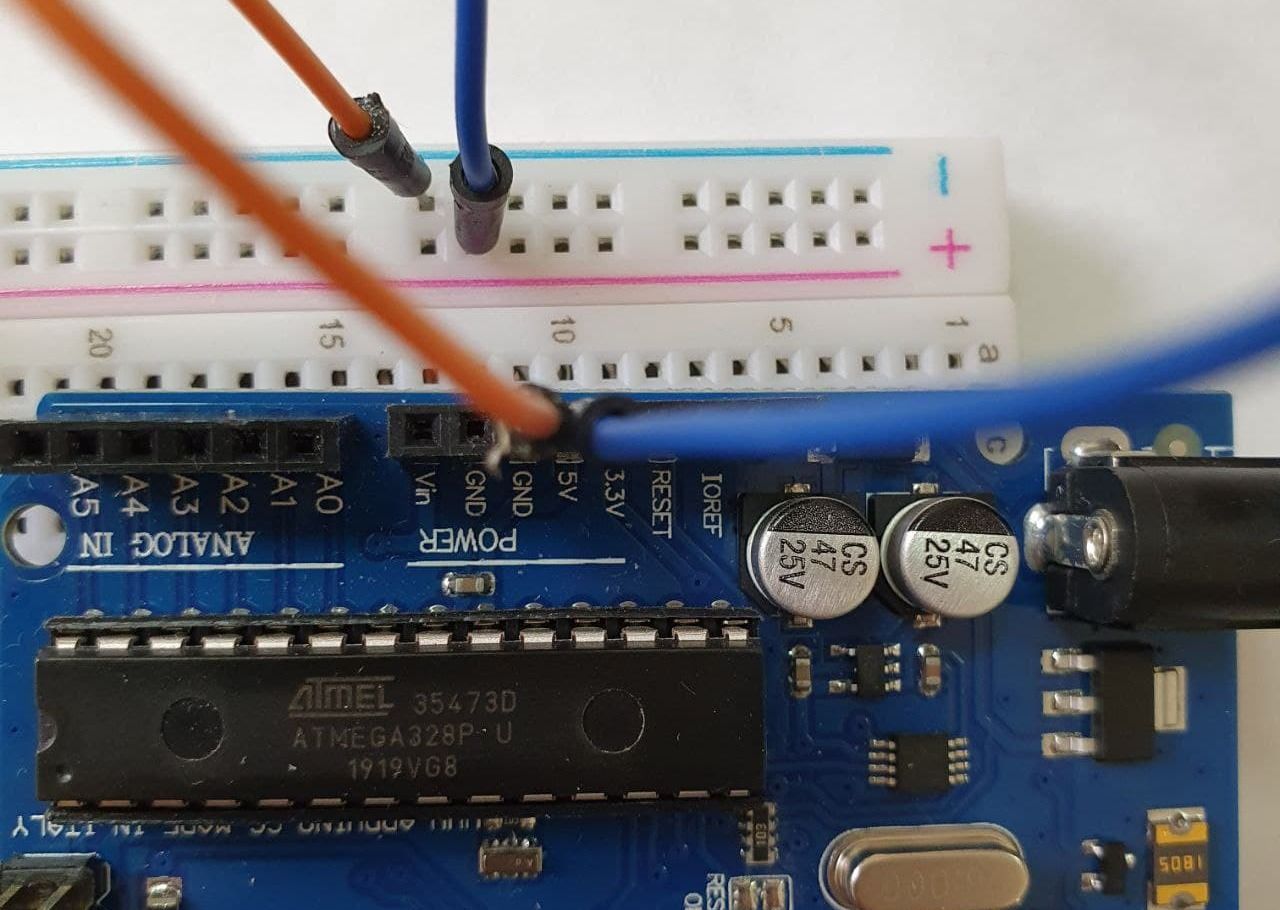
3. Run the wires from the Arduino to the breadboard. GND → “-“; 5V → “+”.
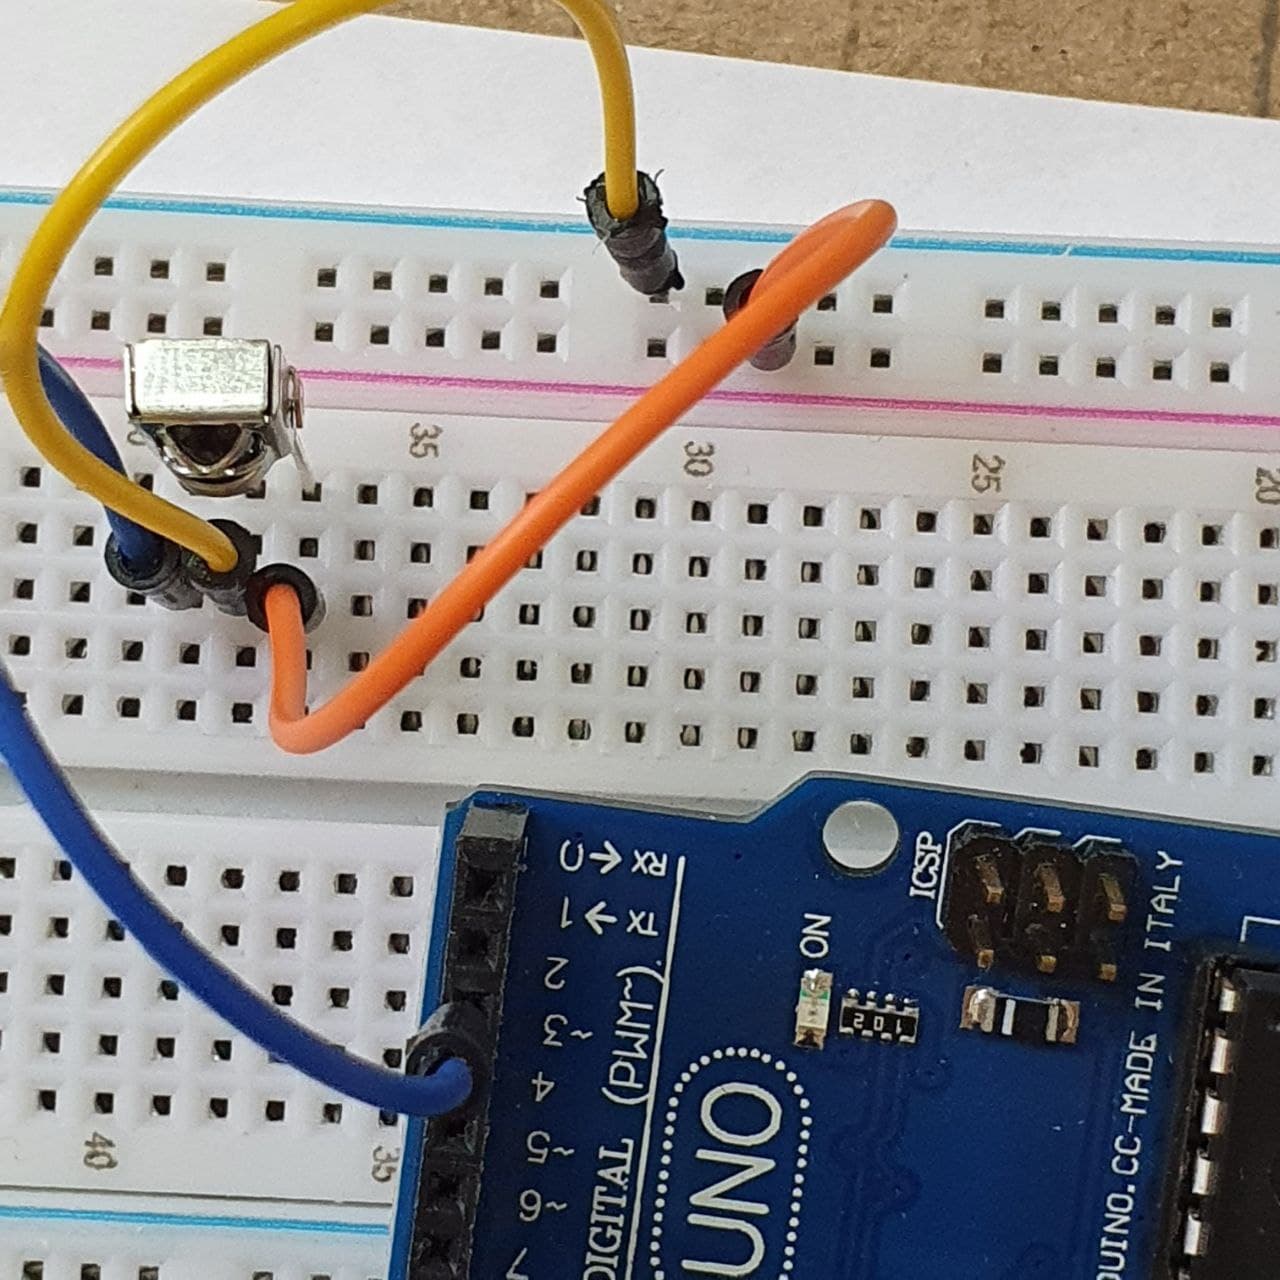
4. Now we will install an IR sensor on the breadboard. The sensor has three legs. The first one on the right goes to “-” (the contact is on the same line with the first leg), the second to “+”, the third to “2” on the Arduino UNO (as in the photo).
When everything is connected correctly as in the diagram, open the Arduino IDE program.
Connect the Arduino to the computer via USB.
If there is no Arduino IDE program on your computer, install it as in the video.

Download the archives with the Arduino-IRemote-master and Stepper library, unzip, paste the library folder into the folder C:Program Files (x86)Arduinolibraries. Watch the video how to do it.

- Then, copy the sketch below and paste it into the program window. Click “check”, if there are no errors, click “load”. Select your Arduino UNO device, wait a few seconds and you can check the operation of the device. Press the + and – buttons on the remote control . The motor shaft should rotate in different directions.
- In the sketch, you can change the number of shaft steps. Just change the number in the code.
Watch the video instructions on how to upload a sketch to the Arduino IDE.
#include <IRremote.h> // connecting the library
#include <Stepper.h> // library for stepper motor
int RECV_PIN = 2; // we connect the signal pin to the 2nd digit.conclusion
IRrecv irrecv(RECV_PIN);
decode_results results;
const int stepsPerRevolution = 40; // the number of steps per 1 revolution, change the value for your motor
Stepper myStepper(stepsPerRevolution, 8, 10, 9, 11);
void setup()
{
Serial.begin(9600); // opening serial
myStepper.setSpeed(130); // we set the speed to 130 rpm
irrecv.enableIRIn(); // initialization of the IR receiver
}
void loop()
{
delay(500);
if (irrecv.decode(&results)) {
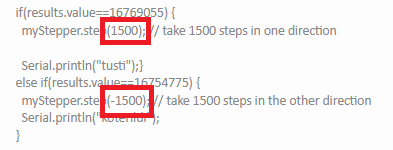
if(results.value==16769055) {
myStepper.step(1500); // take 1500 steps in one direction
Serial.println("tusti");}
else if(results.value==16754775) {
myStepper.step(-1500); // take 1500 steps in the other direction
Serial.println("koterildi");
}
Serial.println(results.value, DEC); // output in the 16th mode
Serial.println(); // for convenience, add an empty string
irrecv.resume(); // we get the following value
}
}
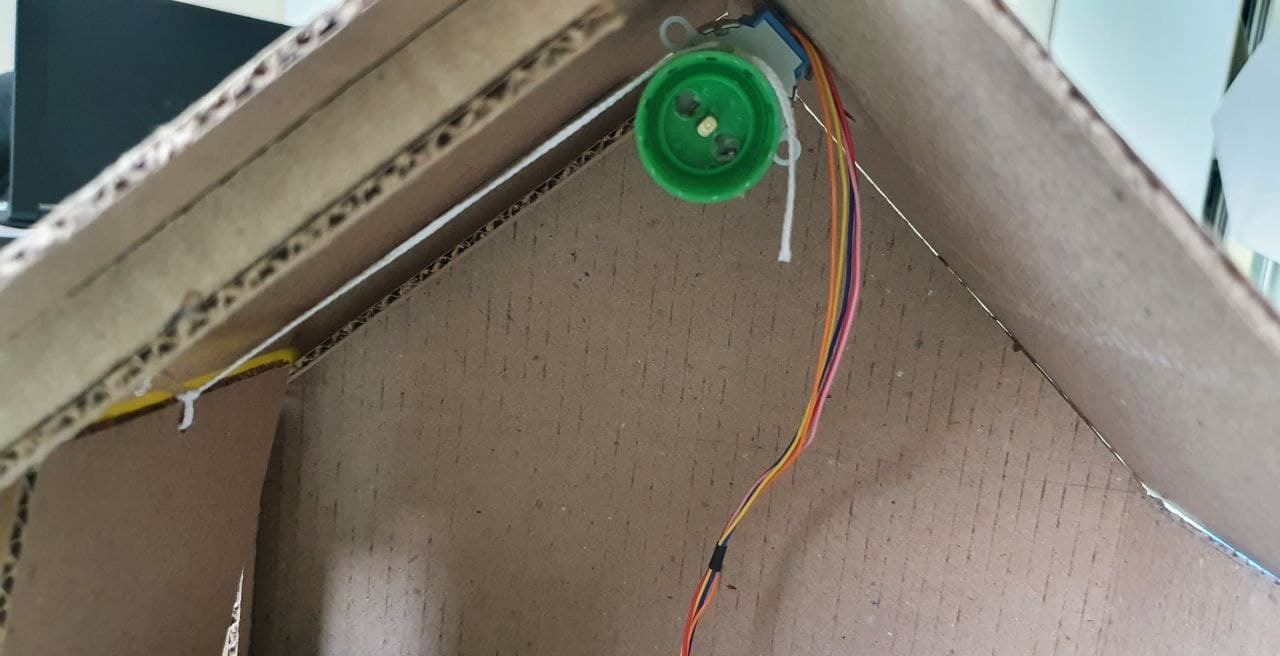
When everything is working and the shaft turns when the buttons on the remote control are pressed, we install the engine in the garage so that it opens the gate. In our case, we will make a hole on the bottle cap according to the size of the shaft, so that it holds tightly and glue the end of our rope from the gate to the lid. We will install the engine on the roof of the garage.